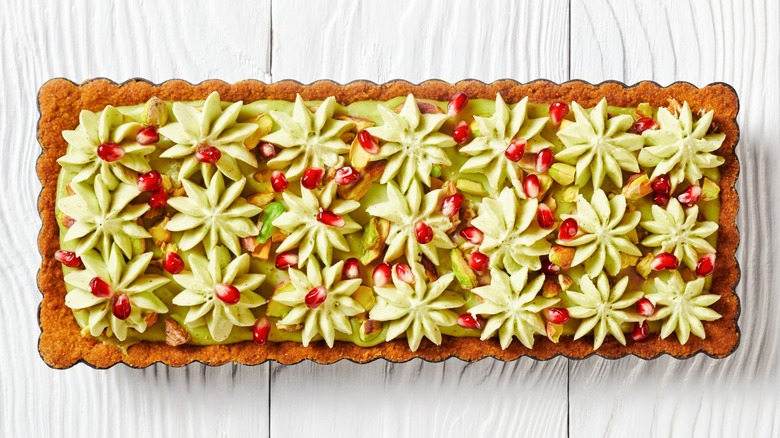
The Baking Sheet Hack For An Easy Tart Pan In A Pinch
When it comes to baking, having the right tools can make all the difference. But what if you're all set to make a delicious tart and realize you either don't have a specific tart pan, or the one you have isn't the right size for your recipe? Before you rush to buy a new pan, here's a simple, ingenious solution using items you most likely already have in your kitchen: a rimmed baking sheet and some aluminum foil.
Start by tearing off a sizable length of aluminum foil. You'll want enough to fold into a sturdy strip to act as a makeshift wall for your tart, allowing you to shape and size your baking sheet as per your recipe's requirements. Fold the foil lengthwise several times until you achieve a strip that's about an inch wide to match the height of your rimmed baking sheet.
Now, grab your baking sheet. Place the foil strip across the sheet to create a smaller, makeshift tart pan area. This is where you get creative. Depending on the size and shape of the tart you're aiming for, adjust the strip's placement. Whether you need a long, rectangular shape, a square one, or a more traditional circle, the foil strip's flexibility allows you to customize to your heart's content. The key here is to ensure the strip is snug against the baking sheet, forming a clear boundary for your crust.
How to use your DIY tart pan
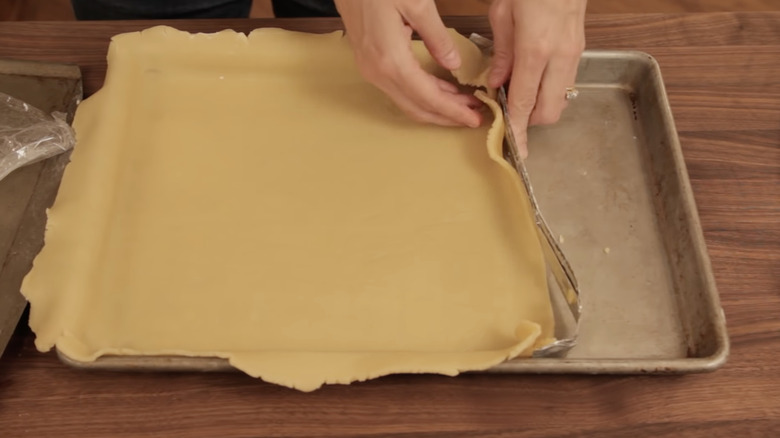
Once your DIY tart pan is ready, it's time to line it with the dough. This might look like a tricky process seeing that the makeshift aluminum foil edge isn't as sturdy as the rest of the pan's rim. But do not fret, it's actually quite simple. First, roll out your dough evenly, ensuring it's large enough to cover the base and sides of your created tart area.
Carefully lift the dough and place it onto the baking sheet, aligning it with the foil strip. While raising the overhanging dough, tuck it into the base and sides of the sheet. When you reach the makeshift edge, lift the dough and support it with the upright foil. Ensure the dough is snug against the foil to mimic the other edges. The foil strip not only supports the dough but also helps maintain the tart's shape as it bakes.
Next, trim off the excess dough hanging over the sides for a neat, professional appearance. Lastly, once your dough is perfectly positioned and trimmed, it's time to add your filling. Pour it into the center of the dough, spreading it evenly up to the edges. The aluminum foil barrier will help keep the filling in place, just like a regular tart pan. And that's it. With this simple hack, you'll never need a special pan to make a tart, no matter what size is required.