11 Tips You Need For Perfect Roasted Fruit
Roasting fruit is a quick and easy solution to nearly every fruit-based ingredient issue. You can bring out the jewel-toned sweetness of bland supermarket strawberries with a quick trip to the oven, or revive bruised pears and punky apples under a broiler's kiss. Dessert is also easy when you roast fruit — think how well a cookie topped with warm berries (and a dollop of whipped cream) can satisfy a person's cravings for pie.
As delicious on a sunny afternoon as a dreary winter's day, roasted fruit is the special treat you didn't know you needed. And unlike the boiling fury of a jam pot, roasting is a much more nuanced approach. It results in an unmistakable, intensified fruity flavor that's quite different from an over-sweetened jellied spread. The heat gently caramelizes the natural sugars on top, while any excess water evaporates — creating a subtle char that's arguably the most delicious part (if you can resist the urge to stir too often).
Since fruit maintains more of its shape when roasting, as well, it's often as visually appealing as it is delectable. But you don't just have to take our word regarding roasted fruit. If you'd like to enjoy the depth of sweetness added by its smoky flavor for yourself, here are 11 tips to help achieve the perfect roasted fruit.
Choose the right fruit
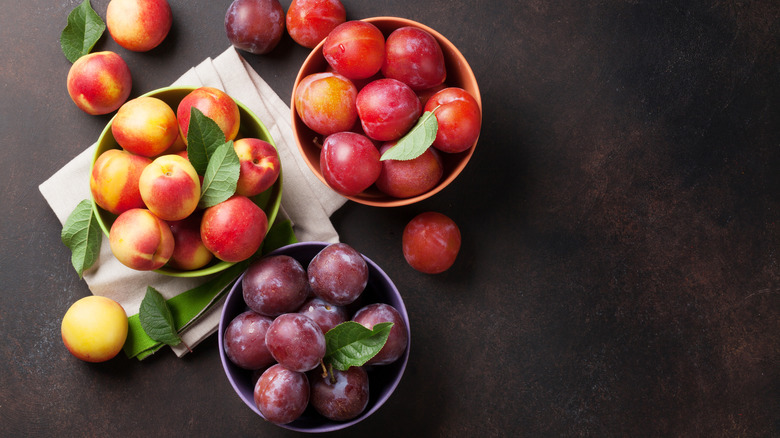
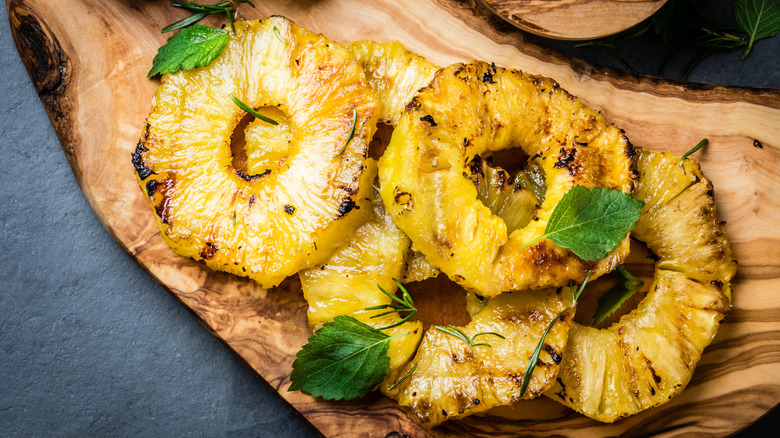
Not all fruits are suitable for roasting. It's best to look for firm, slightly underripe fruits that can withstand high heat without turning mushy, like peaches, plums, and pineapples. It's also okay to use perfectly ripe or bruised fruit, as roasting is a beautiful way to use ugly produce that might otherwise be discarded.
If you're in a hurry, select a fruit that roasts faster. Raspberries (and their other delicate berry friends) will turn lusciously jammy in no time; crunchy pears and apples, on the other hand, take more time to yield. Additionally, consider the amount of sugar you'd like to use. Underripe or naturally tart fruits (think Granny Smith apples) will need more sugar, but that August peach is likely fine with little more than a light dusting of sugar, or a drizzle of maple syrup.
Keep in mind that the best approach depends on what you plan to do with the fruit once it's done. For example, if roasted fruit is the sweeter element in a savory salad, you won't necessarily want it to taste the same as if it's the centerpiece of a dessert (as in the case of bananas foster).
Prep fruit carefully
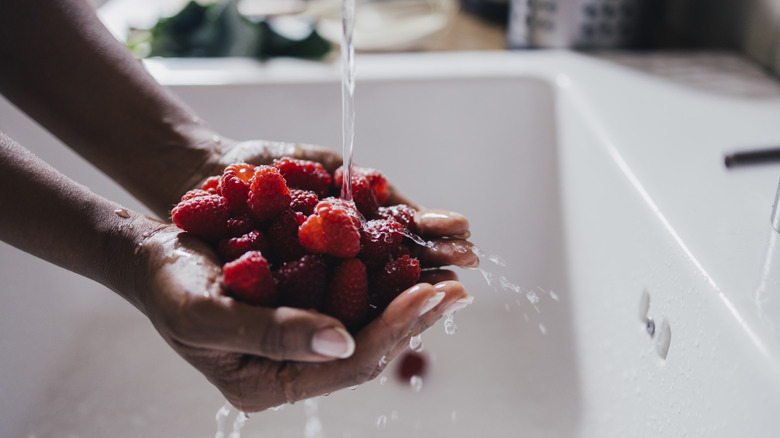
Yes, roasting fruit is quick and easy. But no: You should not sleep on proper fruit preparation. Organic fruit is the ideal choice, but it's not always available (or affordable), so you'll need to start by washing the fruit before cutting it. Berries can be soaked in a bowl filled with water and a splash of vinegar for several minutes, then rinsed carefully. Fruit with firmer flesh, like pears, can be soaked in a vinegar bath, as well, then given a firm scrubbing.
Be sure to remove any seeds (and all other inedible parts) from the fruit before roasting. You can also peel apples beforehand, but this is optional. Now comes the critical part: the cut. Smaller berries can be scattered whole across a baking sheet, but when it comes to strawberries (and other larger fruits)? You have some decisions to make. Larger chunks of fruit or halves are generally better than smaller pieces, which tend to overcook.
Regardless of the size, consistency is most important. Even-sized pieces cook more uniformly and evenly, which means you won't have an al dente piece nestled up next to a mushy one. If you are considering mixing fruit, remember that texture and size will affect how fast each fruit cook. We suggest you save yourself from disaster, then, and roast different fruits on separate trays before combining them at the end.
Make cleanup easier

Everyone knows that cleanup is the worst part of any cooking experiment. Since roasting fruit can get sloppy quickly, save yourself some time and heartache by lining your baking trays with parchment paper. Parchment paper often has a non-stick side and a regular side, but this is generally less important when roasting fruit. Just make sure you use enough so that it reaches up all four sides of your baking tray, or you'll be consigned to scrubbing sticky fruit juice off the tray if there are any gaps.
If you prefer to go the more environmentally conscious route when it comes to kitchen tools, consider reusable silicone mats. These won't necessarily prevent the juice from hitting the baking tray, but they will keep the fruit from sticking or burning on the tray itself. Silicone mats do need to be cleaned after baking (unlike parchment, which can just be discarded), but you still might save yourself some scrubbing time.
After you remove the fruit, rinse the mat immediately. Soaking the mat in warm, soapy water will likely do the trick — or you can follow an old baker's trick, and pop it back in the oven for an hour before scrubbing it in the sink. If you don't want to deal with too much juice overflow, try roasting citrus. The unpeeled fruit contains most of the juices, and makes cleanup much easier (while creating its own serving vessel, too).
Roast at the correct temperature

There are many schools of thought when it comes to roasting. Some prefer high heat for short periods, while others espouse low and slow heat. While the second method is excellent for breaking down the tendons and ligaments in a tough piece of meat, it won't do much for fruit — except make it limp, sad, and hot. For perfectly roasted fruit, you'll want a fairly hot oven for a brief period of time.
A hot oven — between 350 and 450 degrees Fahrenheit — is ideal for roasting fruit. The sudden blast of heat quickly caramelizes the natural sugars, and provides a rich depth of flavor. But pay attention: Depending on the oven and type of fruit, roasting times can vary. That same bump of heat essentially squeezes out the juices, after all, which can quickly blacken fruit, and make your final product bitter and inedible.
Although a little char on your fruit adds to its complexity (and can make for a more interesting dessert), too much of a good thing is possible in this case. So keep a close eye on your fruit to prevent burning, especially towards the end of its cooking time.
Bump up the flavor
Slurping up hot roasted fruit from the pan is plenty good enough. But once you've mastered a straightforward version with just a touch of sugar — and salt (see below) — you might like to experiment with different flavors. Roasted fruit plays well with everything from dried spices to fresh herbs — though you'll want to take care when adding them to avoid losing the flavor of the fruit itself.
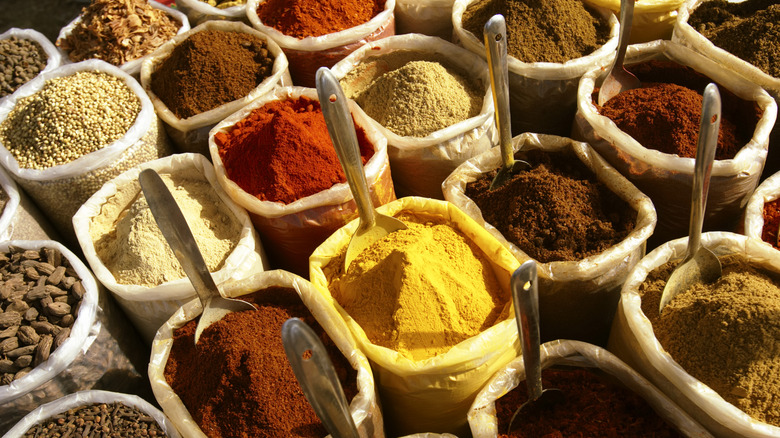
Before roasting, add dried spices — like cinnamon, crushed cardamom, and lavender — as well as various sugars. Agave, brown sugar, and maple syrup can change the flavor profile for the better, but plain white sugar is fine, too. Just skip anything with aspartame (such as Equal), as not all sugar alternatives can handle high temperatures. Other things to add before roasting include a splash of vanilla or citrus juice.
Balsamic vinegar can be added before or after baking. If you are using a fine balsamic syrup, save it for serving when the fruit is roasted, as some of these dessert-type vinegars are already condensed (and may suffer with additional cooking). Fresh herbs, even sturdy ones such as rosemary, should be added after the fruit comes out of the oven. The volatile oils in the herbs will perfume the fruit, brightening the whole dish. Leafier aromatics — like mint or basil — can be chopped, but herbs with wooden stems should be kept whole (and removed just before serving).
Don't crowd the pan
It's tempting to chop up an entire bushel of ugly apples and simply throw them in a roasting pan. It's fast — and you have things to do, right? But if you go this route, two things might happen: You'll have several layers of fruit roasted to different degrees of doneness, and the cooked fruit will be steamed instead of roasted.
Now, some may try to tell you that steam-roasting is a thing, but don't be fooled. Steaming can indeed cook food faster and more evenly, but if you add water to a pan (or crowd it), the result will be hot, watered-down fruit. The sugars won't caramelize in the presence of steam, so there won't be the depth of sweetness you're looking for — and isn't that the whole reason for roasting fruit in the first place?
Additionally, the multiple layers of fruit trap moisture, which results in a watery mess at the bottom of the pan that dilutes the succulent juices. To save yourself (and your dessert) from this cooking disaster, arrange the fruit in a single layer with some space between each piece. This allows heat and air to circulate, producing proper roasting (and glorious flavor).
Don't forget to flip the fruit

Flipping fruit is important ... sort of. Once again, your technique is going to vary depending on the fruit. If you're roasting pears, apples, or peaches that are cut in half, start them slice side down, then flip midway through to ensure the fruit is cooked thoroughly and evenly.
On the other hand, if you're roasting whole berries (like blackberries or blueberries), you might just give them a shake at the halfway mark. Berries will cook through very quickly, so this is much easier and more efficient. It also gets the job done, as it's less about heating them all the way through than it is about making sure nothing is sticking or burning.
Flipping or shaking also gives each side of the fruit access to heat. Even though the heat may circulate around well-spaced fruit, some parts of the oven are naturally more intense (like the pan you're cooking on). Shaking fruit, then, or carefully flipping it over, helps it brown more evenly. And since color equals flavor — as with all baking — flipping fruit midway through roasting spreads that love all over.
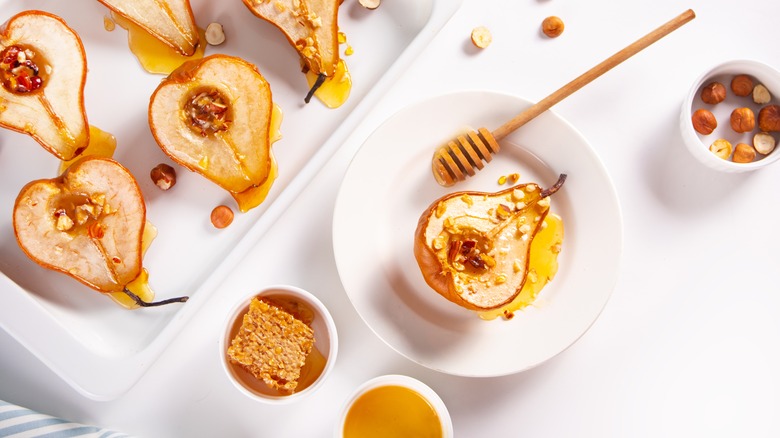
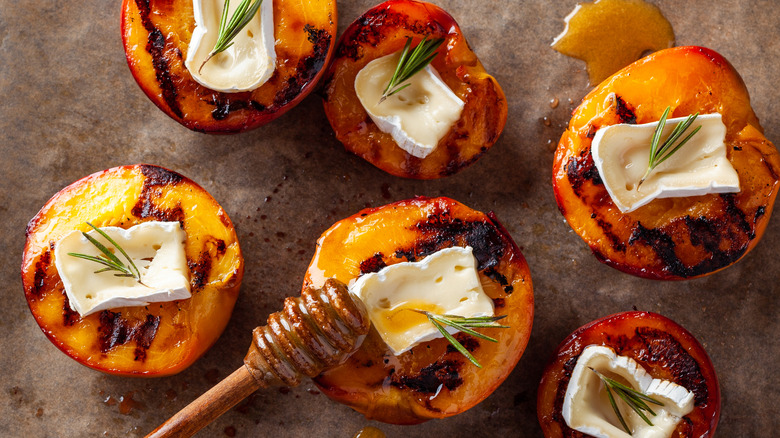
Finish under the broiler

By this time, your kitchen is likely scented with pure fruit essence. Now, go the extra mile, and turn on your broiler. Finishing fruit under the broiler for a minute or two leads to a deeper caramelization. You can even add an extra sprinkle of sugar on top if you like, as the extreme heat cooks the sugar to create a crunchy top. This technique is best for larger fruits, such as peaches, pear halves, or bananas.
Keep in mind: This last step puts you in the burning danger zone. It can be tempting to turn away for a minute or two, but you'll want to stay close to the oven. Sugar scorches quickly, after all — which can ruin the fruit — and even if your fruit doesn't burn, the liquid in the baking pan might (like that judicious splash of citrus you added to keep things moist without steaming).
If your broiler isn't up to the task, you can use a hand torch (if you have one) to add that final caramelized crunch on top. This is the same technique used for crème brûlée, and can lead to spectacular results.
Use roasting juices
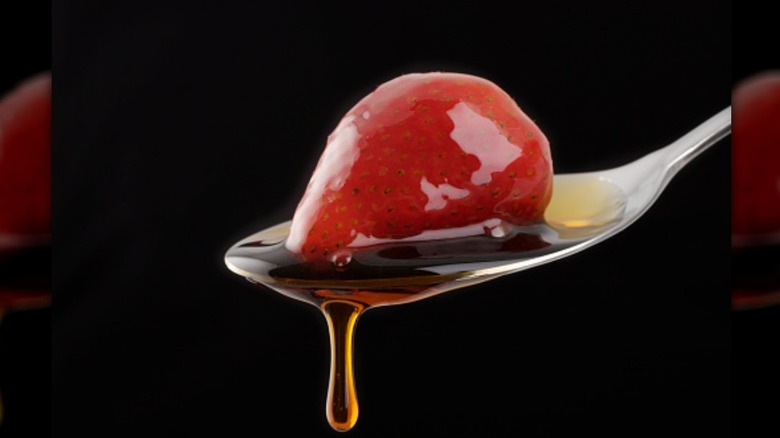
Roasting juices are liquid gold. Super flavorful and chock full of fruity goodness, they are 10 times better than the syrup surrounding canned fruit (though just as versatile). While the amounts may vary, most fruits will release at least some of their internal juices while cooking. But don't discard the liquid that comes out during roasting; because even if you aren't using that juice in the dessert, there are tons of other uses.
The first way to repurpose juice is to further reduce it into a syrup. This fruit syrup can then be used to flavor seltzer water, or drizzle over everything from ice cream to roast meats. Another use of leftover fruit juice is to add it to cocktails, or use it as a base for your own homemade bitters.
Frankly, you can use the juice anywhere you'd like to add a burst of fruity flavor and natural sweetness, such as a marinade, in a salad dressing, as a smoothie booster, or in flavored ice cubes. If you add leftover juice to a savory dish, though, be mindful of the spices and herbs used to flavor your fruit (as you don't want to overpower other spices or seasoning you may be using).
Add a pinch of salt
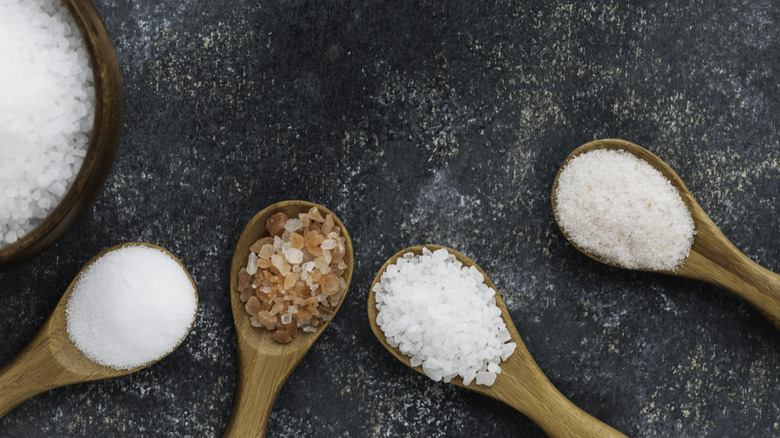
Salt is the secret ingredient for many professional bakers. It may seem counterintuitive, but salt enhances and increases how we perceive sweetness. The sweet taste of both natural and artificial sweeteners is perceived in the mouth through receptors called T1R. In other parts of the body, a protein called the sodium-glucose cotransporter 1 (SGLT1) moves glucose into different parts of the body to supply them with energy. The other half of this transporter, sodium, works in tandem so that glucose (i.e. that sweet, sweet sugar) is easier to detect.
Salt is also a natural flavor enhancer used by savory cooks to elevate the taste of food. Salted dishes are not overwhelmingly salty, but, instead, taste more intensely of themselves — and the same often holds true for salted roasted fruit. Just remember a sprinkle of finishing salt can add a definite salty crunch, so if you prefer a more subtle boost of flavor without the salty bite? Add your salt when adding spices or liquids.
Let fruit rest
In addition to being as hot as molten lava, roasted fruit isn't as delicious when it's pulled right out of the oven. The extreme heat blunts our ability to perceive all of the sweetness of the fruit, since our taste receptors are most open to sweet flavors at a maximum of 95 degrees Fahrenheit. And if you've just pulled a tray of roasted fruit out from under the broiler, chances are good the temperature is drastically higher than that.
You don't need to pull out your Thermapen to gauge the ideal temperature once fruit is finished roasting (though it can't hurt). But be sure to let it cool slightly before serving. A resting period — even a brief one — will help all the flavors settle to a point where your taste receptors are ready to welcome the flood of sugariness.
Resting leads to roasted fruit that tastes sweeter (with spices and flavors that seem more intense), and it's also much easier (and safer) to handle a cooler tray of slopping fruit. Additionally, if you're using it on ice cream, or to top a mound of whipped cream? Letting fruit cool slightly ensures your dairy products don't become a puddle on the plate before your first bite. So for flavor and utility purposes, always allow your roasted fruit to cool slightly before serving.