12 Tips You Need When Making Scones
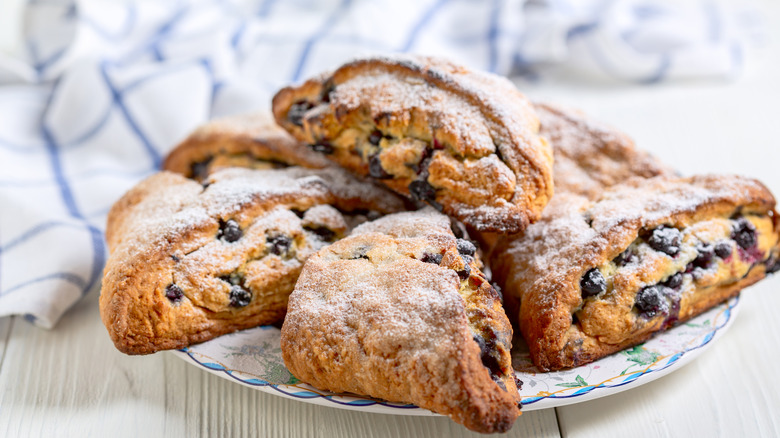
The best scones are tender, buttery, and flavorful with crisp edges. They can be sweet or savory and made in different shapes and sizes, from triangles to circles to squares. Serve warm scones for breakfast with a dollop of jam, at afternoon tea with clotted cream, or as a savory appetizer. These delightful pastries originated in Scotland, and there are some marked differences between American and English scones. American scones are rich, sweet, soft, and made with copious amounts of dairy, while English scones are typically drier, lighter, less sweet, and more similar to American biscuits.
Scones can be challenging to make correctly. They can become dense and bland if you don't use the right ingredients and techniques. So, we're sharing tips on how to make moist, tasty, beautiful scones every time. These tips will help you master these pastries that are not quite a biscuit and not really cake or bread either. Once you learn the basics of making scones, you'll be well on your way to conquering scone-making. So grab your apron, and we'll guide you, step by step, in making scones that are as good as can be.
Use cold or frozen butter
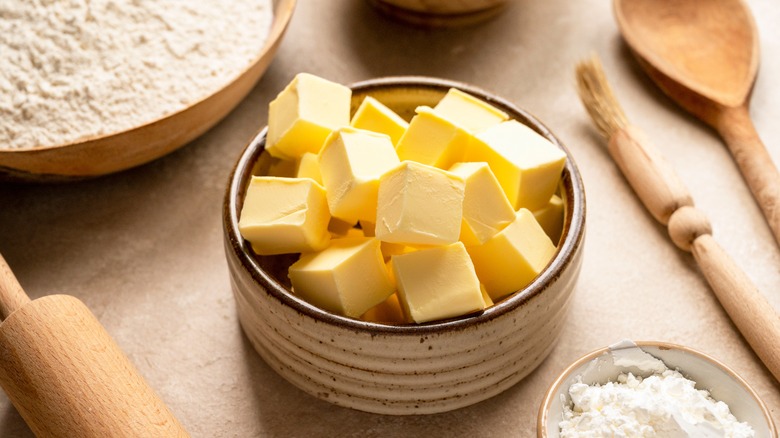
You must keep your butter cold from the very beginning until the dough enters the oven — your scones will taste better if you follow this simple tip. The solid butter pieces scattered throughout the dough will create pockets of fat, so your scones turn out light and flaky. As the scones bake in the oven, the cold butter begins to melt, and the water in the butter evaporates into steam. As the steam escapes outward, it creates a flaky, fluffy texture for a better-tasting scone. The steam also pushes the layers up, giving your scones added height.
While you can use butter straight from the fridge in your scone recipe, we encourage you to take an extra step to chill the butter further. After you cut your refrigerated butter into small cubes, place them in the freezer for 10 minutes before making your scone dough. This extra boost of chill will buy you some time before the butter starts to get warm. Another suggestion? If you're one of those efficient home cooks who store butter in the freezer, shred the called-for amount with a box grater and proceed with your recipe.
Incorporate the butter with a pastry cutter
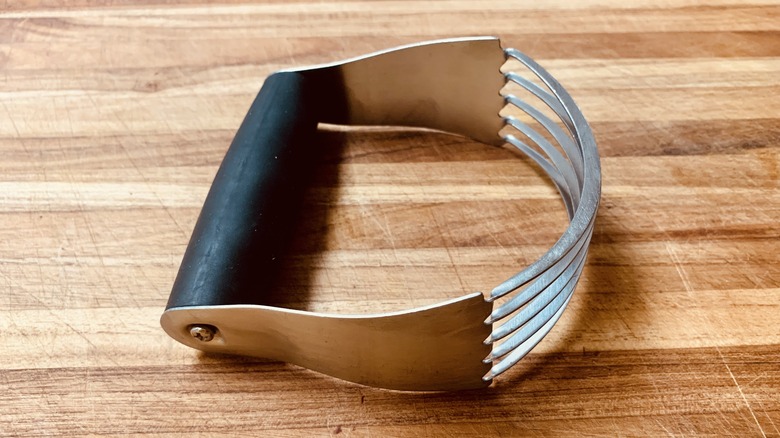
Scones are made with the cut-in method, the same technique used to make pastries like pie crust and biscuits. This method involves breaking the cold butter into small, pea-sized pieces while coating them with dry ingredients, like flour. Unlike the creaming method, which fully incorporates the butter, the cut-in method leaves the butter intact before baking. When exposed to the oven heat, the bits of butter melt and steam, leaving small pockets of air and fat throughout the scone and creating layers with a flaky texture and rich buttery taste.
While you may want to use a food processor to cut in your butter, it's best not to. A pastry cutter gives you better control over the size of the butter pieces and lets you focus on breaking up the larger pieces of butter in the mixing bowl while ensuring that the butter pieces don't get too hot. Note: If you are using frozen, shredded butter, you can simply stir in the butter shreds until well combined with the dry ingredients — no pastry cutter needed.
Choose low-gluten flour
There are a variety of flours you can use when baking. The right one to choose depends on what type of baked good you're making, be it bread, cookies, cakes, you name it. The deciding factor comes down to the gluten content of the flour. Gluten is a natural protein that forms in grains like wheat, rye, and barley when mixed with liquid. The resulting network of gluten proteins provides structure in foods. This structure makes gluten-forming flours stronger, sturdier, and more elastic.
When making scones, you want to limit the amount of gluten formation in the dough. This means that not all types of flour are suitable for making scones. You should stick to low-gluten flour, like pastry flour, and avoid high-gluten flour, like bread flour. With a gluten-forming protein content of about 8 to 10 percent, pastry flour is perfect for light, tender scones. The less gluten formation that your scone dough develops, the lighter and flakier the final texture will turn out. If you want to use an equal mixture of all-purpose flour and pastry flour for some added structure, you can, but don't omit the pastry flour entirely.
Don't skimp on the leavening agents
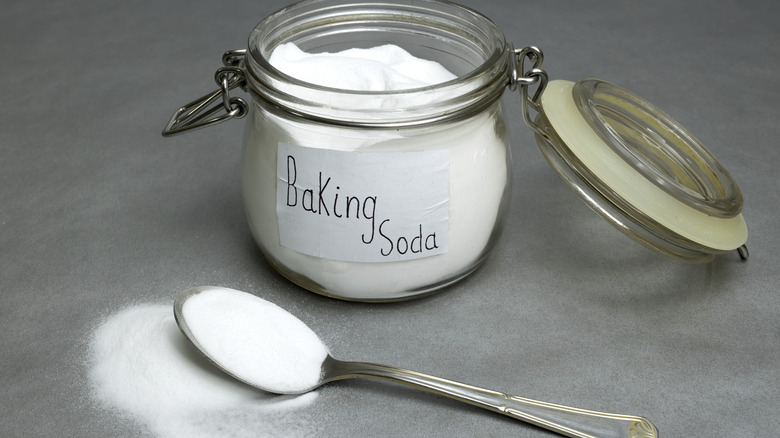
In baking, there are three types of leavening agents: organic, mechanical, and chemical leaveners. Leaveners work to expand doughs and batters, resulting in tender, light, airy baked goods. Where they're used depends on what you're baking, be it a loaf of bread, croissants, or muffins.
The primary agent in organic leavening is yeast, typically used when making bread. Mechanical leavening relies on air or steam, and most baked goods naturally benefit from mechanical leavening as they bake in the oven — including scones. But for an even better rise in your scones, including some chemical leavening agent, like baking powder or baking soda, is imperative. These chemical leaveners react to the oven's heat or the liquid in the recipe to form carbon dioxide gas. The release of carbon dioxide causes the dough to expand, rise, and puff, giving your scones gorgeous height and light layers. Not adding a leavening agent could be why your scones turn out dense and heavy.
Make sure to add an acid
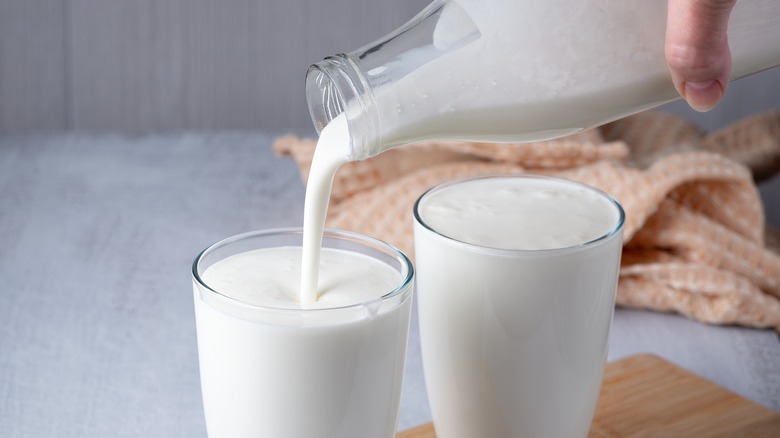
If your scones keep turning out flat and dull, there may be a simple fix. Adding an acid to your scone dough can help with leavening and taste. Acids work to tenderize the gluten in the scone dough, which leads to more tender and fluffy scones. Acids also neutralize the baking soda, if present in your recipe, causing the scones to rise and puff.
There are many options for what kind of acid you can add to your scones, like yogurt and sour cream, but our go-to acid when making scones is buttermilk. This sour milk keeps the dough tender and adds a lovely tang to create another dimension of flavor. If you don't have any buttermilk on hand, you can easily make it by stirring 1 cup of whole milk with 1 to 2 tablespoons of white vinegar and letting the mixture sit for 5 to 10 minutes to curdle. This buttermilk substitute works just as well as the real thing. If you prefer to use milk in your scones, add a splash of lemon juice or a sprinkle of cream of tartar to the milk before making your dough.
Incorporate your liquid gradually
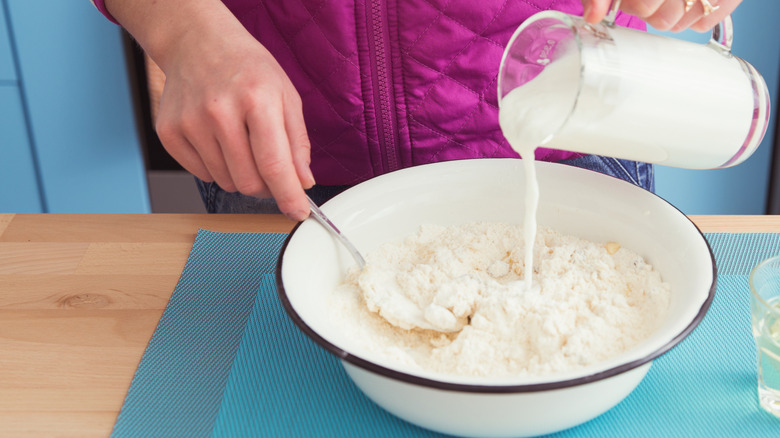
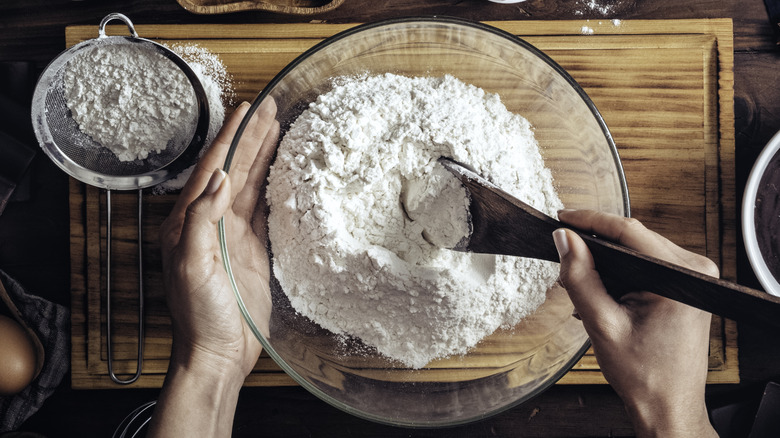
Scones can be finicky, sometimes turning out too dense or too wet, depending on how much liquid you add to the dough. If you don't add enough liquid, your scones will likely turn out dry and crumbly. Too much liquid and your scones will be sticky, difficult to cut, and won't hold their shape. That's why, when making scones, gradually incorporating your liquid is a simple step you can take to help you avoid tough scones. If you add your liquid slowly, you'll be sure to use just the needed amount.
We suggest adding half of the liquid first, gently incorporating it into the dry ingredients, then adding the remaining liquid a little at a time until the dough comes together. Flours absorb liquid at different rates. Depending on the humidity and elevation of where you are, the dough may require more or less liquid than what's listed in the recipe. For this reason, it's best to start with half of the amount of liquid and add more as necessary.
Use mix-ins for custom flavors
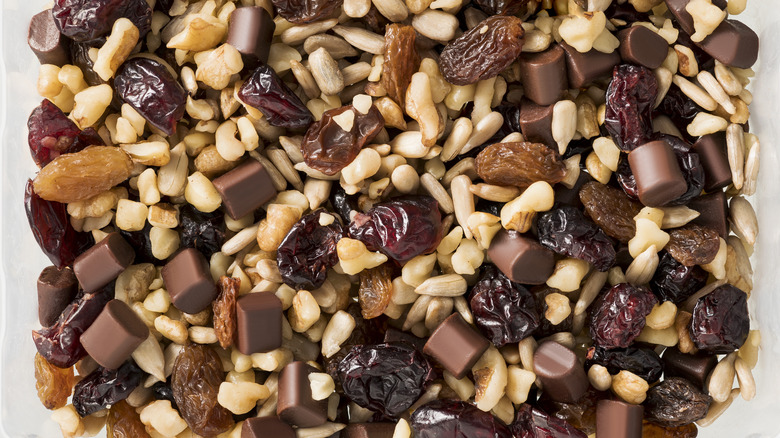
Mix-ins aren't just for ice cream and cookies! Once you've found a scone recipe you love or nailed down your own recipe, you can add mix-ins to make scones in your favorite flavors. Try dressing up your scones by adding chopped nuts, toffee bits, chocolate chips, or citrus zest — or go savory and add dried herbs, ground spices, or grated cheese.
If fruit is more your pleasure, dried or frozen fruit is the way to go as they are easy to work into the dough and won't affect a scone's final texture. Another advantage of using frozen fruit is that the dough stays colder, and cold dough rises better. But if you'd rather use fresh fruit, you certainly can. Just remember that fresh fruit contains a lot of moisture, so be careful when adding it to your dough. Adding fresh fruit towards the end when your dough is just coming together works best. Mix the fruit into the dough carefully to not break up the fruit and release moisture. Any additional liquid — even from the fruit — will affect the texture. Our advice? If you decide to make a batch of fresh fruit scones, use slightly less liquid than what's called for in the recipe, then fold the fresh fruit into the dough. If the dough is too dry after adding the fruit, you can always add more liquid.
Do not overwork the dough
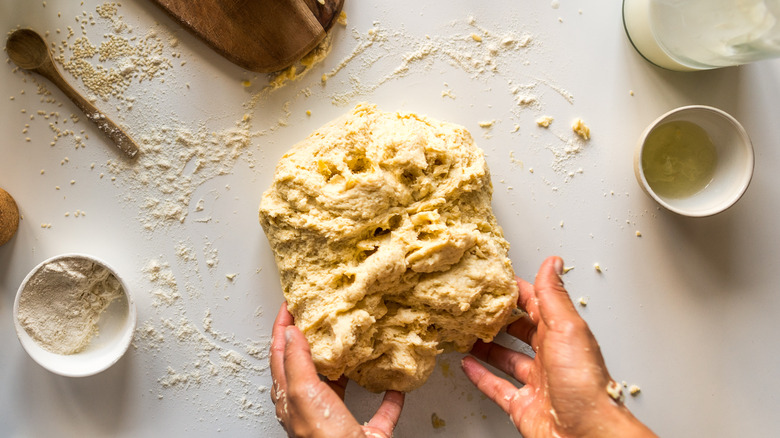
When making scones, you want to create as little gluten development as possible in the dough (unlike bread, for example, where you want the exact opposite). The absence of gluten protein strands in scone dough helps keep them flaky, light, and delicious. If you've used a low-gluten flour, you're on the road to success. But there's another thing you can do to prevent dry, dense scones, and it all comes down to mixing the dough.
When liquid mixes with flour, gluten begins to develop and form a network of protein strands, so you want to mix your scone dough as little as possible to prevent too much gluten from forming. Overmixing the scone dough will lead to excess gluten formation and a rubbery dough, which leads to tough, dense scones. If you tend to have warm hands, be mindful of keeping the butter cold while working the dough; if needed, use a bowl scraper, rubber spatula, or your fingertips. If the butter becomes too soft and greasy, chill the dough in the freezer for 5 to 10 minutes before continuing. You can also transfer the dough to a marble pastry board to help keep the dough cool while you shape it.
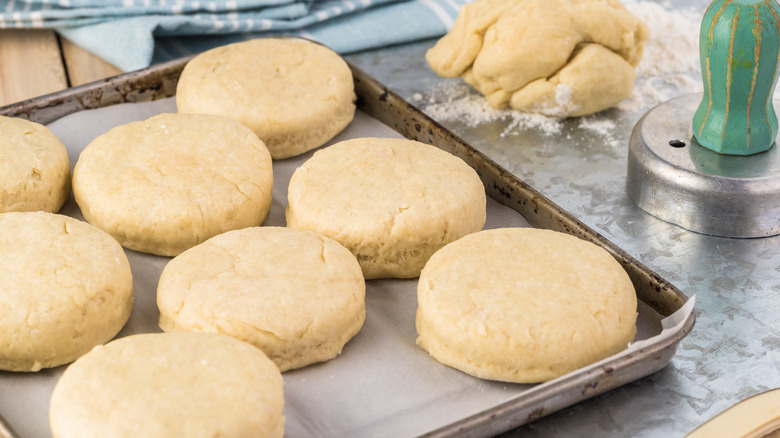
Cut the scones cleanly

Scones come in various shapes and sizes, like wedges, rounds, and squares. Most are cut into wedges using a knife, but scones can also be cut into rounds with biscuit cutters or into unique shapes with cookie cutters. Whatever shape you decide to make your scones, they must have clean-cut sides to help them rise straight and high. The cut edges of the scones allow the layers to separate, expand, and lift vertically. If you cut your scones cleanly, they will rise gloriously high.
Use a sharp, thin knife to cut your scones into perfectly-shaped wedges. Execute straight, vertical cuts for the cleanest cuts, and if you find the dough sticking to your knife, lightly dust the blade with a bit of flour. If you choose to use biscuit or cookie cutters, use straight-edged cutters with no dings. Avoid twisting the cutter while cutting out the shapes. Doing so will seal the edges of the dough and affect the rise of your scones. If the dough sticks to your cutter, lightly coat the cutter with some nonstick pan spray or flour.
Chill the scones before baking
As previously mentioned, the butter in the scone dough must remain cold from the beginning until the dough enters the oven. So, once your scones are cleanly cut and evenly placed onto a baking sheet, pop them into the refrigerator or freezer to chill. This is an added precaution that you can take to be sure that the pockets of butter in the dough bake properly to create expansion and tenderness.
Chilling the scones before baking is a good idea because after cutting in the butter, mixing in the liquid, incorporating add-ins, and shaping the scones, there's a chance that the dough may have gotten too warm. Some chill time in the refrigerator or freezer allows the butter to firm up again, so your scones will turn out light and flaky. This final chill also gives the gluten time to relax, resulting in a more tender final product. While the scones chill, use this time to preheat your oven so the kitchen doesn't get too warm while you make the dough.
Apply an egg wash to the scones before baking
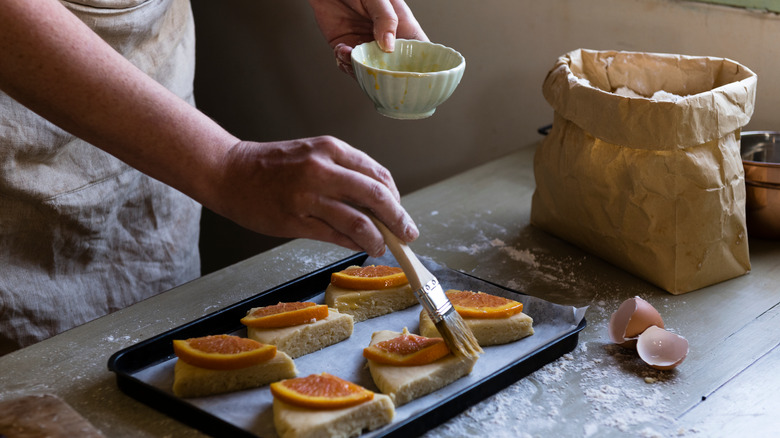
An egg wash is a simple mixture of egg and liquid — like water, milk, or cream — brushed onto ready-to-bake pastries to give them a shiny, brown finish. Adding an egg wash to a baked good before it goes into the oven is an easy way to turn a dull exterior glossy, golden, and impossible to resist. By brushing egg wash onto your scones before they bake, you can improve and enhance the appearance of the top crust. As your scones bake in the oven, the egg wash cooks onto the surface for a golden luster that elevates the look and, to a certain degree, the flavor of your scones.
A basic egg wash recipe is made by whisking together an egg with 1 tablespoon of water. You can add more liquid to achieve your desired consistency if needed. Just make sure to whisk long enough so the egg white and yolk are completely incorporated and the wash is thin enough to brush over your scones with a pastry brush easily. Any leftover egg wash can be stored in an airtight container in the refrigerator for two days. If you don't use it by then, we suggest mixing it into a batch of scrambled eggs in the morning!
Eat the scones the day they're baked, or freeze unbaked scones

Some baked goods keep well for days, sometimes even a week. Unfortunately, scones don't fall into that category. The best way to enjoy scones is to eat them the day they're baked — even better if you are lucky enough to eat them warm, straight from the oven!
Freshly baked scones are far superior tasting to day-old scones. So, if you have leftover scones, we suggest freezing them instead of leaving them on the counter to dry with each passing day. First, arrange the scones in a single layer on a tray and place them in the freezer until partially frozen. Then, transfer them to an airtight container and store them in the freezer for up to 1 month. Another option is to store a batch of unbaked scones in your freezer for future enjoyment. This way, you can bake off as many or as little scones as desired — and when needed. When baking scones from frozen, you'll need to add 2 to 5 minutes to the baking time in your recipe, depending on the size of the scones.