No-Bake Orange Dreamsicle Dessert Bars Recipe
Dreamsicles are enjoyed by young and old fans of frozen treats alike since the ice cream bars were invented in the early 1900s. The original version, with a creamy vanilla ice cream center surrounded by an outer layer of orange sherbet, is perhaps the one most associated with this dessert on a stick. Nostalgia for this classic goodie has inspired a variety of desserts featuring the oranges-and-cream flavor combination, from frozen sliced desserts and refreshing smoothies to cakes, pies, and even cocktails.
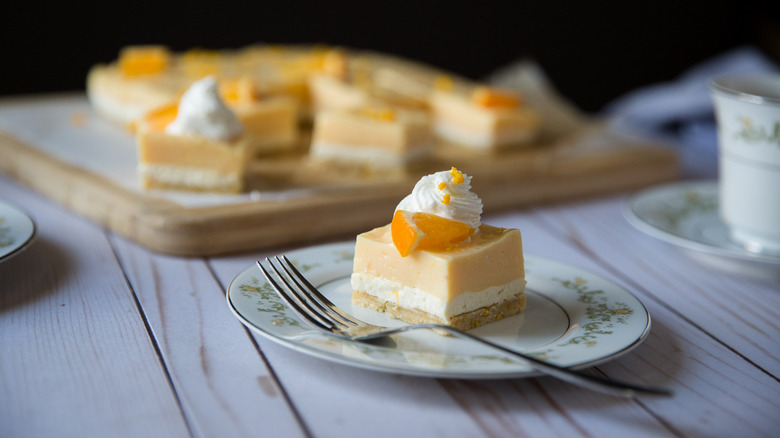
Recipe developer Michelle Bottalico has created these orange dreamsicle bars, a no-bake dessert featuring a moist, orangey crust; a decadent cream cheese layer; and an orange cream pudding layer on top, which brings the whole thing together with true orange flavor. Instead of relying on instant pudding or boxed gelatin mix, this version is made with whole ingredients and cuts back on processed sugar, without sacrificing any taste. Make this dreamy dessert ahead of time because once the layers are in place, it needs to chill and set for 1 ½ hours — the ultimate test of patience.
Gather the ingredients for these no-bake orange dreamsicle dessert bars
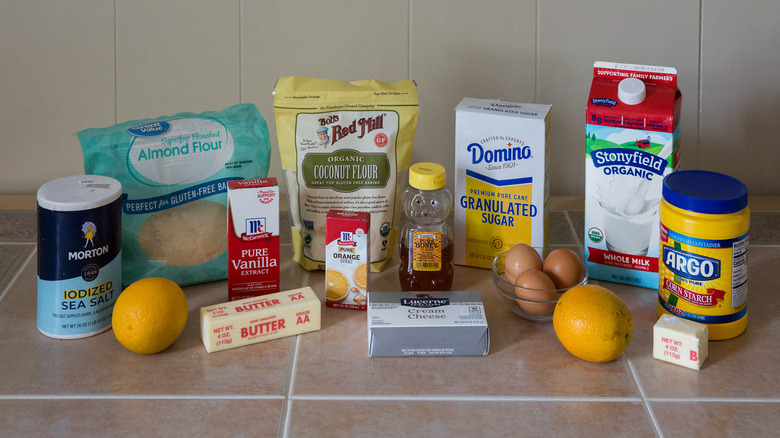
These no-bake bars are assembled in 3 separate layers. The bottommost layer is the crust, and instead of using graham crackers, you'll make this decadent crust with honey, wholesome almond flour and coconut flour, butter, orange zest, and salt. Organic oranges are best in this recipe since you'll be grating and eating the peel.
For the middle cream cheese layer, you will need cream cheese, butter, honey, and vanilla extract. Make sure to use regular cream cheese and not a whipped cream cheese spread, which won't hold up the same, and be sure to bring it up to room temperature ahead of time so it's easier to beat and yields a creamier result.
The uppermost orange cream layer is a homemade pudding, and to make it you will need sugar, cornstarch for thickening, salt, milk, egg yolks, butter, orange juice, and orange extract. Freshly squeeze the juice from about 2 oranges if you can, because it will give the pudding a fresher flavor. Lastly, have some whipped cream on hand for topping the finished dessert. Optional ingredients for this recipe are a few drops of orange food coloring for a more intense orange color, as well as more orange zest to garnish the finished product.
Line the pan
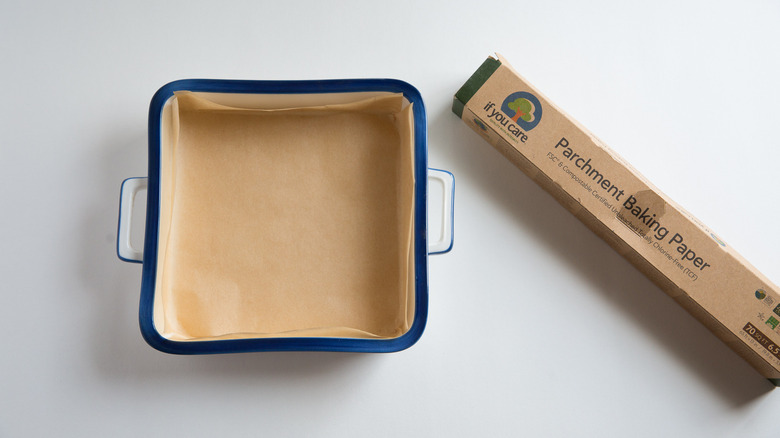
Line an 8x8-inch baking pan with 2 pieces of parchment paper. Cut the pieces so they're the same width as the pan (8 inches), and lay them down in different directions so all 4 sides of the pan are covered. This method, as opposed to using a single piece, prevents bunched paper corners from being impressed into the soft bars as they set.
Mix the crust ingredients
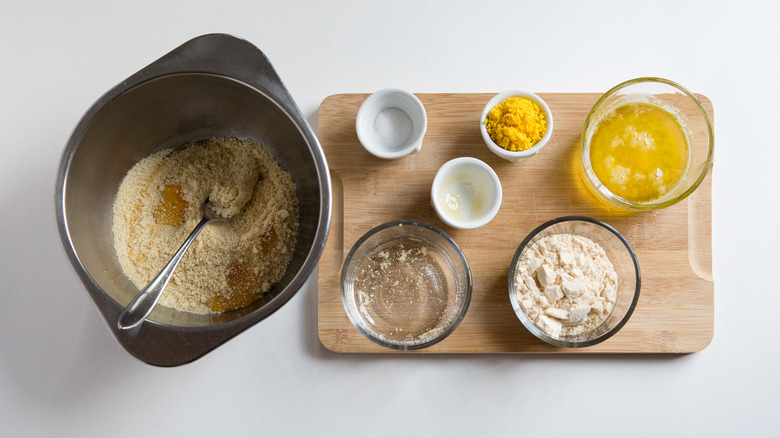
Place the honey, almond flour, coconut flour, butter, orange zest, and salt in a medium mixing bowl, then mix well with a fork. Though it's not a typical crust ingredient, the inclusion of orange zest gives the dish extra natural orange flavor. Further, you won't feel the textured specks of zest when you bite into the crust, whereas you would if they were added to the soft pudding.
Press the crust into the pan
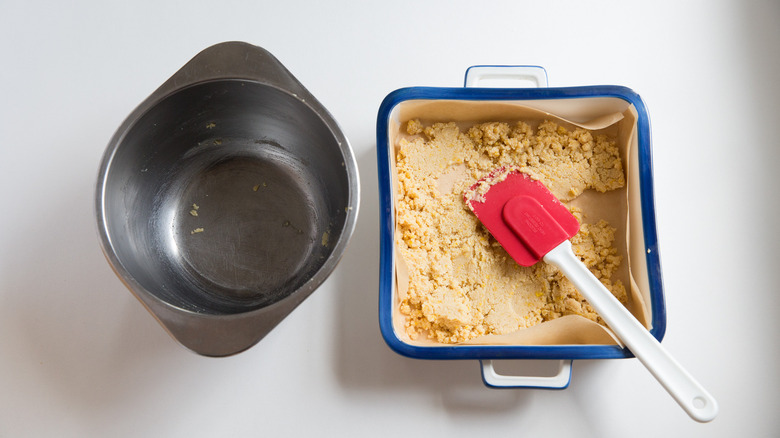
Place the crust mixture into the pan and use the back of a spatula to press it down so it's very firmly packed. This will help it stay together. Once the height is as even as you can manage, place the pan in the freezer to firm up while you make the cream cheese layer.
Beat the cream cheese layer ingredients
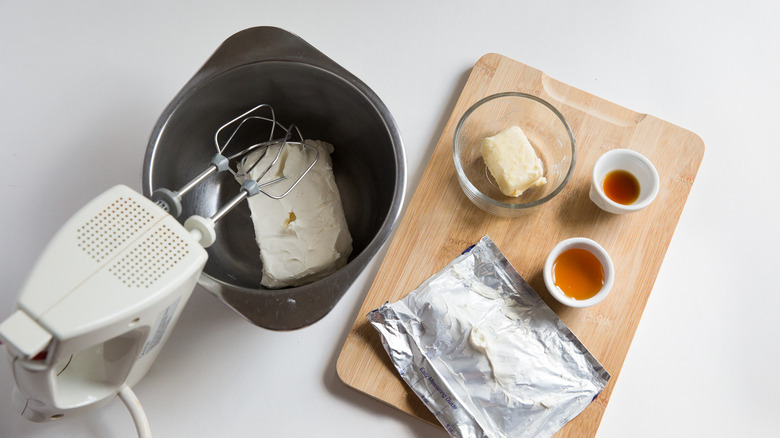
Place the room temperature cream cheese, butter, honey, and vanilla in a medium mixing bowl. Using a hand mixer, beat the mixture until smooth and creamy.
Spread the cream cheese layer into the pan
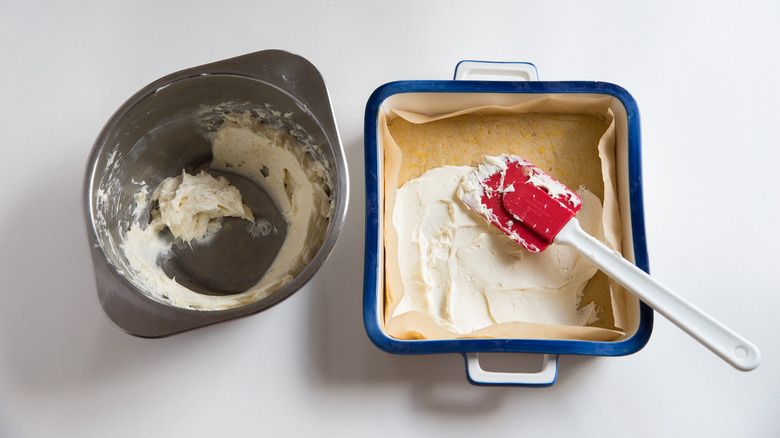
Remove the pan from the freezer. The crust should be nice and firm now, so use a spatula to evenly spread the cream cheese mixture on top of the crust. Now, put the pan back into the freezer to firm up the second layer. This will prevent the cream cheese mixture from melting and getting messy when you spread the warm orange cream layer on top.
Make the orange cream layer
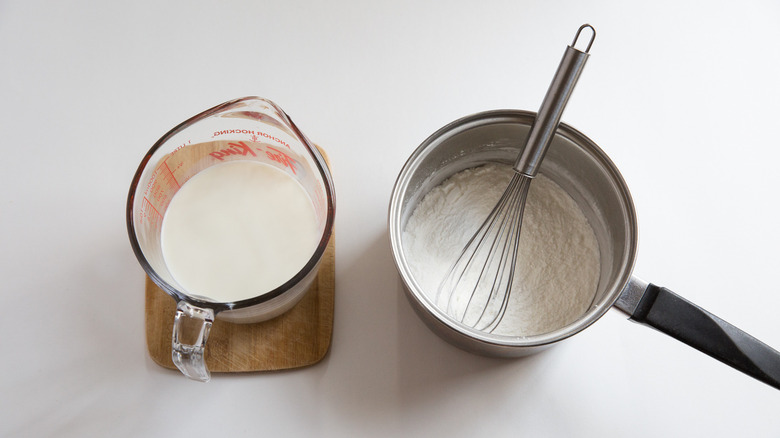
Place the sugar, cornstarch, and salt into a medium saucepan, and mix well with a whisk. Slowly pour the milk into the pan while continuing to whisk. The amount of cornstarch used here is more than what you would use for a regular pudding. This firms up the pudding layer more so it can stand on the top of the dreamsicle bars and stay intact when sliced.
Bring the milk mixture to a boil
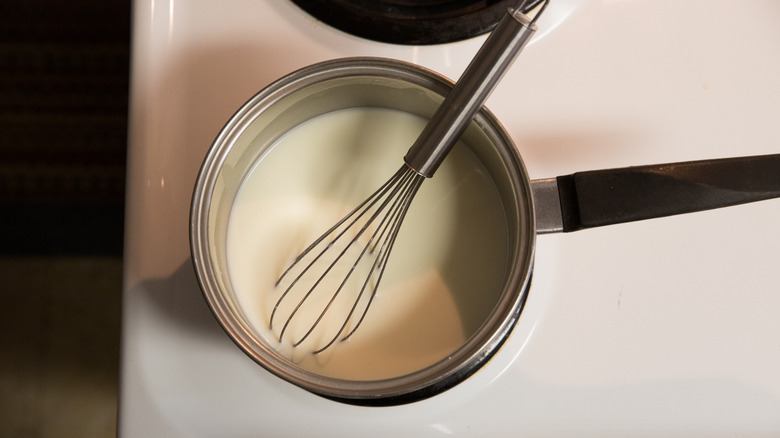
Place the saucepan on the stove and let it heat up slowly over medium heat until it comes to a low boil, whisking all the while. You'll notice the mixture gradually become thicker as it heats up. Once it comes to a boil, whisk continuously for 1 minute, then take the pan off the heat.
Temper the egg yolks
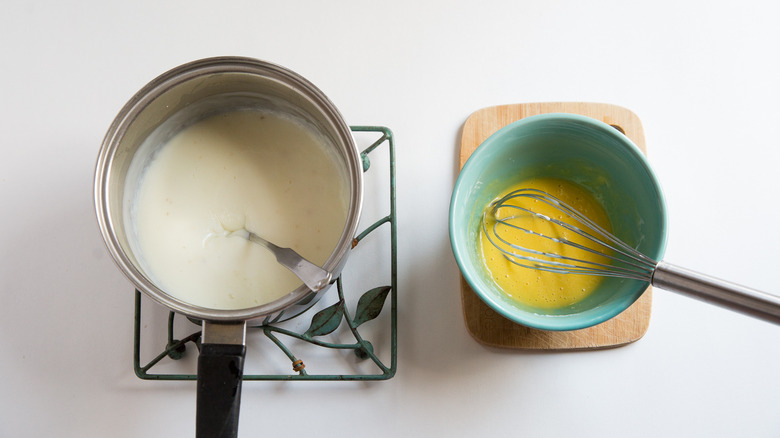
Whisk the egg yolks in a medium bowl until they look foamy. Now add about ¼ cup of the hot milk mixture into the bowl with the yolks. You don't need to be exact with this measurement, so you can eyeball it. The important thing is to quickly whisk the mixture so the yolks don't start to cook.
Bring the mixture to a boil again
Add the egg yolk mixture to the saucepan that's holding the rest of the hot milk. Place the pan back over medium heat and bring it to a low boil again, whisking while it heats up. Once it boils, continue whisking for 1 minute. This continuous movement does take a little muscle, but it will keep the pudding from getting lumpy.
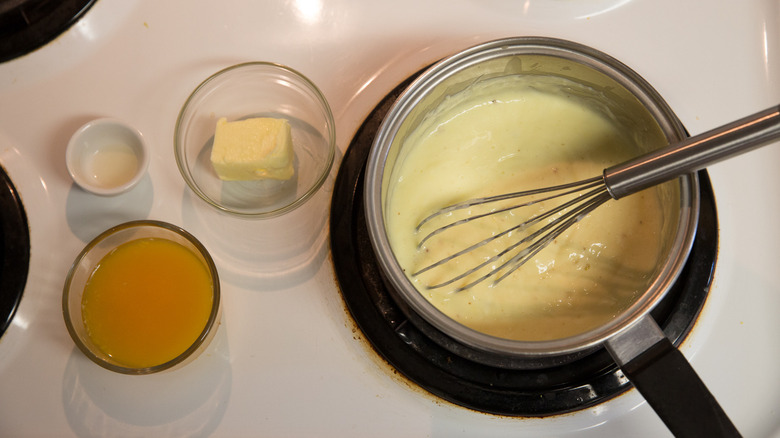
Next, reduce the heat to low so the mixture stops boiling. Add the butter, orange juice, and orange extract and give it another whisk just until the butter melts, and take the pan off the heat. If you're using food coloring, add it now and give the pudding a good stir until the color is even. (A little goes a long way, so start with a drop or 2 and see what the color looks like.)
Immediately pour the pudding into a wide, shallow dish. This kind of dish will create more surface area in the pudding, allowing it to cool faster. Let it cool for 10-15 minutes until it's no longer hot, but don't let it sit longer than that, because you don't want it to set. You can press a piece of plastic wrap on the surface of the pudding while it cools to prevent a skin from forming.
Spread the orange cream layer into the pan
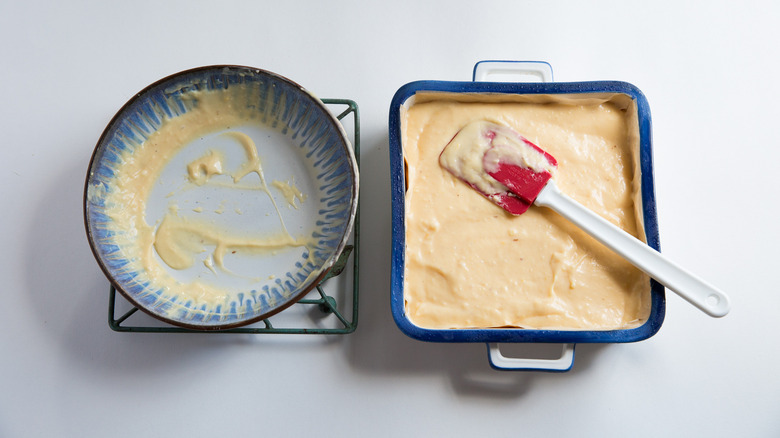
By now, the cream cheese mixture should have firmed up in the freezer. Take the pan out of the freezer and carefully spread the slightly cooled orange pudding on top of the cream cheese layer, using a spatula to make it as even as possible. You're almost done now, but your orange dreamsicle bars aren't quite ready to enjoy. Refrigerate the pan for 1-2 hours until the pudding sets completely and the crust and cream cheese layers soften a little.
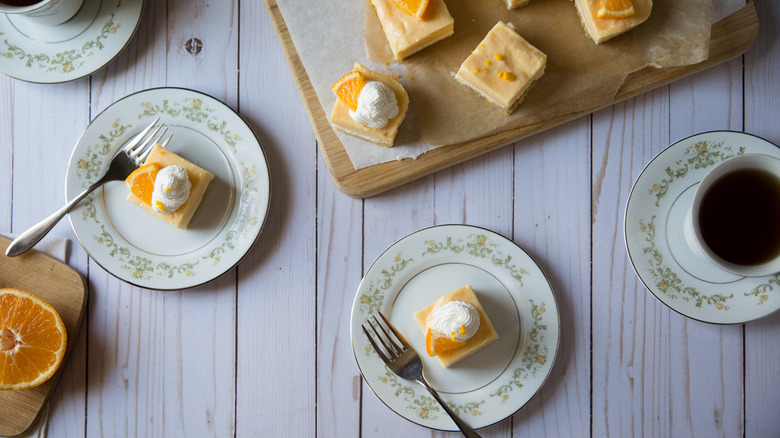
Serve the no-bake orange dreamsicle dessert bars
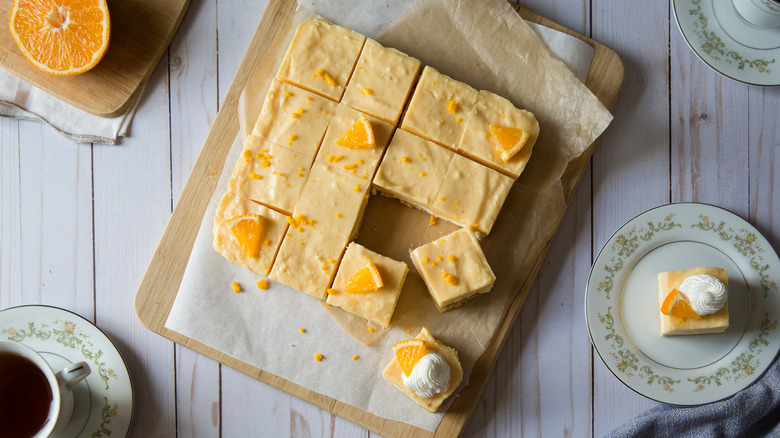
Finally, get ready to enjoy this cold, delicious treat. Slice up the dreamsicle bars to the size of your choice; Bottalico prefers a 4x4 cut to make 16 bars. The soft and creamy layers have a tendency to smudge a bit, so in order to cut neat slices, wipe your knife clean between each slice.
Top your dreamsicle treats with whipped cream before serving, as well as more orange zest if you like. Because of the perishable ingredients, any leftovers are best stored in the fridge.
No-Bake Orange Dreamsicle Dessert Bars Recipe
Inspired by the nostalgic orange dreamsicle, these triple-layered bars have just as much orange flavor as they do visual appeal.
Ingredients
- For the crust
- 2 teaspoons honey
- ⅔ cup almond flour
- ⅓ cup coconut flour
- 5 tablespoons unsalted butter, melted
- 2 tablespoons grated orange zest from about 1 organic orange
- ½ teaspoon salt
- For the cream cheese layer
- 8 ounces room temperature cream cheese
- 3 tablespoons unsalted butter, softened
- 1 tablespoon honey
- ½ teaspoon vanilla extract
- For the orange cream layer
- ¼ cup + 2 tablespoons granulated sugar
- 5 ½ tablespoons cornstarch
- 1 pinch salt
- 2 ¼ cups whole milk
- 3 egg yolks
- 3 tablespoons butter
- ¼ cup + 2 tablespoons orange juice (about 2 oranges)
- ½ teaspoon orange extract
- For the topping
- Whipped cream, as needed
Optional Ingredients
- Orange food coloring
- Additional orange zest, for garnish
Directions
- Line an 8x8-inch baking pan with 2 pieces of parchment paper, both cut to 8 inches wide but positioned in different directions so all 4 sides of the pan are covered.
- Make the crust: Add the honey, almond flour, coconut flour, butter, orange zest, and salt to a medium mixing bowl and mix with a fork until well incorporated.
- Spread the crust mixture in an even layer on the bottom of the pan. Press it down firmly with the back of a spatula so it will stay together.
- Place the pan in the freezer while you prepare the next layer.
- Make the cream cheese layer: Add the cream cheese, butter, honey, and vanilla to a medium mixing bowl and beat with a hand mixer until smooth.
- Take the pan with the crust out of the freezer and, using a spatula, spread the cream cheese mixture in an even layer on top.
- Place the pan in the freezer while you prepare the next layer.
- Make the orange cream layer: Add the sugar, cornstarch, and salt to a medium saucepan and whisk to mix well. Gradually whisk in the milk.
- Slowly heat the milk mixture over medium heat, whisking all the while, until it comes to a low boil. Once boiling, whisk continuously for 1 minute. (It should have thickened considerably.) Remove from heat.
- In a medium bowl, whisk the egg yolks until foamy. Temper the egg yolks by adding about ¼ cup of the hot milk mixture into the bowl and quickly whisking so the egg yolks don't cook.
- Pour the egg yolks into the saucepan containing the hot milk mixture and return it to medium heat. Bring it to low boil while whisking, and once it boils, whisk continuously for 1 minute.
- Reduce the heat to low and add the butter, orange juice, and orange extract, whisking continuously just until the butter melts. Remove the pan from the heat. If you're using food coloring, stir it in now.
- Pour the pudding into a wide dish. Let it cool for about 10-15 minutes until it's not hot anymore, but it hasn't yet set. Cover it with plastic wrap pressed against the surface to prevent a skin from forming.
- Take the pan with the first 2 layers out of the freezer and, using a spatula, carefully spread the orange pudding in an even layer on top of the cream cheese layer.
- Place the pan in the refrigerator for 1-2 hours to set the pudding and thaw the other layers before serving.
- For the neatest slices, clean the knife by wiping it on a cloth or paper towel between cuts.
- Serve the dreamsicle bars topped with whipped cream and optional extra orange zest.
Nutrition
| Calories per Serving | 225 |
| Total Fat | 17.3 g |
| Saturated Fat | 9.2 g |
| Trans Fat | 0.2 g |
| Cholesterol | 66.0 mg |
| Total Carbohydrates | 14.6 g |
| Dietary Fiber | 1.5 g |
| Total Sugars | 9.6 g |
| Sodium | 148.9 mg |
| Protein | 3.9 g |