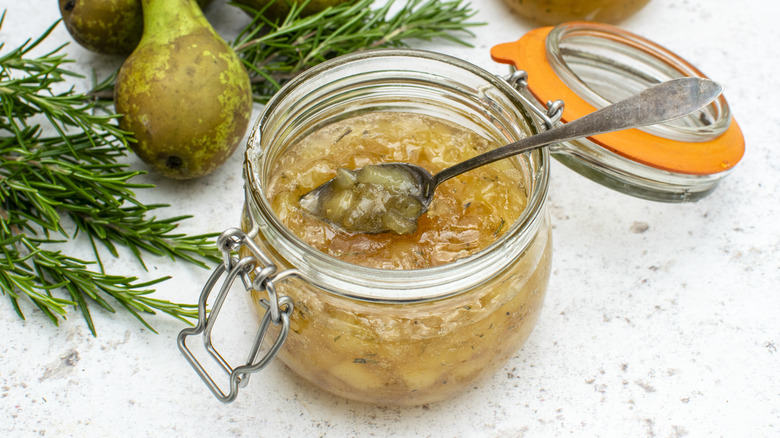
Rosemary And Pear Jam Recipe
Store-bought jam may offer convenience, but homemade jam offers an undeniable freshness and the unique opportunity to customize flavors. If you're tired of the same old strawberry or peach, switch things up with this rosemary and pear jam recipe, courtesy of developer Annabelle Randles. While pears might not be the most common fruit of choice when it comes to the spread, Randles assures us that this is a "unique and flavorful jam recipe," and though some patience is required to macerate the pears, the process as a whole is a remarkably easy one.
"This delightful combination of sweet pears and delicate notes of aromatic rosemary creates a truly unique jam with a rich and chunky fruity texture," Randles describes, and once you whip up this homemade creation, there's a good chance you'll never go back to the store-bought stuff. Spread this jam on toast or English muffins, or get creative and swap it out for typical grape jelly in your next PB&J sandwich.
Gather the ingredients for rosemary and pear jam
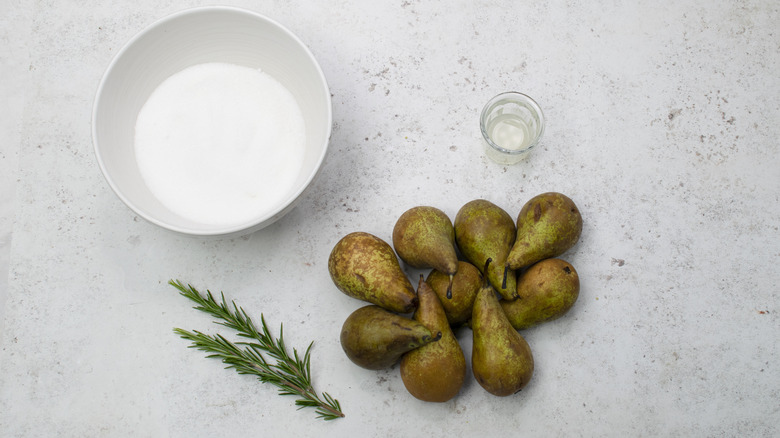
The beauty of this recipe shines through in its simplicity. Ingredients-wise, all you need are ripe pears (such as Bartlett, Bosc, or Comice), granulated sugar, lemon juice, and fresh rosemary sprigs.
Sterilize the jars
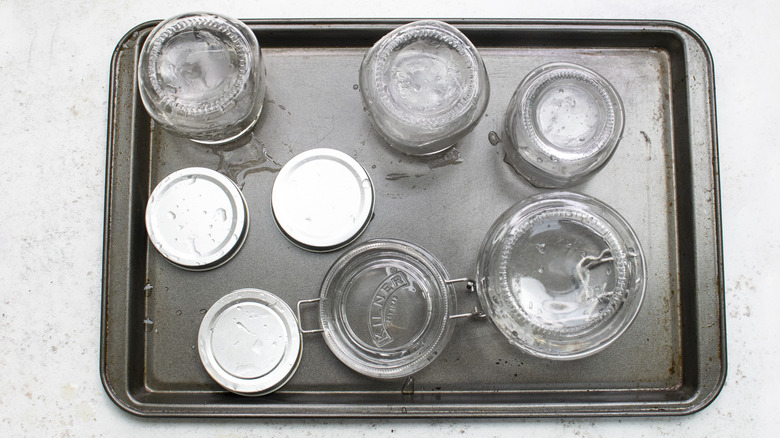
Before you make the jam (or as you're making it), you'll want to make sure that your jars are sterilized. To do so, preheat your oven to 320 F and wash your jars thoroughly (Randles uses 4 8-ounce jars for this recipe) with soap and water, making sure to get the lids as well. Don't dry the jars after washing, but instead place them upside down on a baking sheet along with the lids. Place them in the oven for 15 minutes, then fill them right away with jam, while they're still warm. To sterilize the rubber seals, boil them in water for about 20 minutes.
Keep in mind that you'll want to plan the timing out right to sterilize the jars. Because this recipe calls for a 12-hour maceration period, wait to sterilize the jars until the jam is already cooking. "It is best to sterilize the jars used to preserve the jam right before you intend to use them," Randles advises.
Peel, chop, and macerate the pears
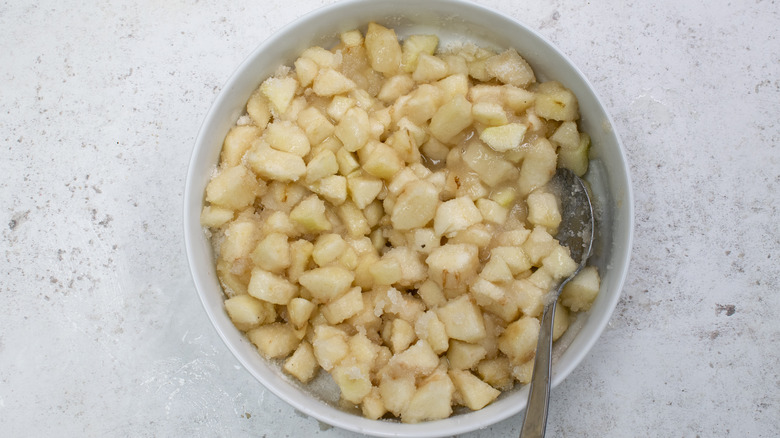
Place a couple of saucers or small plates into your freezer — these will be used later in the recipe, so once they're chilling, turn your attention to the pears. Peel them, remove their cores, then chop them up into small chunks. Add them to a mixing bowl along with the lemon juice and sugar, stir, then cover the bowl and place it in the fridge for 12 hours. This step allows the pears to macerate, which is a process that will soften the pears and draw out their juices and flavors.
Cook the jam
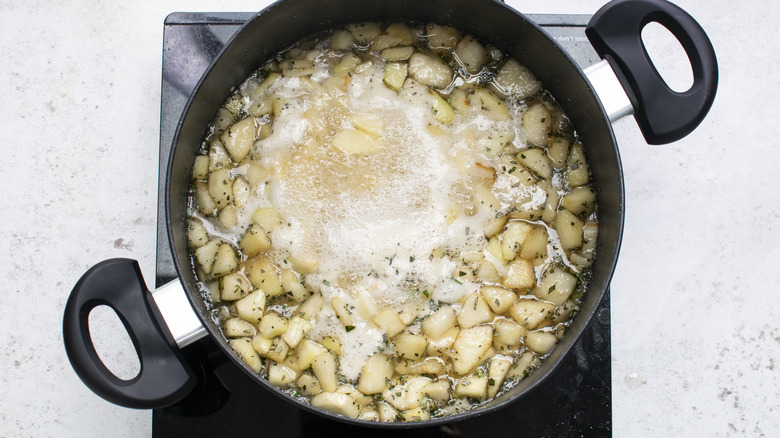
After the 12-hour maceration period is up, go ahead and chop up the rosemary sprigs — you'll want 2 tablespoons' worth of leaves. Then, place a large, heavy-bottomed pan over medium heat and add in the pears (and all of the juices), along with the chopped rosemary. Cook for a few minutes and stir occasionally, giving the sugar a chance to fully dissolve.
Once the sugar has dissolved, turn the heat up to high and keep the jam at a bubbling boil, stirring occasionally and skimming off any scum that may form on the surface. After 15 minutes, begin checking to see if the jam has reached its setting point, which is 221 F. Be sure to give the jam a thorough stir before testing the temperature to avoid any cold or hot spots, and once it reaches 221 F throughout, remove it from the heat. "To check that the jam has set, I use both a digital thermometer and the 'wrinkle test,'" Randles explains. "If you do not have a digital thermometer, just use the 'wrinkle test,'" which is detailed in the next step.
Use a chilled plate to test the jam's doneness
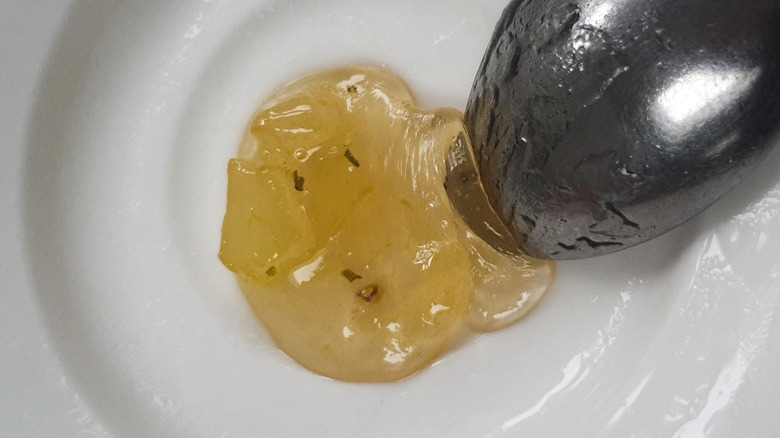
Remember that saucer you put in the freezer? Well, it's about to come in handy in helping you determine whether or not your jam has set. Grab the saucer and place a tiny dollop of jam on it. Allow the jam to sit for about 30 seconds, then push a spoon up against it — it the jam wrinkles on top, then it's ready to go. If not, return it to the stovetop and heat it for 5 more minutes, then try the wrinkle test again (this is why it's useful to put more than one saucer in the freezer).
Store the jam in jars and enjoy as desired
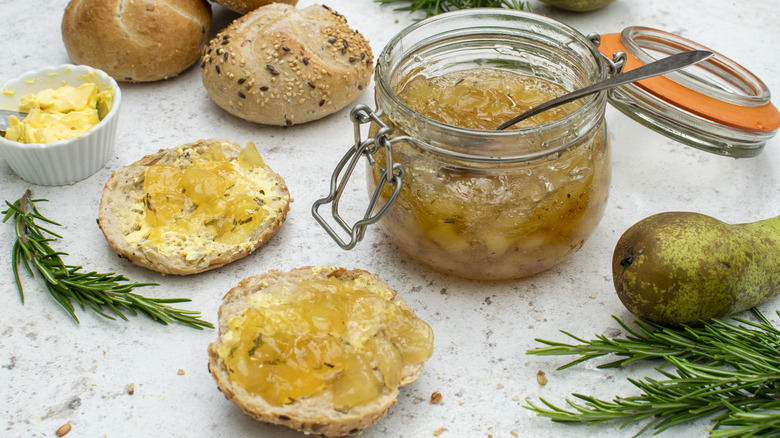
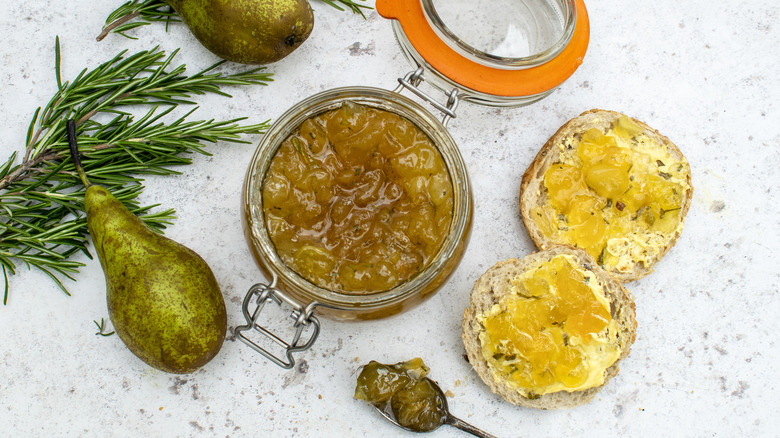
Once the jam is officially set, transfer it to your freshly sterilized, still-warm jars. "This jam will keep up to a year unopened when stored in a cool, dry place. Store refrigerated once opened," Randles advises.
Of course, if you want to dive right in to your homemade jam, there's no shortage of options when it comes to using it. You could slather some jam on rolls, sandwiches, muffins, or even use it to make a pan sauce for meat dishes. This sweet, herbaceous jam also makes for a great gift, whether for a friend, family member, or new neighbor.
Rosemary and Pear Jam Recipe
This rosemary pear jam is perfect not only on toast and muffins, but also with cheeses and in pan sauces.
Ingredients
- 3 pounds ripe pears (such as Bartlett, Bosc, or Comice)
- 3 ¾ cups granulated sugar
- 2 tablespoons lemon juice
- 2 large rosemary sprigs
Directions
- Put 2 saucers in the freezer. (These will be used later to test the jam for doneness).
- Peel the pears, remove the cores, and cut the fruit into small pieces.
- Place the pear chunks into a mixing bowl with the sugar and lemon juice. Stir until well combined. Cover and leave to macerate for 12 hours in the fridge.
- When you are ready to make the jam, finely chop enough rosemary leaves to yield 2 tablespoons.
- Transfer the pear mixture, including the juices, into a large, heavy-bottomed pan. Add the rosemary leaves.
- Heat the pan uncovered over medium heat, stirring from time to time, until the sugar dissolves completely.
- Once the sugar has dissolved, increase the heat to high. Cook the jam over a bubbling boil, stirring occasionally and skimming off any scum that forms on the surface, for about 15 minutes. At this point, it should have reached its setting point of 221 F. Use a digital thermometer to test the temperature, stirring the jam to avoid any cold or hot spots. Once set, remove the pan from the heat.
- To double-check that the jam has set, remove a chilled saucer from the freezer and place a little bit of jam on top. Allow the jam to cool on the plate for 30 seconds, then push it with your finger or a spoon. If it wrinkles on the surface, it is ready. If it doesn't wrinkle, put the pan back on the stove, heat the jam for another 5 minutes, and test it again.
- When ready, pour the jam into warm, sterilized airtight jars, seal, and label.
Nutrition
| Calories per Serving | 925 |
| Total Fat | 0.7 g |
| Saturated Fat | 0.2 g |
| Trans Fat | 0.0 g |
| Cholesterol | 0.0 mg |
| Total Carbohydrates | 240.4 g |
| Dietary Fiber | 11.0 g |
| Total Sugars | 220.5 g |
| Sodium | 6.2 mg |
| Protein | 1.4 g |