15 Tips You Need For Melting Chocolate
What do chocolate-dipped strawberries, dessert fondue, and peppermint bark all have in common? Besides being delicious and full of cocoa flavor, these sweets all require a home cook to know how to melt the confection properly. The melting process changes the candy's chemical and physical structure, making it easier to adhere to your favorite baked treats. If you're making a recipe like a fudgy brownie, properly melted chocolate can also boost the flavor of the batter and infuse it with a moist, desirable texture.
Incorrectly melting your chocolate can cause fundamental issues with the texture and flavor of your recipe. For example, one big mistake often made with melting the candy is scorching it — which can lead to a burnt flavor. Seizing, when the chocolate turns gritty and tough, can also occur. But, with a little bit of knowledge and some practical tips, you will be well on your way to mastering the art of melting chocolate.
Pick a method that works for you
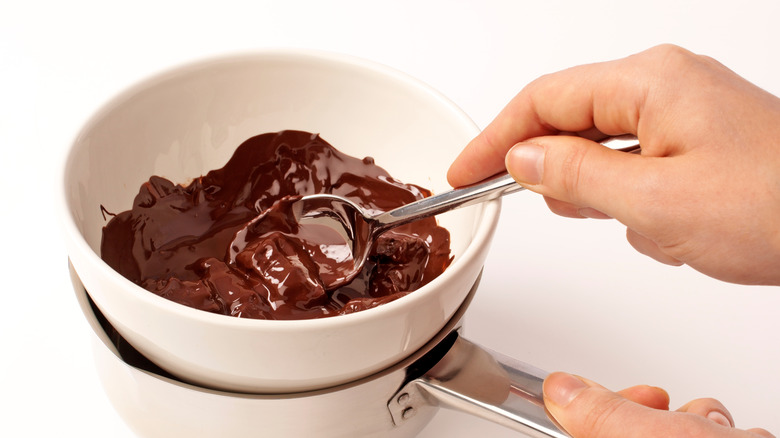
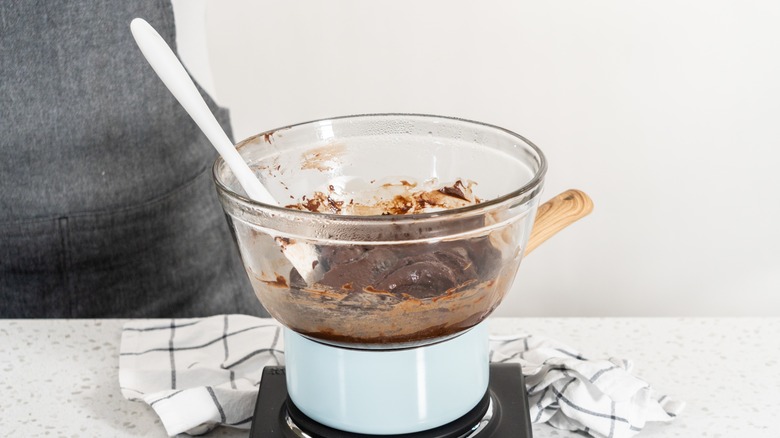
There are many, many different ways to melt this confection, some of which are more beginner-friendly than others. An easy option is using a bain marie (or a double boiler) which applies indirect heat to the chocolate as the water in the saucepan below heats up. While this common method is generally reliable, the process can get very tedious because you'll need to be mindful of the chocolate on the edges of the bowl which tend to scorch faster.
Other methods include taking advantage of the ever-popular microwave — which, although fast, is very easy to overheat — and melting your chocolate directly in a saucepan over low heat. When all else fails, you could even take a hair dryer and silicon spatula to your chocolate to achieve the perfect melt. Ultimately, the path you choose will depend on your comfort level, access to supplies, and above all — your patience.
Chop your chocolate into small pieces
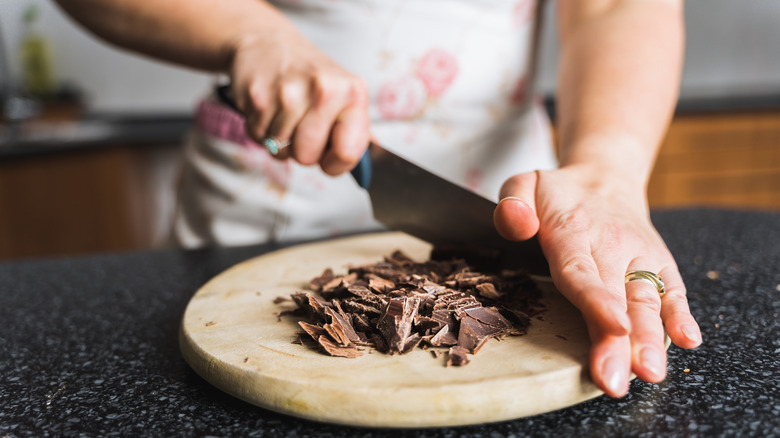
Here's an important time-saving step: You should chop chocolate before melting it because it will speed up the process since smaller pieces of chocolate have more surface area exposed to heat. It will also reduce the risk of the chocolate overheating.
There are several different tools you can use for chopping your chocolate. A chocolate chipper is a great option for inordinately large blocks of chocolate, while a heavy chef's knife will do for your standard baking bar. If you're working with a more fragile type of chocolate, like milk or white, cut it into thin matchsticks or shards no larger than ¼ inch thick. You can also place the bar in the microwave for short, 10-second intervals to make the chocolate easier to cut. Once the corners of the bar start to shine, you can remove it from the heat and slice it with a serrated knife.
Try grating your chocolate for easier melting

When you're preparing chocolate for melting, your knife and a cutting board should be your go-to. But there might be another utensil in your kitchen that will unlock the perfect melting experience. Perfect-tempered chocolate is easier to achieve with a grater because the tool easily breaks the bar down into the smallest possible pieces, thus increasing the exposure of the chocolate to heat. It also makes it more difficult to overheat the chocolate and potentially cause the dreaded "bloom" which results in a grainy texture and unappealing white color.
You should use a box grater or microplane to grate your chocolate into a double boiler or microwave-safe bowl. Start by melting about ⅔ of the chocolate down, stirring constantly according to your chosen melting method. Then, once your chocolate has melted, finish with the last ⅓ of the chocolate. The small size of the flecks will dramatically speed up the time it takes to melt down your chosen type of chocolate — meaning you're only moments away from completing your confection.
Use short intervals if you're melting chocolate in the microwave

Melting chocolate in a microwave shouldn't be seen as "the easy way out." This method takes not only a keen, trained eye but also a ton of patience. Before melting chocolate in the microwave, you should be prepared to stand by and ready to periodically remove it, stir it, and place it back in. This is because microwaves don't heat food evenly (hence, why your reheated pasta has a cold spot or two), so attempting to melt your chocolate in one shot will likely lead to parts of it scorching and burning.
Start by chopping your chocolate into small pieces. Then, move the chocolate to a microwave-safe bowl (we recommend ceramic or glass which tend to hold heat well and make it easy to see when the chocolate is melted). Heat the chocolate on low to medium power for 30 seconds. After the timer is up, stir the chocolate with a dry spatula before returning it to the microwave for another interval. This will ensure your chocolate is perfectly melted — no double boiler needed.
Make sure your chocolate is melted all the way
One of the biggest mistakes people make when melting chocolate for baking is not being patient enough. If you don't allow enough time for the process to fully take its course, not only will chunks of chocolate interspersed in your smooth brownie distract eaters, but it may even lead to a batter that is dry, crumbly, and lacking in cocoa flavor.
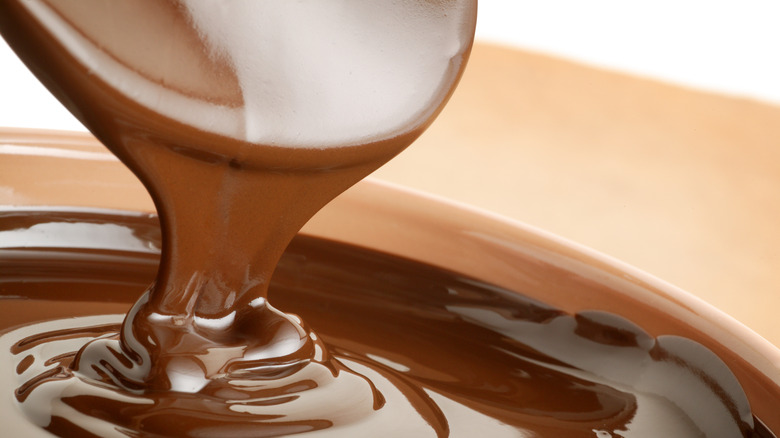
If the process is executed to perfection, you shouldn't be able to find any discernable chunks of chocolate. It should instead be liquid and trickle smoothly off a spatula. Adding the chocolate to the batter while it's hot will allow it to blend seamlessly without any chunkiness. Although it might take a couple of extra minutes to ensure your chocolate is fully melted (yet, not scorched), it will produce the best texture and flavor in whatever recipe you're using it for.
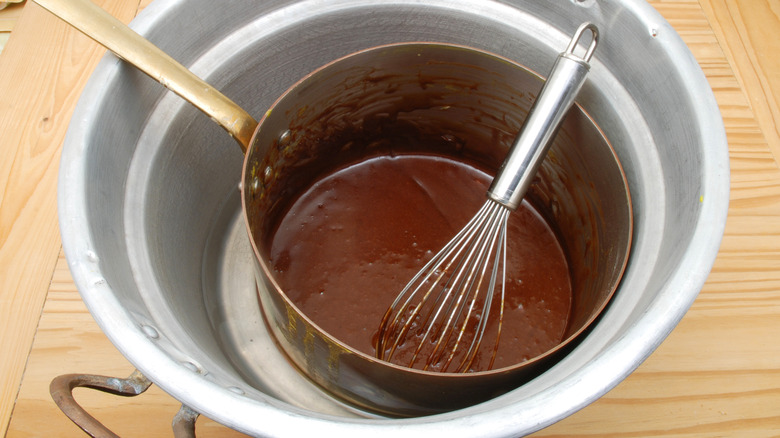
Always use a thermometer
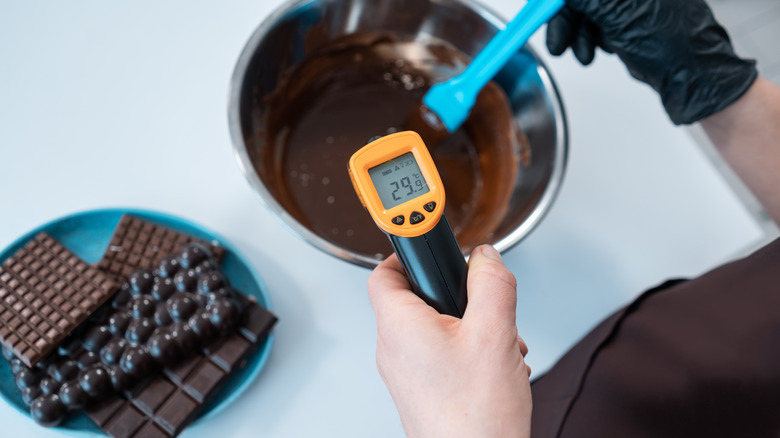
Chocolate is finicky, that's for sure. Since it is prone to seizing and scorching, you must keep a kitchen thermometer handy when melting it down or taking it a step further and tempering it. The tempering process doesn't just change the chocolate into liquid — it involves repeatedly heating and cooling the chocolate very precisely to change the crystal structure of the chocolate. The result is chocolate with a glossy finish and a crisp, satisfying snap, perfect for dipping or candy making.
If you're tempering chocolate at home, take a tip from master chocolatiers and dab a bit of chocolate on your wrist when you think it's melted enough. It should feel warm but not burn your skin. This comfortable temperature is around 88 to 90 degrees Fahrenheit. If you want to be very precise, you should take a thermometer reading to ensure it's within this two-degree temperature zone.
Fix seized chocolate with liquid
Melting chocolate is not a set-it-and-forget-it task in the kitchen. It's essential to be on top of mixing, stirring, and moving your chocolate to prevent it from seizing. But is there a way to fix seized chocolate?
While the easiest solution to ameliorate seized chocolate is to prevent it from seizing in the first place, accidents do happen. Before you toss out your chocolate and start melting a new batch, add a bit of liquid to bring it back to life. Water, butter, or liqueur are great candidates. It is important to remember that adding these liquids won't turn back time and change the chocolate back to its original state. Hence, it's best to use the new chocolate mixture as chocolate syrup or a drizzle rather than for tempering or a recipe like bonbons.
If you notice that your chocolate is starting to seize up as you're stirring it, try removing it from the heat and adding some unmelted chocolate. Continue stirring to keep your mixture cool before placing it back on the heat and continuing. This method will cool down the chocolate and not alter its flavor or texture too much.
Don't stop stirring
Celebrity chef Alton Brown has many tips for home cooks around almost every food cooked in the kitchen — including melting chocolate. Brown's top tip for tempering chocolate is to be mindful of the heat and to keep stirring the mixture. This is because tempering, which gives melted chocolate an attractive glossy appearance and crisp snap, can only happen at a specific temperature range.
When he tempers chocolate, Brown will dip the bottom of his bowl in the steaming water for about five seconds before removing it and stirring for 30 seconds. He repeats these steps until the chocolate is about half-melted and will then reduce the dip time to about three seconds. Once the chocolate is smooth in texture and appearance, Brown recommends that home cooks keep stirring for about a minute before dipping or removing it from the bowl. If the chocolate starts to harden, the Food Network star recommends returning it to the heat, which should be kept within the 88 to 90 degrees Fahrenheit buffer zone.
Avoid using chocolate chips
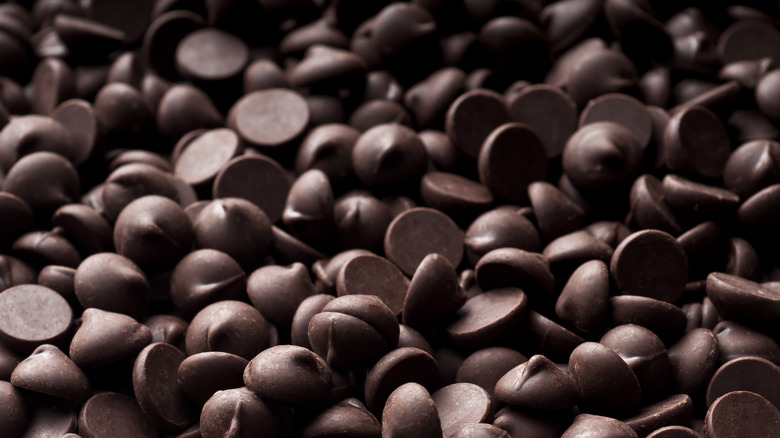
Not all chocolate is created even. The most important thing to know before melting chocolate chips is that this pantry staple often contains stabilizers to help the chocolate maintain its shape (it's why your chocolate chip cookies never seem to have any melty streaks to them). The stabilizers, which often include soy or sunflower lecithin, cause the chocolate to resist melting and also produce thicker, creamier chocolate when they are heated to the right temperature. If you're looking for a chip suitable for melting, check for stabilizers on the label or select a thin chocolate wafer instead.
In short, you'll spend more time trying to get your chips to melt, and you may not like the result. Instead of using chips, we recommend using couverture chocolate instead. This type of baking chocolate has one of the highest concentrations of cocoa butter at close to 31% — meaning that it is much easier to melt. If this chocolate is tempered correctly, it produces a satisfying snap and a perfectly glossy shade of brown.
Be wary of how other ingredients will impact your chocolate

Not only does the temperature of your chocolate impact how it will melt, but also the temperature of other ingredients as well. You should always use warm ingredients when cooking with chocolate to ensure it stays melted rather than solid. To remain in a smooth, liquid state, the chocolate needs to be kept above 90 degrees Fahrenheit. Adding an ingredient that is too cold can suddenly shock the chocolate and cause it to solidify, which would erase all of your hard work.
Ensure the rest of the ingredients you're cooking with are between 90 and 115 degrees. This includes ingredients like butter, milk, and alcohol, which should be brought to warm temperatures but not boiling. Using warm-temperature ingredients for baking may also have other unanticipated benefits, such as more easily incorporating into the batter and being easier to mix by hand.
Keep water and chocolate separate
If you think back to chemistry class, you'll remember that oils and water aren't fond of one another. When you're melting your chocolate, be sure to avoid mixing it with any sort of water. This includes adding water to the chocolate in lieu of butter or fat or forgetting to dry your double boiler bowl completely before adding your pieces of chocolate to it. Broadly speaking, mixing chocolate with water will cause seizing and produce a thick, fudgy result rather than a smooth, tempered one. From a food science perspective, adding a very minimal amount of water to chocolate produces the same effect as adding water to flour. This is because refined chocolate is made with very little moisture, so adding water to the mix causes the sugar and cocoa particles to become wet and pasty.
The only time this rule does not apply is when you add a lot of water to the chocolate and continuously stir, which causes the cocoa butter in the chocolate and the water to emulsify — which produces an evenly dispersed, homogenous mixture with minimal clumping. It's why Alex Guarnaschelli's quick method for rescuing melted chocolate sauce is to add several spoonfuls of water to seized chocolate and continuously stir until the mixture is thick and smooth.
For extra smooth chocolate, add butter
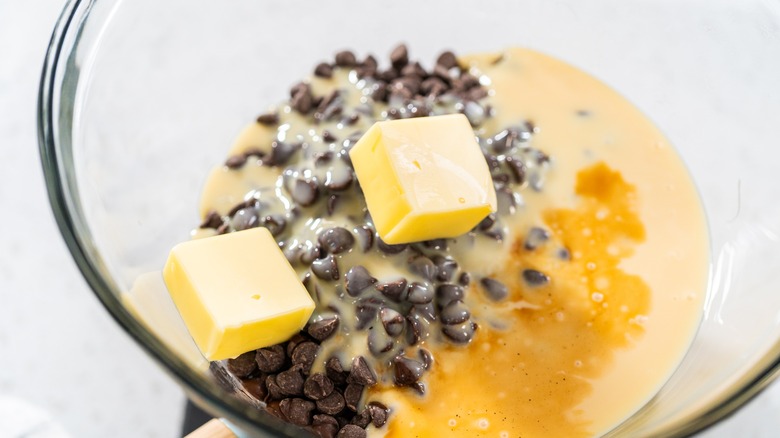
Chocolate and water don't mix — especially when tempering chocolate. Instead, opt for butter, which increases the fat content of the mixture, making it smooth, creamy, and easy to work with. It can also make melting chocolate easier after it's been hardened or comes out too clumpy. Simply add a pat of room-temperature butter to your chocolate to bring the temperature of the chocolate down and rescue it from the brink of scorching.
The amount of butter you'll need to add to the chocolate depends on its cacao concentration. Chocolate that is 55% to 65% cacao needs about 1 tablespoon of butter for every 2 ounces of chocolate, while darker, 70% to 90% cacao chocolate will need about 1½ tablespoons of butter per 2 ounces of chocolate.
It's important to remember that adding butter to the chocolate changes some of its properties, including the temperature at which it solidifies. Melted chocolate and butter will harden between 65 and 70 degrees Fahrenheit in three to five minutes. This means you'll have to move quickly to dip your cookies in the chocolate or drizzle it on whatever you're making.
Alter your temperature based on the type of chocolate you're using
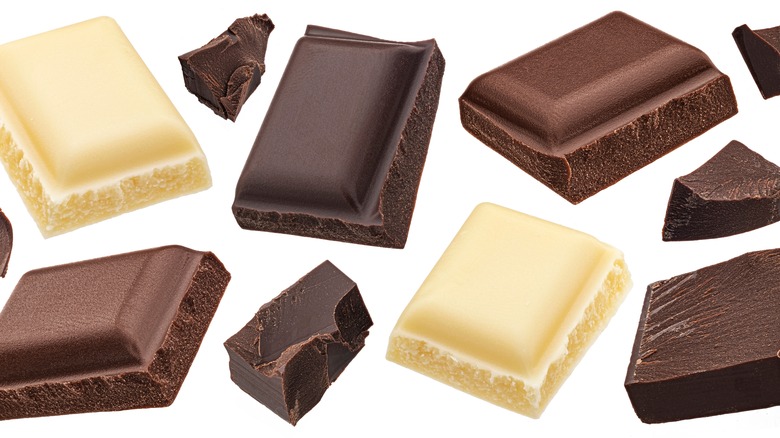
The exact instructions for melting chocolate will depend on the chocolate variety you choose. This is because the amount of cacao in the chocolate will alter some of its melting properties. High-cacao dark chocolate, which contains about 85% cocoa solids, will start melting at 114.8 degrees F. Milk chocolate, which only contains between 20 and 50% cocoa solids, will melt between 104 and 113 degrees Fahrenheit. Lastly, white chocolate, which contains no cocoa solids and a cocoa butter content of around 20%, will melt between 98.6 and 109.4 degrees.
Regardless of cacao content, avoid heating your chocolate beyond 133 degrees, otherwise, you are likely to end up ruining its texture. If the thermometer temperature starts rising too much, remove the chocolate from the heat source and try transferring the chocolate to a fresh bowl. This will bring down the temperature and prevent the chocolate from seizing up.
Avoid agitating and covering the chocolate as its tempering
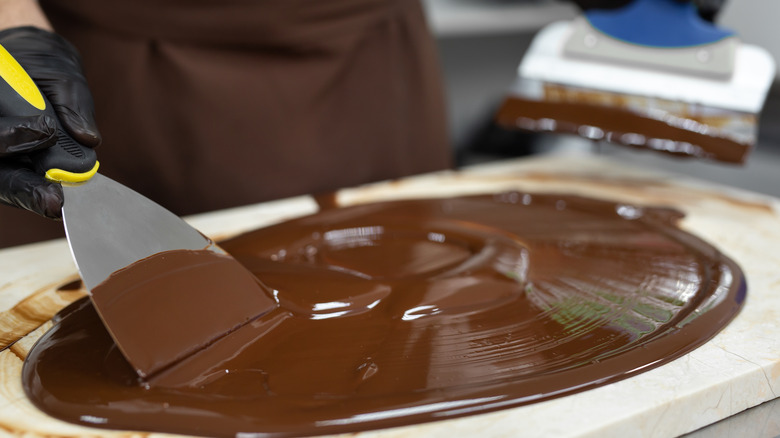
You've finally completed the difficult task of tempering your chocolate by meticulously heating and cooling it to just the right temperature. Now, it's time for you to test and see if your efforts were fruitful. Once your chocolate is melted to the correct temperature, test it by spreading it on a sheet of baking paper or a knife. It should start to set (harden) within two to three minutes if you're using dark chocolate and three to five minutes if you opt for milk or white chocolate. If your tester batch transitions from a liquid to a solid within this time, then you should be good to spread out your chocolate.
When your tempered chocolate is setting, be careful not to agitate it. This includes scraping the mixing bowl of partially-hardened chocolate into your mold which can promote crystallization and lumps. You should also avoid covering the chocolate while it's setting, as restricting airflow can inadvertently cause blooming. In addition, the chocolate needs to sit at room temperature rather than in your refrigerator because the condensation of the fridge can create moisture issues and promote blooming.
Thin chocolate with an oil
Thinning chocolate is essential because it produces a delicate shell on foods, such as cake pops or chocolate-covered pretzel rods, rather than a dense chocolate coating that hurts your teeth as you bite into it. The type of chocolate you melt and how high-quality the fats are will impact how the chocolate thins, but there are several ingredients you can add to the mixture to help you achieve the perfect chocolate shell.
Fats are going to be your best friend for thinning out chocolate. Adding canola or vegetable oil to the chocolate before melting is a neutral flavor choice that produces a dreamy chocolate shell. These oils are good alternatives to coconut oil, which tends to have a more pronounced flavor. You can also add paramount crystals to your mixture; chocolatiers use these tiny flecks of partially hydrogenated palm kernel oil as a cheaper alternative to grated cocoa butter.