Perfect Tempered Chocolate Is Easier To Achieve With A Grater

Tempering chocolate can be a daunting task, even for experienced bakers. You've likely seen bakers and chocolatiers get nervous about tempering chocolate on competitive cooking shows, and with good reason. If chocolate is not properly tempered, it will not have its signature shine and snap. In fact, if chocolate is melted and cooled without proper tempering, it can result in a dull, grainy texture with white streaks known as "bloom." The process also ensures that the chocolate has a firmer structure and allows it to be used in more architectural ways, such as chocolate domes or curls to garnish desserts.
For successful results, it all comes down to getting the perfect controlled temperature, typically below 95 degrees Fahrenheit. Though getting the chocolate to the right temperatures can be tricky, there's a simple trick that can make it easier, and you probably already have the necessary tools in your culinary arsenal. Grab your grater to prepare the chocolate before melting it.
Grate the chocolate for better results
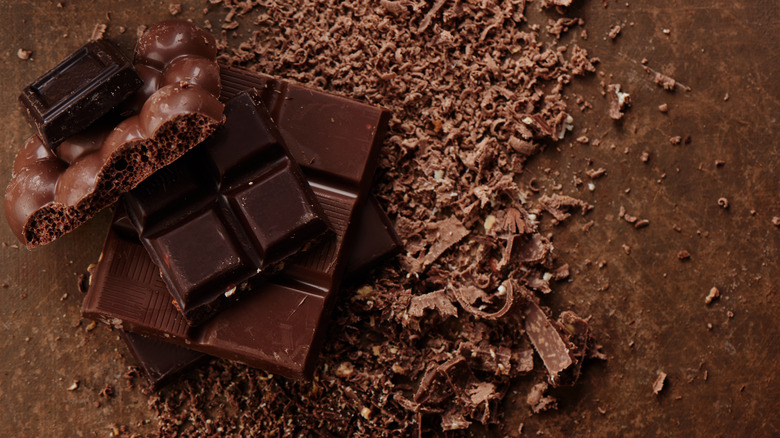
Grating chocolate before melting it can make tempering easier because it breaks the chocolate down into smaller pieces that can melt more easily and evenly. When chocolate is melted in large chunks, it can be difficult to control and create a uniform temperature. Smaller pieces also ensure that the chocolate is less likely to overheat or burn as it melts.
To grate chocolate for tempering, simply use a box grater or microplane. Then, melt the chocolate according to the recipe's instructions, making sure to monitor the temperature carefully. Many recipes recommend that you melt 2/3 of your chocolate, then stir in the additional in its solid form 1/3. Using a grater makes this protocol even easier, as the thin pieces will melt into the mixture seamlessly.
Give it a try the next time you're tempering chocolate to enjoy a smooth and glossy finish every time. You just might be surprised by the impact such a simple prep step can have.