Shoestring Garlic Parmesan Fries Recipe
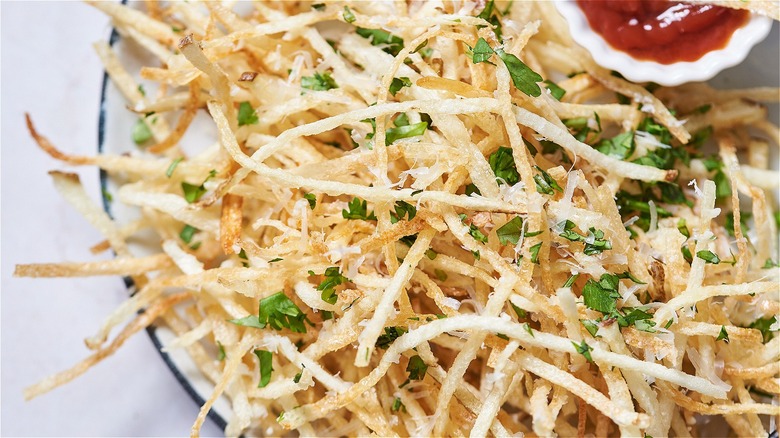
Have you ever noticed that the more expensive the restaurant, the thinner the French fries are? Tiny, crispy, wispy fries are often found stacked on top of tender meatloaf or beside tender steaks at fancy-casual Americanas (and for the sake of the example, we're ignoring McDonald's). There might be a reason for that: Thin, crunchy, golden fries aren't easy to make. Besides the delicate process of frying such small pieces of potato, the spuds have to be julienned, a technique that can be time consuming and difficult. Whether you're familiar with julienning or not, the delicate stacks of fried matchsticks are impressive, and dare we say, beautiful.
Shoestring french fries can range from wispy-thin to as thick as a pencil, and in this recipe developed by Michelle McGlinn, we'll show you how to make both. If you're not sure which one to try, think of it this way: A super-thin fry makes a good topping, and a thicker one a good side dish. These fries will also come decked-out with a savory garlic Parmesan topping, so fry lovers unite — this is most definitely the recipe for you.
Gather the ingredients for shoestring garlic Parmesan fries
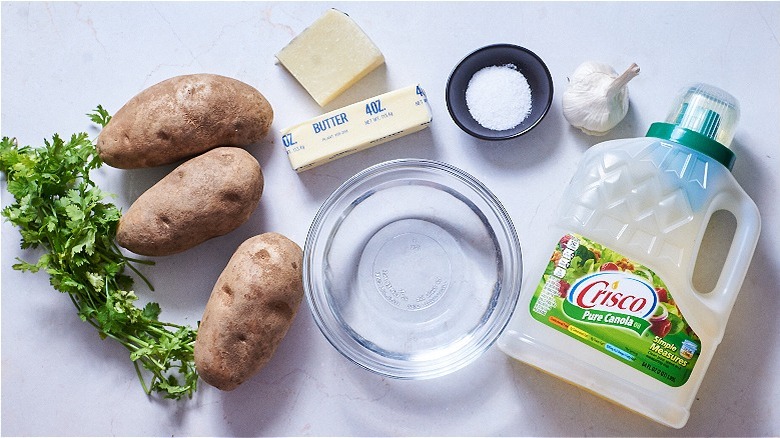
For the fries, you'll need a quart of canola oil and a few russet potatoes. There's no room for switching the potatoes here — the size, shape, and texture of Idaho spuds are necessary for French fries. Gold will get too mushy, and red too waxy. With the potatoes julienned and fried, you'll need salt, butter, garlic, grated Parmesan, and parsley to give them a delicious, buttery flavor.
Slice the potatoes with a mandoline
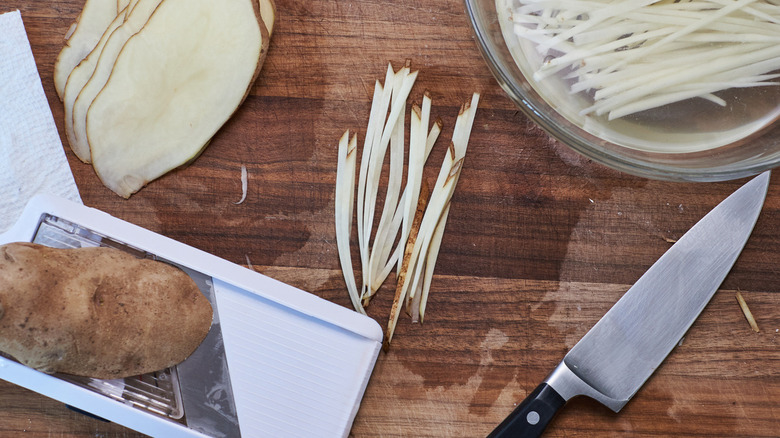
This step will walk through using a mandoline, and the next will walk through using a peeler — whichever way you go about cutting the potatoes, be sure to have a large bowl of water on standby to place the sliced potatoes.
The most common way to julienne a potato is to use a mandoline with a julienne attachment. This will push the potato through a series of blades that cut it directly into thin matchstick pieces. This is the technique that a restaurant would likely use, since it's fast, easy, and guarantees even slices. But not everyone has this kind of mandoline.
If you happen to own a handheld mandoline for slicing, set it at about ⅛-inch thickness and slice the potato into slabs, skin-on (a peeled potato is too slippery for this). If you don't own a mandoline, do this by hand with a sharp knife, being careful to make even, ⅛-inch slices. With the slabs sliced, julienne thin strips about the width of a pencil, then immediately place in a bowl of cold water to prevent oxidation.
Alternatively, use a peeler to get very thin slices
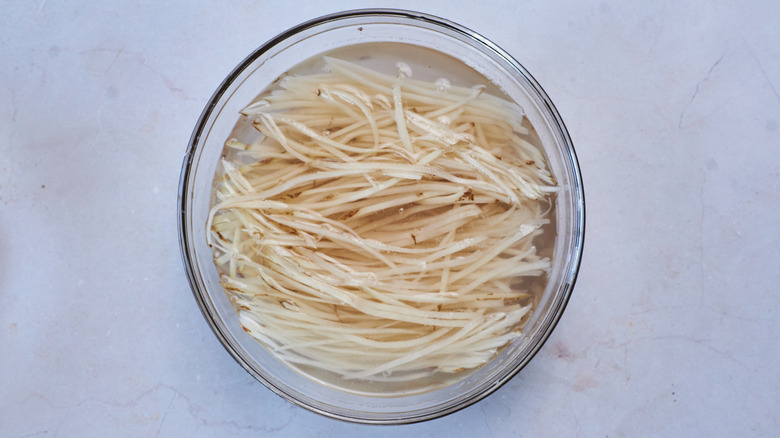
For very, very thin French fries (like the kind an upscale bar might call "haystacks"), use a julienne peeler to peel long, thin strips across the potato. Again, forgo peeling the skin so that you can grip the potato better, and run the julienne peeler across the length of the potato, rotating to use all sides. This might be tricky at first, since this peeler is usually used for shorter juliennes, like carrots in a soup. Dig deep and peel quickly, and you'll find this method to be fast and easy, too. Soak the fries in water while you work.
Rinse and dry the fries
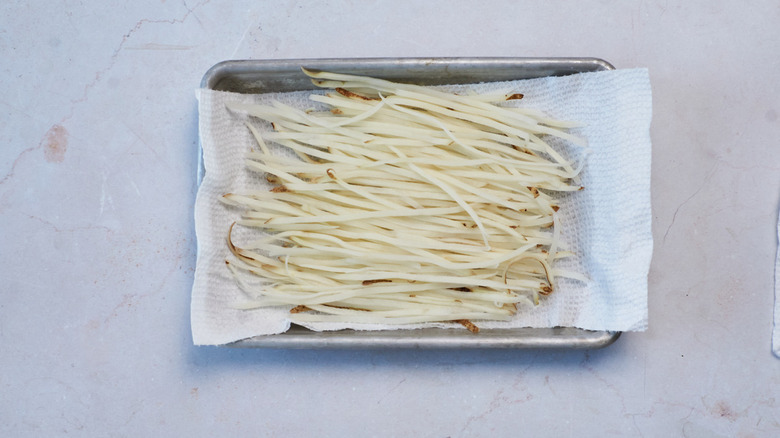
If you forgot to prepare a bowl of water while slicing the potatoes, you might have noticed the potatoes beginning to turn pink. Water will prevent oxygen from reaching the potato flesh, so it's important to soak them as soon as possible after cutting. If your potatoes are oxidizing quickly, don't worry; stick them in water anyways, and some of the pink will fade.
Once the potatoes are cut, start rinsing. By now, the water is likely cloudy with starch; drain it, then fill it up again, tossing the potato slices with your fingers until the water is again cloudy. Drain and repeat the process until the water runs clear. This will take quite a few rinses, so set aside 5 to 10 minutes for this step.
With the potatoes rinsed, spread them on a sheet tray and dry completely with paper towels. To dry them even further, put the sheet tray in the refrigerator while the oil heats up; this will remove any remaining moisture.
Cook the fries

French fries need to be deep fried because the strips are too thin to rotate in a shallow amount of oil; the potato would cook unevenly, leading to one soggy side and one crispy side. To deep fry, pour a quart of oil into a deep pot, like a Dutch oven, and heat to 400 F. Because we are putting the fries into the oil directly from the refrigerator, the oil needs to be very hot to accommodate the drop in temperature.
Drop a handful of fries into the hot oil — the fries should sizzle and cook right away. If they sink to the bottom, use tongs or a skimmer to stir them until they float in the oil to avoid sticking. From there, look for firm, hard fries. The color won't change drastically in the oil, so you'll need to use tongs to test the texture. Once the fries no longer bend, pull them out of the oil and drain on a paper-towel lined sheet (and if you do prefer a softer fry, take them out a little early).
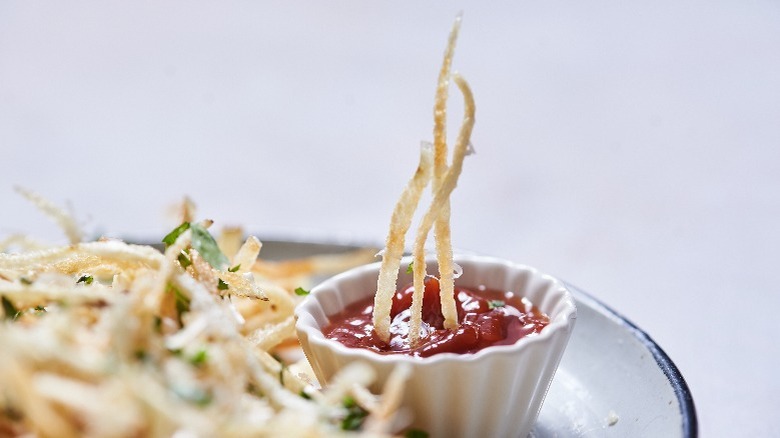
Toss in garlic butter and serve
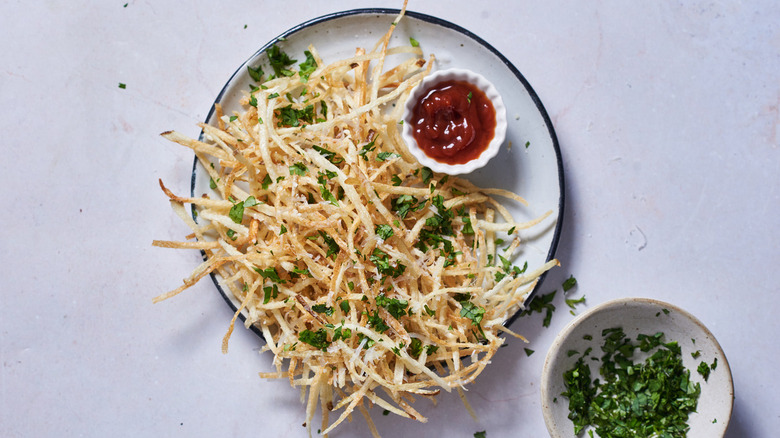
Whisk the melted butter and garlic together, then toss into the salted fries. Once cooled, toss with Parmesan then sprinkle with parsley. This type of fry pairs great with ketchup, but even better with aioli. For something a little different, try piling these fries on top of meatloaf or hamburger steaks for a new take on starchy carbs. Like most french fries, these don't save very well, and are best enjoyed fresh out of the fryer. If you have leftovers and can't bear to throw them away, try reheating them in an air fryer for 5 minutes, or throw them in a conventional oven for 10.
Shoestring Garlic Parmesan Fries Recipe
These shoestring garlic Parmesan fries are ultra-thin, crispy, and savory.
Ingredients
- 3 large, long russet potatoes
- canola oil, for frying
- 2 teaspoons Kosher salt
- 3 tablespoons melted butter
- 2 cloves garlic, grated or pressed
- ¼ cup finely grated Parmesan
- ¼ cup finely chopped parsley
Directions
- Prepare a large bowl with water. Julienne the potatoes, skin on, into ⅛-inch strips. To do this, use a mandoline with a julienne attachment, or slice the potatoes with a knife or standard mandoline into thin slabs and then julienne into strips. For very thin fries, you can also use a julienne peeler across the length of the potato. The slices should be the same width as a matchstick or a shoestring. For a thicker version, cut the potatoes into slices the width of a pencil.
- Place the sliced potatoes into the water. Once the water becomes cloudy, rinse the fries, shaking the slices to release the starches as you rinse. Repeat, covering the potatoes with water and rinsing until the water runs clear.
- Drain the potatoes and dry with a paper towel. Place on a paper-towel lined sheet tray and store in the refrigerator while preparing the oil to fry. If prepping ahead of time, store in the refrigerator for up to 6 hours. After this, the potatoes will start to shrink.
- Pour the oil into a deep pot or Dutch oven and heat to 400 F. Take the fries out of the refrigerator and pat dry again, then carefully add a handful to the oil using tongs or a skimmer. Do not crowd the pot.
- Fry the french fries until just beginning to brown; they will no longer be limp and will feel crispy to the touch. Remove from the oil and place on a paper-towel lined sheet tray or plate. Season immediately with a pinch of salt per batch.
- Once all fries are fried and crispy, mix the melted butter and garlic together in a small bowl. Pour over the fries and toss to coat. Sprinkle on the Parmesan and parsley flakes.
- Serve immediately.
Nutrition
| Calories per Serving | 528 |
| Total Fat | 41.2 g |
| Saturated Fat | 9.0 g |
| Trans Fat | 0.1 g |
| Cholesterol | 29.2 mg |
| Total Carbohydrates | 34.3 g |
| Dietary Fiber | 2.5 g |
| Total Sugars | 1.2 g |
| Sodium | 555.8 mg |
| Protein | 7.6 g |