15 Tips You Need To Make The Best Fudge
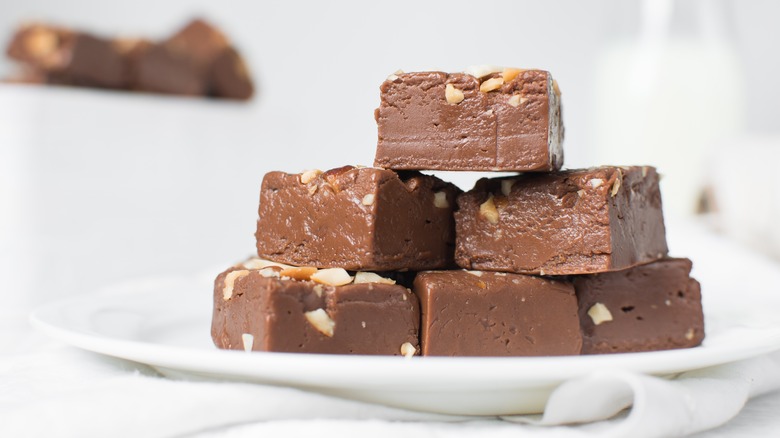
Fudge is a confectionary treat best enjoyed sliced with a white plastic knife on the way home from a tourist destination. And although many people can describe the decadent squares as the soft, creamy, marshmallow-like, and often chocolatey treat of their childhood, very few people can explain how it is made or what it actually is.
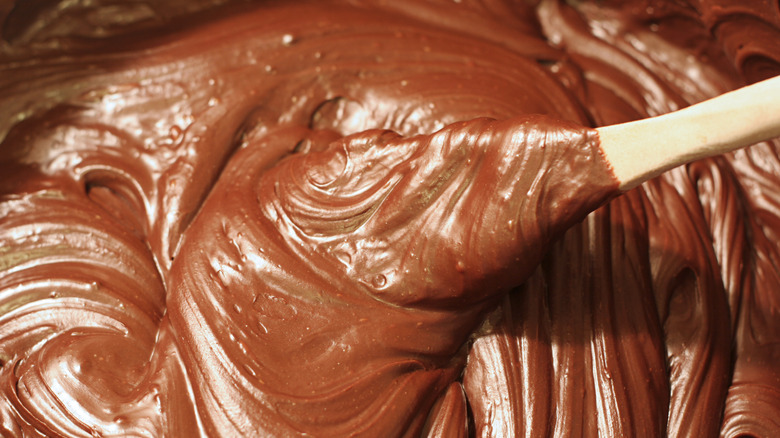
Fudge is a candy made by cooking chocolate, sugar, and milk. Like marshmallows, the sugar in fudge is boiled down to remove the water from the heat and whipped as it cools. The whipping motion causes sugar crystals to form (this gives the confection its unique soft texture) while the air causes those crystals to remain relatively small, preventing a chunky fudge. While you may think this process is best left to the pros, it is entirely possible to take on the take at home. Simply follow these tips and you'll be on your way to making your very own delicious (and stress-free) fudge.
Always use a thick pan

When it comes to making fudge, there are good pans, and there are bad pans. The size of the pot you use should correspond with the amount of fudge you're making. A lot of fudge in a little pot risks uneven cooking, while the opposite is much more likely to burn or overcook.
Your pot should be able to hold about four times the amount of fudge you plan to make; this will ensure you have enough room for stirring. Most regular fudge recipes can use a two to three-quart pan, while larger recipes should aim for a five-quart capacity. You should also look for a pan with a flat bottom and even sides to ensure that your fudge is evenly cooked. Even heating is crucial for getting an accurate temperature reading from your candy thermometer.
Although copper is more expensive than other types of pots, it has excellent conductivity and cools down quickly once the heat is removed which makes it ideal for making fudge. If you're looking for a pan on a budget, try to find a pot with a copper core rather than a 100% copper one. Aluminum is another great option because of its high conductivity, but it will be more challenging to clean than copper.
Be precise with your temperatures
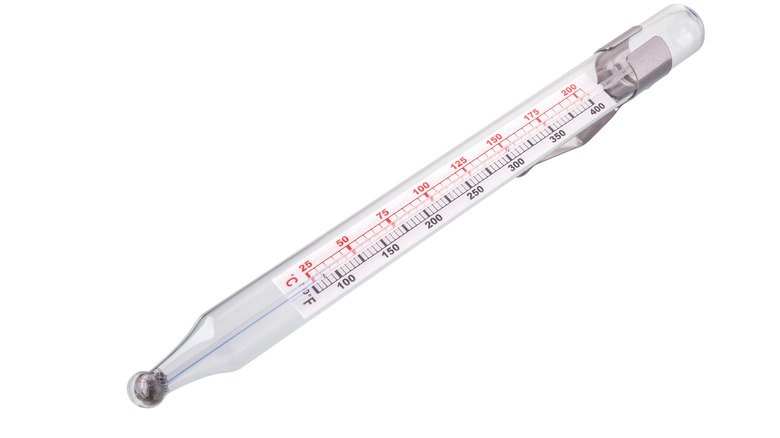
If your homemade fudge is a crumbly mess, it's a sure sign that you did something wrong. Poor texture or incorrect settings are most often associated with poor temperature management. To get the perfect fudge texture, you'll need to cook the sugar mixture past its boiling point, and you'll need to reach the proper temperature to solidify your fudge. If you cook the fudge at a low temperature or too long, it will not form a cohesive block and will instead come out crumbly. When in doubt, read the recipe for the exact amount of time and temperature to cook your fudge for — and resist all temptation to remove it from the heat prematurely.
For our easy fantasy fudge recipe, we recommend letting the mixture hit 234 degrees Fahrenheit to allow for proper crystallization. A candy thermometer is the best way to monitor this exact temperature.
Re-melt the fudge if you make a mistake

If your fudge falls short, don't panic. You can take some remedial action to fix grainy, poorly set, or hard fudge and ensure your recipe turns out just fine. Start by pouring your mixture into a flat-bottomed, heavy pan with a cup of water per 8-by-8-inch baking pan of fudge. Next, stir the fudge over low heat until it dissolves into a molten state.
Raise the heat to medium until the fudge starts to boil and reaches the soft ball stage (when it's dropped in water, it forms a soft ball) at 234 degrees Fahrenheit. Just be sure to stir the fudge while it's cooking to prevent crystallization. Once it has reached this point, remove the fudge from the heat and allow it to cool down. Then, complete the recipe by beating the fudge as directed. No one has to know that you had to make the recipe twice!
If you're a fudge novice, stick to a simple recipe
Fudge is one of the more difficult confections to make at home. If you're starting your fudge-making experience, we recommend starting with more simple recipes like fantasy fudge, which is made with evaporated milk, sugar, and butter, heated to the soft ball stage. Then after the mixture has boiled, immediately remove it from the heat and add marshmallow fluff and chocolate chips. Then, add walnuts, vanilla extract, and almond extract for a bit of sublime flavor and crunch. After you've added your flavoring agents, the fudge is set in the fridge, sliced, and ready for you to enjoy.
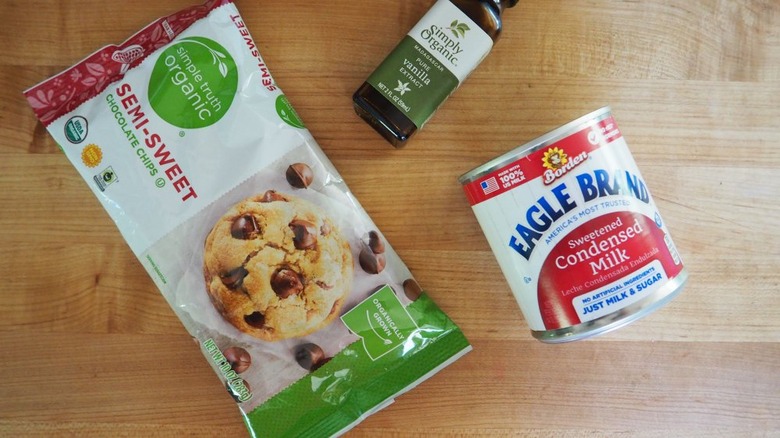
Other simple iterations of fudge include a 3-ingredient fudge recipe made with a base of sweetened condensed milk, vanilla extract, and chocolate chips. This recipe is simple enough to be made in a microwave and flavored with your favorite nut butter, crunchy cookies, or decadent chocolate.
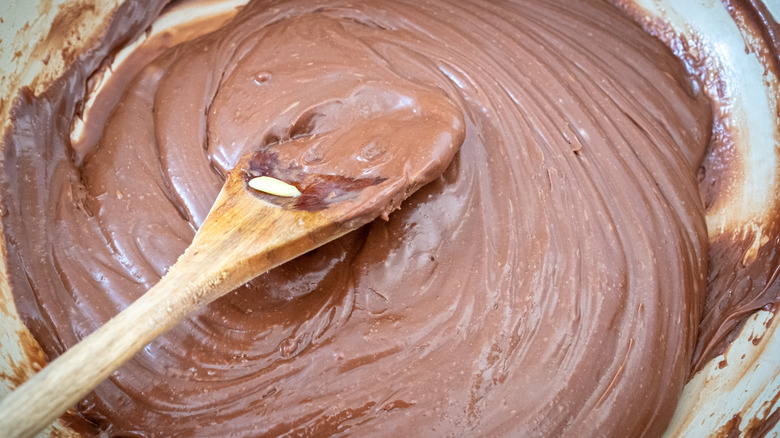
Once your mixture simmers, stop stirring

The "when" of stirring your fudge mixture is vital to ensure its perfect texture. You should mix the cream, butter, and sugar when making your fudge, but put down the spoon once it has reached its boiling point. Stirring while your sugar mixture is boiling will only form sugar crystals and make your fudge crunchy rather than silky smooth.
Since sugar will inevitably splash on the walls of your pot, keeping a pastry brush and water handy is one trick to keep it from crystallizing on the sides. Simply coat the sides of the pan with water before boiling to prevent the sugar from sticking. That way, you won't have to scrape the walls of your pan and risk introducing more sugar crystals. You should also avoid scraping the sides of your cooking vessel down after adding your fudge to the baking pan; this will prevent any grainy sugar residue from being added back into the fudge.
Only beat your fudge after it's cooled
One of the mistakes people make with fudge is beating it too prematurely or over-beating it. If you start mixing the fudge shortly after it has crystallized, you'll find that the texture is grainy rather than silky smooth. Fudge expert and founder of Lake Champlain Chocolates Jim Lampman notes that overcooking the fudge can worsen the crystallization, as well.
Once the fudge has come up to the soft ball stage, it must cool slightly to between 110 degrees Fahrenheit and 113 degrees Fahrenheit, or for about 15 minutes after removing it from the heat to solidify. Since the mixture will thicken as it cools, beating air into the mixture will prevent your fudge from becoming too dense. You should follow the designated timeline on the recipe once the 15-minute cooling time has passed. This will ensure that you aren't over-beating or under-beating your fudge. Your cue that the fudge is well-beaten is a surficial change from glossy to dull or matte, which can take up to 10 minutes.
Try making a no-cook fudge
If you want to get the same soft, melt-in-your-mouth fudge without worrying about soft ball stages and stirring, you can always try to find no-cook fudge recipes. These recipes are perfect for making with kids because you won't have to worry about hot surfaces and subsequent burn risks.
Begin making your no-cook "fudge" by combining powdered sugar, cream cheese, butter, and vanilla in a stand mixer, whipping on high for about a minute until all the ingredients are combined. Add cocoa powder and melted chocolate chips if you want to make chocolate fudge. Or, for a maple walnut fudge, add room-temperature maple syrup and chopped walnuts. Be sure to add any chunky ingredients, like nuts, chocolate chips, or dried fruit, until the end to ensure the texture of your fudge is creamy and homogenous all through. Refrigerate for at least half an hour before slicing and serving. This traditional "fudge" variation is both delicious and almost indistinguishable from the cooked variety.
Use a sturdy spoon or spatula to stir your fudge
There are a ton of different spatulas and spoons to choose from, but in this case, stick with trusty wood and sturdy silicon options. Flimsy spatulas won't be able to move the fudge effectively — and may even snap with enough weight.
But won't a wooden spoon taste like fudge until the end of time? This kitchen tool actually won't retain odors and tastes as you think it would, provided that is cleaned correctly. Stop worrying about cooking with a wooden spoon because there are many ways to clean and sanitize the stirrer to prevent bacteria or taste transfer from food to food. Wash the surface of these spoons with warm water and dish soap immediately after use to maintain their longevity. Keep in mind that you shouldn't put wooden utensils into the dishwasher because the high heat will cause the spoon to lose its natural oily coat. This protective layer is important because it allows food to slide off of it and prevents bacteria from seeping inside.
Keep a cup of water nearby to test for the soft ball stage
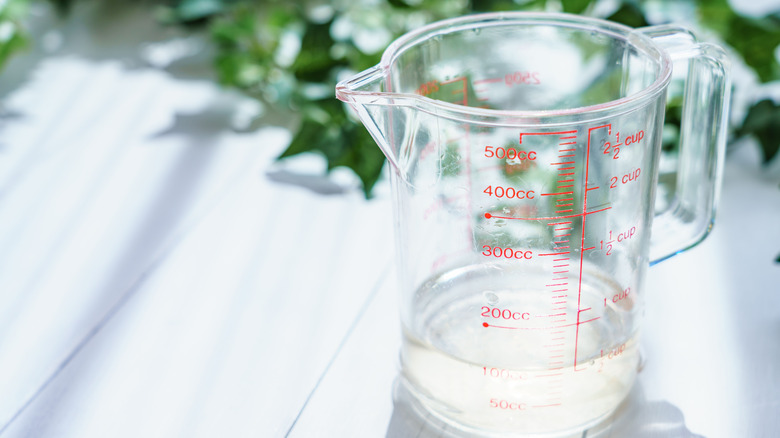
Kitchen thermometers aren't always the most accurate — which can come to the detriment of finicky recipes like fudge. There are only 3 degrees separating fudge that is undercooked and fudge that is overcooked. Therefore, you should always test your candy thermometer to ensure it's working before you start cooking. Bring at least 4 inches of water to a rolling boil on your stove to check the calibration. Then, place the thermometer into the water, careful not to touch the sides, and ensure that the thermometer reads 212 degrees Fahrenheit (the boiling point of water). Then, wait five minutes and check your thermometer to see if it reads the same temperature.
If you want to be sure your fudge is at the proper temperature, you can test it to see if it has reached the soft ball stage. Dribble a few droplets of the fudge mixture into a glass measuring cup filled with water. If the candy is ready, it should form a soft ball when dropped into water. When you remove it from the water, you should be able to crush it into a disc shape with your fingers.
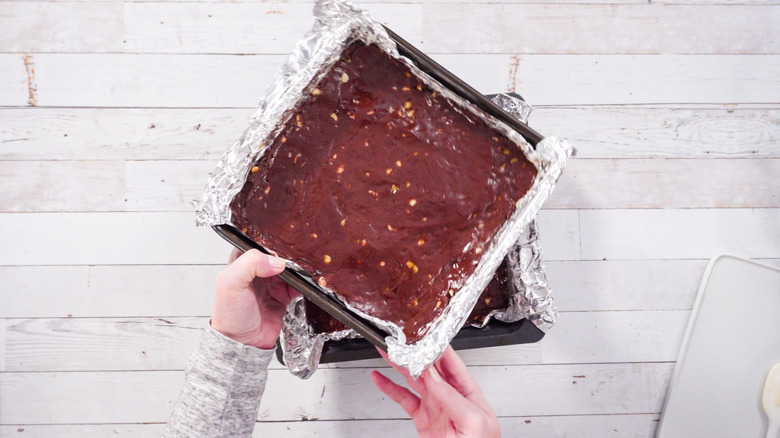
Always line your pan
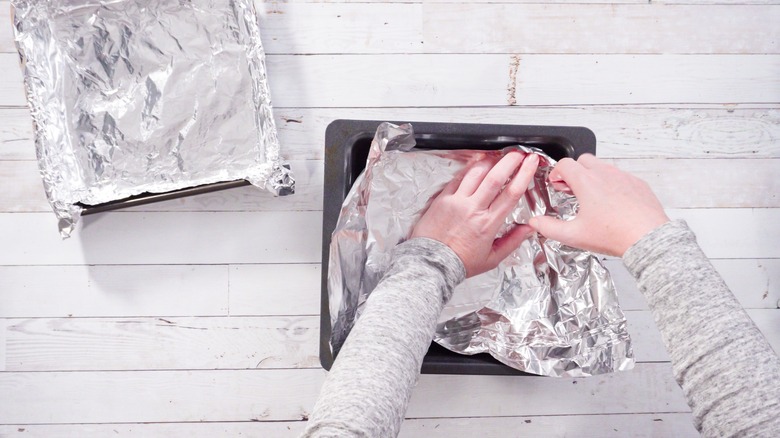
Dealing with fudge can put even the most experienced candy makers into a sticky situation. You should always line your pan with foil to pull it away from the fudge mixture once it's done setting. While you can grease your pan and go without the foil, you risk the fudge still sticking to the pan — and having to spend a ton of time cleaning the fudge flecks off. You can also use a silicon mat instead of foil, but you won't get the same crisp edges.
The most foolproof method is to use a combination of cooking spray and foil. To make the removal process more manageable, leave a couple of extra inches of foil on each side as "handles." When it comes time to remove the fudge, carry it with the handles, flip it over, and remove the foil.
The size of your pan is less critical when making fudge since you're just using the pan as a cooling vessel for the confection. However, Jim Lampman notes that a taller pan makes for thicker fudge and a better final product presentation. Some recipes will use glass pans or aluminum in sizes starting at 8-by-8 inches.
Get creative with your mix-ins
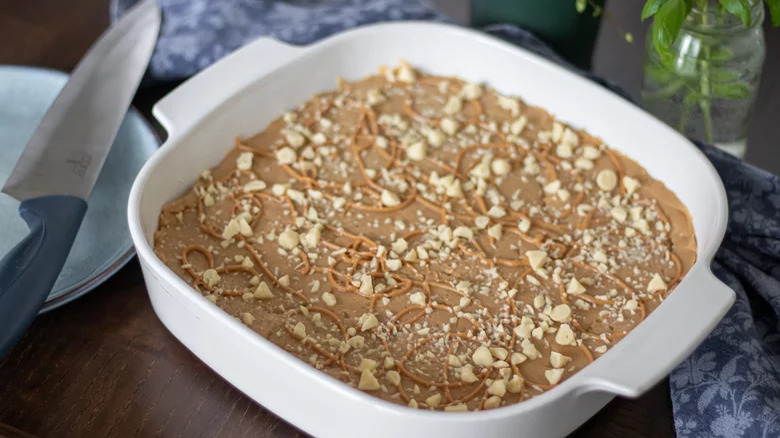
You'll want to add crunchy additions to your fudge after you've finished stirring it and a thin film has developed on top. Jim Lampman recommends that you should always mix the ingredients before the fudge has set, allowing the ingredients to stick into the fudge rather than fall out.
You can add many different flavoring options and ingredients to take your fudge to a new level. Lampman suggests using the highest quality ingredients to flavor your fudge, such as real maple syrup or natural peanut butter. One of our favorite combinations is old-fashioned peanut butter fudge and white chocolate chips; warm up the leftover peanut butter in your microwave and add a garnishing drizzle after your fudge has thoroughly cooled. We also love the textural element of adding chopped walnuts or pecans to fudge. Above all, Lampman recommends just being creative with your recipe.
Allow your fudge to harden at room temperature before slicing
After you've spent so much time on your fudge, you're probably super excited to eat it! But rushing the setting process will prevent fudge from coming out perfect every time. Many recipes require a setting time of around three hours, but if you have the patience to go more than that, we would recommend it. You'll know your fudge is set when it's firm to the touch and does not jiggle when you move the pan.
According to Jim Lampman, weather and humidity can also play a significant role in the cooking and setting process of fudge, so giving it more time to set means that your hard work won't go to waste. Hot and humid days require more time to set than if your kitchen is kept cold. Plus, adding certain mix-ins can also extend the time at your fudge takes to set.
One of the best methods to help speed up the rate that fudge takes to set is to increase its surface area. For example, using a muffin tin instead of a square baking pan can accelerate the setting process.
Use baking chocolate rather than chocolate chips
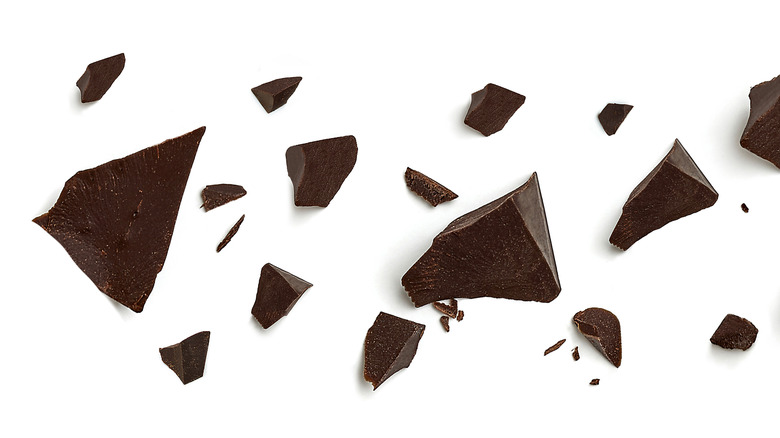
If you've wandered through the baking aisle at your grocery stores, you've probably seen tons of different kinds of chocolate available. So how do you pick the best one for baking — or making fudge? The fundamental difference between baking chocolate and regular chocolate is that baking chocolate is made with pure cacao and does not contain any added sweeteners or flavors. Cacao is bitter rather than sweet, so it will prevent you from making your homemade fudge too sweet when you mix the sugar or condensed milk with the dairy ingredients. Baking chocolate is also much more rich and flavorful than regular chocolate, which makes it perfect for fudge.
However, if you use chocolate chips instead of baking chocolate, you may find the chips more difficult to melt. This is because cocoa butter is the ingredient that causes the chips to melt; a lower ratio of cocoa butter means the chips will hold their shape. While this is ideal for chocolate chip cookies, it's not great for fudge.
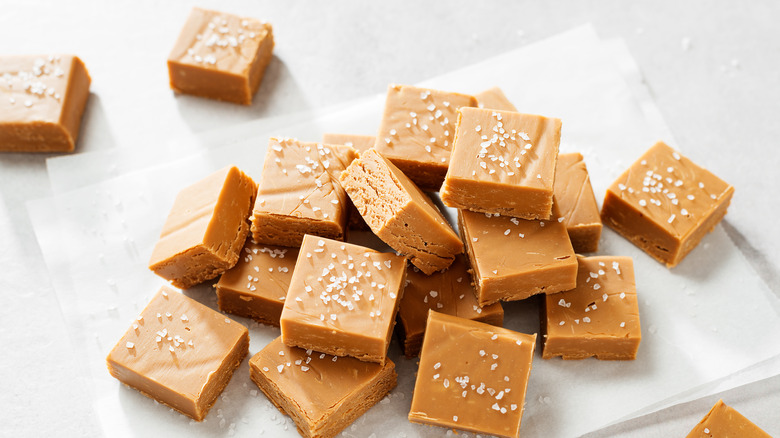
Score your fudge for even lines
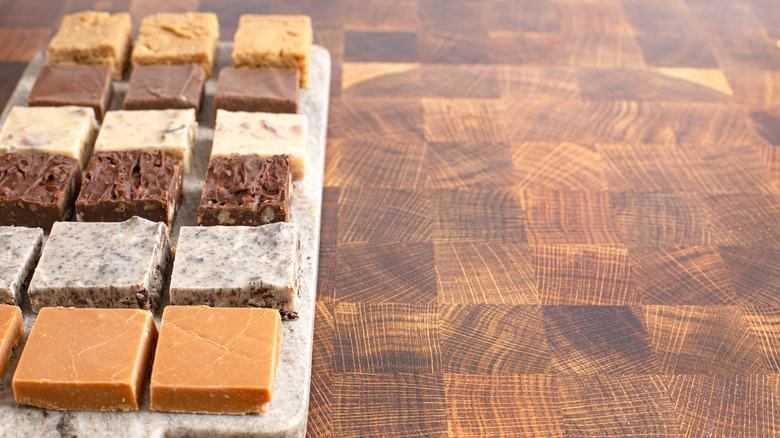
The most beautiful pieces of fudge are cut into perfectly even squares. With a couple of extra steps, you can have gift-able fudge too. While the fudge is still warm but still somewhat solid, score the fudge with a sharp knife by gently pressing into it. This step will make cutting the fudge easier after cooling it for at least three hours. Once the fudge is cool, flip it face-down onto a flat cutting board. Using a large, flat-edged knife, slice into the score mark. Wipe your knife between each slice for the cleanest slice possible.
If you're slicing into fudge with a chocolate layer on top, you'll need to take some extra steps to ensure clean cuts. Adding a little extra oil to your chocolate before pouring it onto your fudge will limit cracking and make it easier to slice. If you put your fudge in the fridge, let it sit on the counter for at least half an hour to warm up before cutting.
Store fudge on your counter or in the freezer
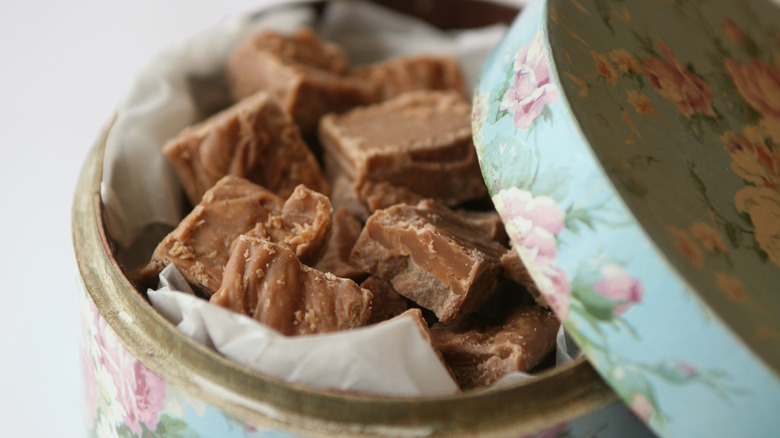
Once you've made your fudge, you will want to store it correctly so you can enjoy it for the longest time possible. The best way to keep fudge is in an airtight container at room temperature; you'll want to seal it up to prevent it from drying out and becoming crumbly.
Refrigerating fudge is not always a good option because the condensation changes can cause the fudge to dry out faster than if you left it on your countertop. Plus, improperly stored refrigerator fudge can end up tasting like everything else in your fridge — and we doubt you'd like the taste of Sunday night lasagna intermingling with chocolate. Fudge lasts up to four weeks on the counter but can still be safe for up to eight weeks. If you freeze the fudge in an air-tight container, it will last up to three months.
Static Media owns and operates Tasting Table and Mashed.