The Simple Trick For Perfectly Swirled Marbled Cakes
We may receive a commission on purchases made from links.
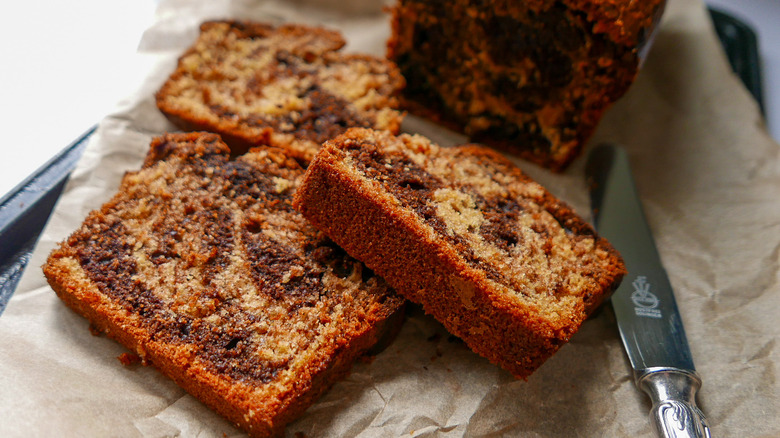
A marble cake features two distinct batters of contrasting colors and flavors that have been swirled together for a marbleized look. The swirls don't need to be in any particular pattern, but ideally, the colors should appear distinct from one another throughout. Otherwise, the finished product will appear not so much marbled as muddled. Likewise, the flavors are meant to remain discernible from one another. The contrasts offered by this cake design are an important part of its charm and can be seen as a metaphor for such romantic notions as opposites attracting or two hearts intertwined. In that sense, a perfectly swirled marble cake can make for as amorous a dessert as, say, these black and white chocolate-covered strawberries.
If you've ever tried making your own marble cake, then you may have had the experience, as many do, that things can veer rapidly from harmonious to chaotic as you mix together the batters. So, how does one go about achieving the perfect marble cake swirl? First things first, a well-marbled cake starts with properly setting up the batters in the pan — a simple task in and of itself. But once you've done that, proper execution all comes down to one almost ridiculously simple trick.
The perfect swirl comes down to exercising restraint
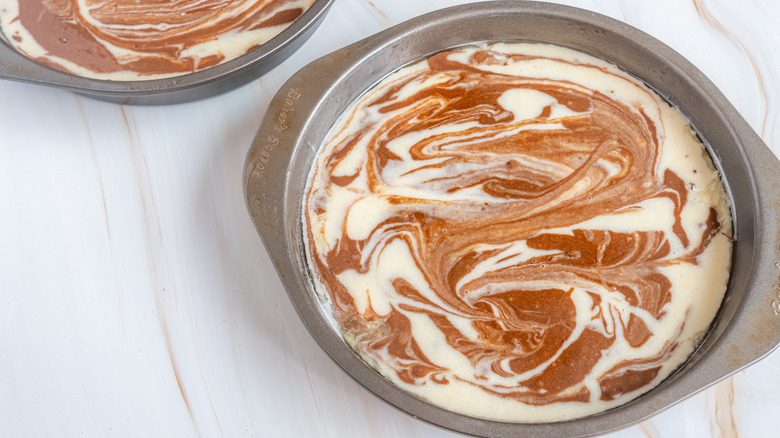
To set up the contrasting cake batters that complete an easy marble cake recipe, we're big fans of the checkerboard method. As demonstrated by Gold Medal Flour (via YouTube), use a clean ladle to deposit a large blob of one batter into one corner. Use another ladle to deposit a large blob of the other beside it. Alternate cake batter blobs to form a checkerboard pattern inside the pan, then repeat to form a second checkerboard layer on top. There's no need to worry about creating a perfect pattern; all that matters is that you're alternating those scoops.
Although that first part requires focus, it's only when taking knife to batter that the exercise of restraint truly comes into play. Start by inserting a butter knife almost to the bottom of the pan. Then smoothly drag the edge of the knife from one side of the pan to the other in a straight line. Without removing the knife, repeat this process two to three more times across the pan. Optionally, you could rotate the pan to repeat the line in the other direction. You may feel tempted to continue swirling (because it's fun!), but do try to resist the urge because the simple trick to a perfectly swirled marble cake is not giving in to that temptation! In fact, MasterClass strongly advises executing no more than three large swirls in total.