12 Tips You Need When Cooking With Butter
We think most will agree that when it comes to elevating flavor in foods, nothing beats butter. Its rich creaminess makes it the perfect enhancer for savory to sweet foods and everything in between. A study by Statista found that the average person in the U.S. consumed approximately 6 ½ pounds of butter between 2000 and 2021. That's a load of butter!
Butter works as a flavor chamber for cooking, providing a haven for taste until the first bite is taken. Along with boosting flavor, butter's texture is dynamic and can transform between three states — solid, velvety, and liquid. Each form has its own unique complementary qualities. From the common household kitchen to a fine dining restaurant, butter is an essential staple.
Whether adding roundness to recipes or as a sauce for savory meats, there are many applications. To help your culinary excursions, we've compiled some necessary tips to keep in mind when cooking with butter.
Use the right butter for the recipe
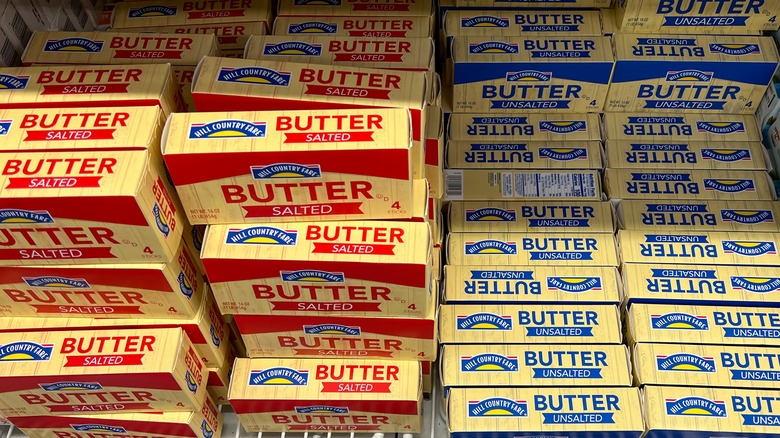
While it's generally accepted that everything is better with butter, using the wrong type can have undesirable results. Some foods have high salt content, whereas others could be improved by adding salt. Fortunately, there is a selection of butter types that work well for any situation.
As the names suggest, salted and unsalted butters are similar, though not precisely the same. Each has recommended uses to achieve the best end result. According to Land O Lakes, while salted butter is generally all-purpose, unsalted butter is suggested if you're looking for more control over the salt content in a recipe. For example, salted butter adds a dreamy melt over veggies and pasta, giving your meal a fuller taste. Unsalted butter is pure cream and best for supporting natural flavors. That's why unsalted butter should almost always be used for baking.
Another type is clarified butter. Unlike salted and unsalted, the clarifying process lets us access pure butter fat by separating it from the water and milk solids. It has a pleasantly intense and delicious aroma. Professional chefs commonly use it to pan-fry, roast, and sear foods because it can be cooked at higher temperatures without burning.
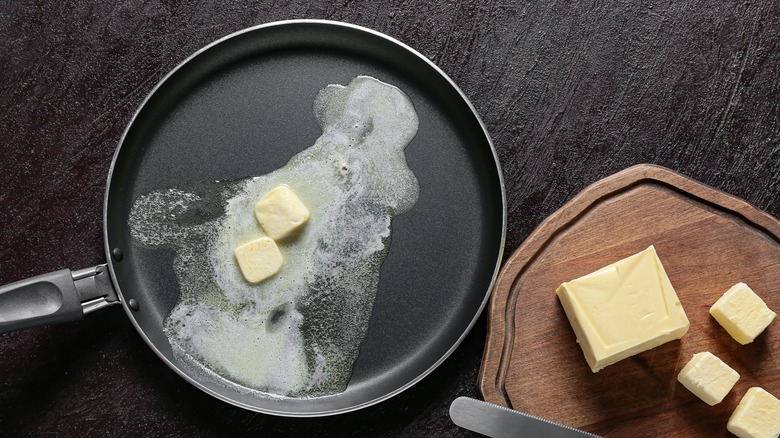
Watch the heat when cooking with butter
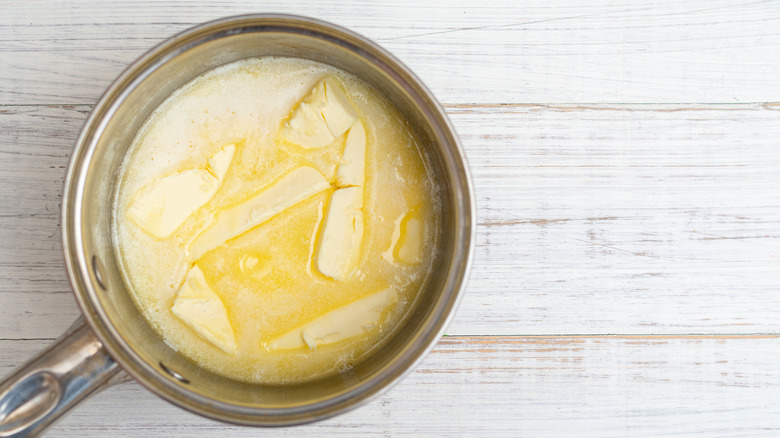
As a saturated fat, cooking it at high temperatures is one of the biggest mistakes you can make with butter. Unlike high smoke points found in oils like avocado, peanut, canola, sunflower, and sesame, butter has a low smoke point of 302 F, meaning low heat is best. An exception is clarified butter, which has a smoke point of about 450 F (via MasterClass).
To cut down on dishes, celebrity chef Alton Brown has a great butter-melting tip. For recipes that call for small batches of melted butter, use a metal measuring cup, and place it directly on the stovetop. This quick method allows the butter to be measured and melted in one fell swoop. It's sure to come in handy next time you're pan-searing, sautéing, or baking cookies.
For larger batches, a microwave is a quick and easy solution. Since it separates as it's heated, adjust your microwave's power setting to low heat and work in intervals to prevent butter from exploding. Start with a microwaveable bowl and a sheet of wax paper for coverage. For one stick of butter, 30 seconds or two 15-second intervals should do the trick. Naturally, you'll need to increase the time depending on the amount of butter you're melting. As you increase the time, it's still important to be mindful of the intervals you choose to microwave within.
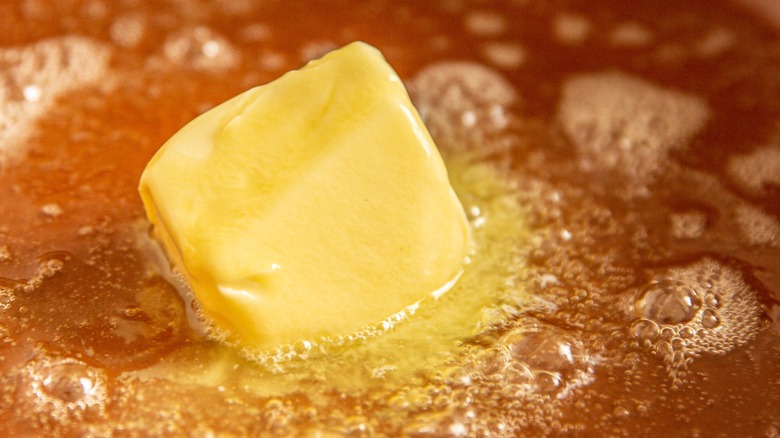
Learn how to brown butter and caramelize foods
Brown butter, or as the French say, beurre noisette (hazelnut butter), is when you heat butter on a stovetop, changing its color and giving it a nutty flavor. In the world of cooking, it's called the Maillard (or browning) reaction. Richer and more complex, browning elevates butter's mouthwatering taste to new heights.
It requires a watchful eye to successfully make brown butter because it's easy to overcook. To start, melt butter using a light-colored pan, swirling it now and again for evenness. Once you see brown specks, you'll know the butter has begun toasting. Move the butter from the heat to a bowl after the brown sprinkles turn darker and you smell a toasted nutty aroma. It sounds simple enough, but it may take a few tries to get right.
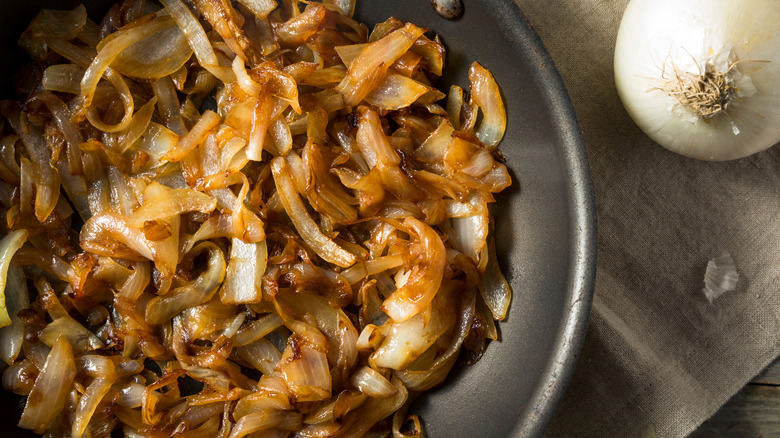
Another awesomely tasty use of butter is caramelizing. It's a cooking process that decomposes sugars in foods which gives them a caramel color (via Science Direct). While results are similar in color, caramelizing is a distinct process from the aforementioned Maillard reaction. It carries a slightly sweet and nutty taste that's great for onions and veggies, as well as marinades and glazes for meats. High and dry heat at temperatures between 320 F and 400 F is the recommended way to caramelization gold.
Mix butter and oil to increase the heat
As previously mentioned, butter has a low smoke point. Yet, through the wizardry of food science, mixing butter and oil in your cauldron allows it to be cooked at a higher temperature. According to WebMD, many oils contain healthy fats and are neutral-flavored, providing a blank canvas for butter to paint. When mixed together, you can retain the butter's rich flavor while increasing the heat.
This wonderful pairing works with any combination of butter and oil types; it really depends on what you're going for. If you prefer neutral-flavored oils that won't overwhelm recipes, canola and vegetable oil are common go-to's. With a respective range between 400 F and 460 F, they both have comparable smoke points, making them suitable for most recipes.
Have a fondness for more complex flavors? Olive oil is considered one of the best and healthiest options around. From light tasting to extra-virgin, which has a noticeably pronounced olive flavor, you can enjoy an array of different types of olive oil suited to your preference and needs. The smoke point varies, as light olive oil has the highest at 465 F, while extra-virgin smokes at a lower 350 F. Beyond olive, there are many other naturally flavored cooking oils like coconut, sesame, and walnut.
Keep things interesting with compound butters
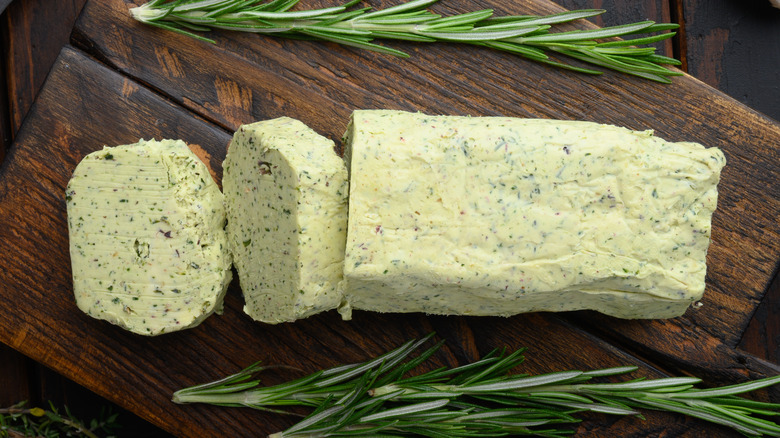
Breathe new life into your butter by mixing it with other ingredients. From classics like Maître d'hotel butter flavored with thyme and lemon juice to homemade spring herb compound butter, the fusion possibilities are endless. Creamy and aromatic, a couple of slices mixed into freshly cooked pasta or a sautéed hodgepodge adds the flavor bomb your tongue is looking for.
Besides offering a custom creamy experience, compound butter can be refrigerated for several days or stored in your freezer for months using plastic wrap or plastic freezer bags. The best part is that making it is easy. You simply place butter in a mixing bowl for 30 minutes to an hour until it reaches room temperature, then evenly mix in the flavorful ingredients of your choice. As suggested for storage, wrap your compound creation in parchment paper, and voilà! It's ready to shake up your next recipe.
Interested in more compound butter combinations? Try kalbi-flavored Korean bbq butter; it has a fragrant mixture of soy sauce, garlic, and scallions, along with a kick of chili flakes. You can also add a boozy twist to your butte for steaks. Another must-try that's sure to add a taste of country twang to your steak is cowboy butter. It's melted butter whisked together with paprika, cayenne, lemon zest and juice, Dijon mustard, garlic, parsley, chili flake, thyme, chives, salt, and pepper.
Spruce up your soup with butter
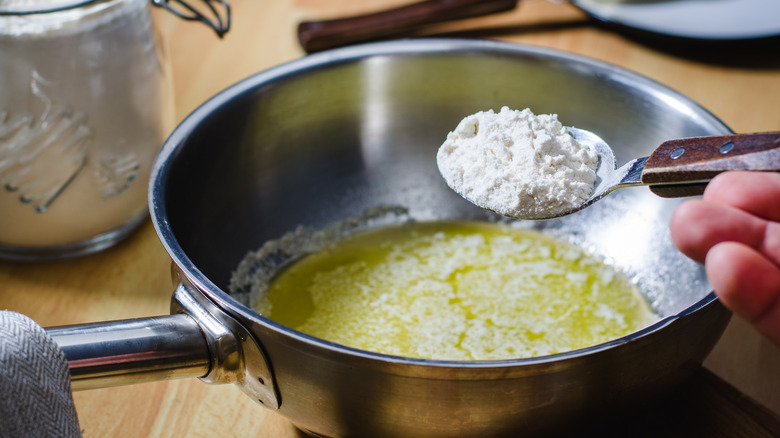
Few foods cozy you up on a chilly day like soup. Deliciously versatile, soups can be enjoyed light or hearty. Whichever your preference, the best recipes pack a full-bodied flavor that's equally sumptuous and soothing. A common mistake everyone makes with soup is failing to thicken it properly. Fortunately, a roux can save the day when you're stuck in the thick of it.
There are four types of roux: white, blond, brown, and dark brown. Before making a roux, it's important to know which style your recipe requires. For soups, white and blond roux are most commonly used to thicken them due to their sturdy consistency. Perfect for a classic potato or cream of mushroom soup, white roux only takes two to four minutes to cook. Using a saucepan, you first melt your butter over medium heat, then add flour, whisking until the mixture achieves a lump-free paste-like consistency and the color you want.
Blond roux, otherwise known as yellow or golden roux, takes a tad longer to cook, at five to seven minutes. Cook until the color of your roux becomes a light golden brown and emits a nutty aroma. It's typically used to spruce up chicken stock.
Enrich your sauces with butter
Chef restauranteur Geoffrey Zakarian once revealed that French salted butter was the secret ingredient he used in sauces, saying it adds depth of flavor. Interestingly, it can be traced back to a French technique called monter au beurre, or mounting with butter. It's a method that allows the butter to soften while emulsifying, or binding, the two liquids. To unlock the buttery secret to making incredible sauces, you whisk one or two cold wedges into a warm sauce after it's cooked, giving it texture and an improved mouth feel. Between prep and cooking time, it should take about 10 minutes.
A similarly worded yet distinct method is beurre monté, which involves heating butter in water to stabilize its natural emulsion. It's a great addition to other sauces or a poaching liquid for vegetables and seafood. According to MasterClass, you first bring four tablespoons of water to a boil, then reduce the heat and whisk the butter in one tablespoon at a time. After the sauce emulsifies, increase the butter in intervals of two to four tablespoons, continuing to whisk. Make sure to keep the temperature below 180 F.
The difference between the two cooked butters? Simply put, the beurre monté method uses precooked butter as a separate yet complementary addition, while monter au beurre uses cold butter as a finishing enhancer.
Baste meat and seafood with butter
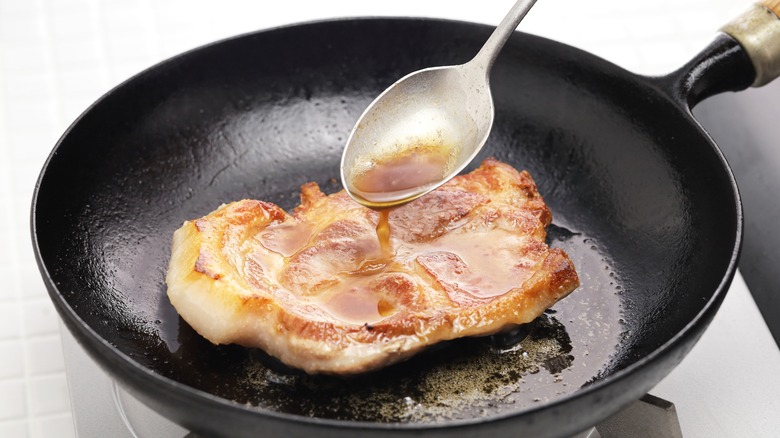
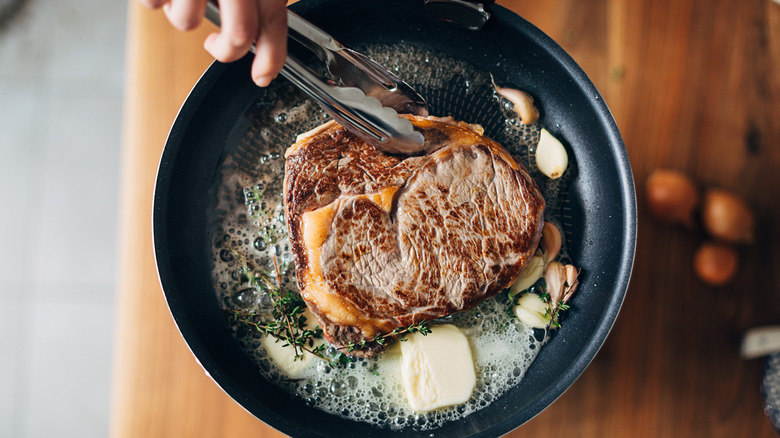
There's something irresistible about a perfectly seared, butter-basted pork chop. When done right, using juices from the pan creates a flavorful crunch-worthy exterior. The satisfying crisp from basting with butter can also be applied to steak, chicken, fish fillets, and more.
To make stovetop pork chops, look no further than butter basting. There are four essential things to remember: thickness, the right pan, oil before butter, and a pink center. To avoid dryness, the cut should be at least one inch. A 12-inch cast-iron pan is considered the best tool for cooking, starting with oil to sear. After searing, add butter, along with your choice of seasoning. As the butter begins to brown, douse the chop in its liquids while flipping frequently.
This butter-basted rosemary steak recipe suggests using butter in two ways. First, add it to a hot cast-iron pan with garlic and rosemary, allowing the flavors to cook into the meat. Then, once you finish searing the steak, let it rest for at least five minutes before topping it with leftover juices and butter from the pan. It gives steak just the right amount of a chip-like moistness. The process is similar for fish: rather than flipping, you want to deliver baste-y tastiness strictly to the skin side of the fillet. The aim is crispy skin with juicy and tender flesh.
Butter your veggies to absorb more nutrients
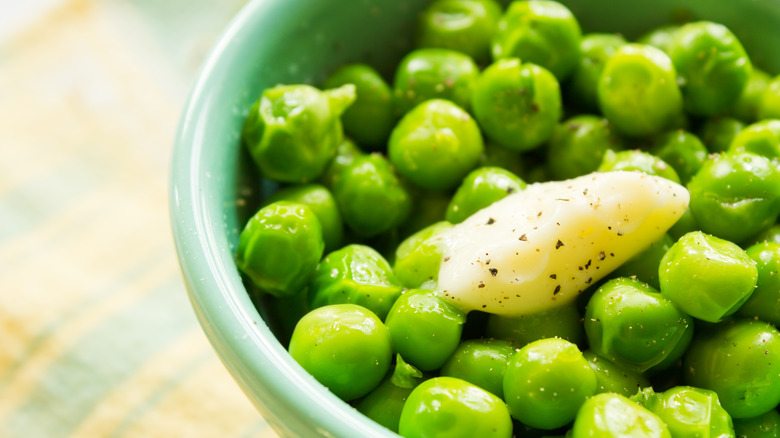
Vegetables pack a ton of necessary nutrients composed of fat-soluble vitamins (A, D, E, and K), minerals (calcium, potassium, and zinc), and carotenoids (responsible for pigments in fruits and vegetables that convert to Vitamin A). The tricky part about eating vegetables is that our bodies often need help to absorb their benefits. A surprising nutrient booster, and a great tip for cooking veggies, is to add fat.
Health experts have found that adding fat, even saturated fat, helps with the absorption process of fat-soluble vitamins (via the National Health Service). While it's generally recommended to replace saturated fats with unsaturated options, butter happens to be one of the most flavorful ways of absorbing more nutrients from your veggies. As with everything, moderation is key. This isn't a license to drench your veggies with butter, but rather, a polite nudge to keep it in mind next time you savor a sauté.
Learn how to make homemade clarified butter
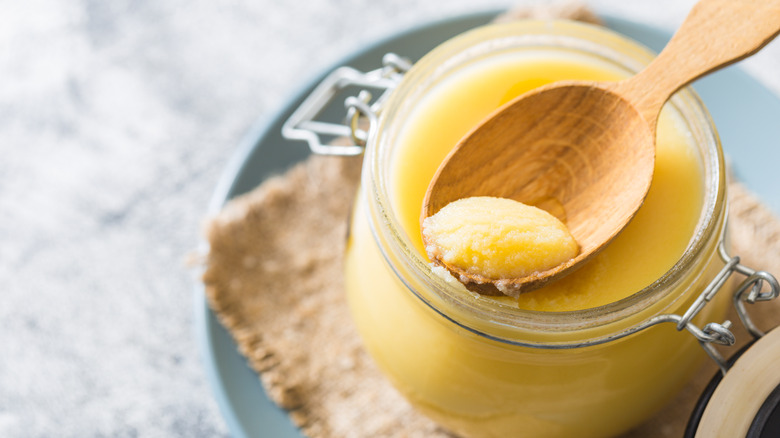
Clarified butter is your ticket to high-heat recipes, seafood dips, and a base for sauces. Learning how to make it at home will elevate your cooking and save you some money. While most conventional recipes involve boiling butter in a saucepan, Ina Garten shares a simple method for clarifying butter that only requires a bit of your time.
To skip the line and secure a seat on the clarified roller coaster, butter can be melted in a glass measuring cup and placed in the microwave for 30 seconds. The heat will quickly separate the milk solids, letting them gather at the bottom of the measuring cup. Next, you can easily access the pure fat liquid sans the remaining milk solids with a steady pour. When making small batches of clarified butter, Garten's method works well, unlike the conventional way, which presents a risk of burning, boiling over, and taking longer.
To clarify butter for larger batches, start by using at least two sticks of good-quality unsalted butter. It can be cooked to a boil over medium heat in a saucepan or, similar to Garten's approach, in a microwave on high for two minutes. Next, take a metal spoon and skim off the upper layer of foam until only warm butter remains. To filter out any foamy remnants, you'll need to pour the contents into a cheesecloth-lined strainer. Your liquid gold treasure can be stored in the fridge for four to six months.
Bathe your steak in clarified butter
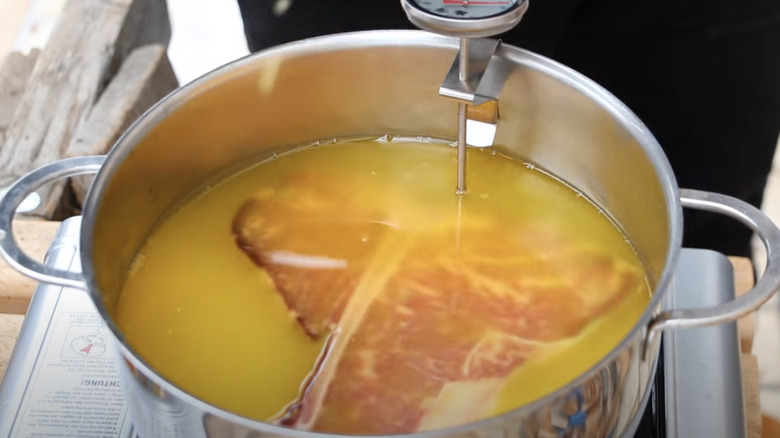
If you're looking for show-stopping deliciousness, take your steak up a notch with a melted butter bath. In addition to increased tenderness and taste, this cooking method also leaves room for creative flavor infusions like garlic and rosemary, or your seasoning of choice, all of which get absorbed to drool-worthy results. Naturally, to whom much flavor is given, much is required, as the recipe calls for two pounds of butter and two hours of cook-time.
Celebrity chef and steak expert Tyler Florence employs another unique approach to steak. After his steak finishes cooking, he lets it rest for a few minutes, as is recommended for even redistribution of juices. His approach is a bit unconventional because Florence rests his steaks in baths of clarified butter for extra flavor. He considers the twist a more productive resting place and also the perfect time to introduce butter to steak as it reabsorbs moisture, making it extra juicy.
Bake better eggs with butter
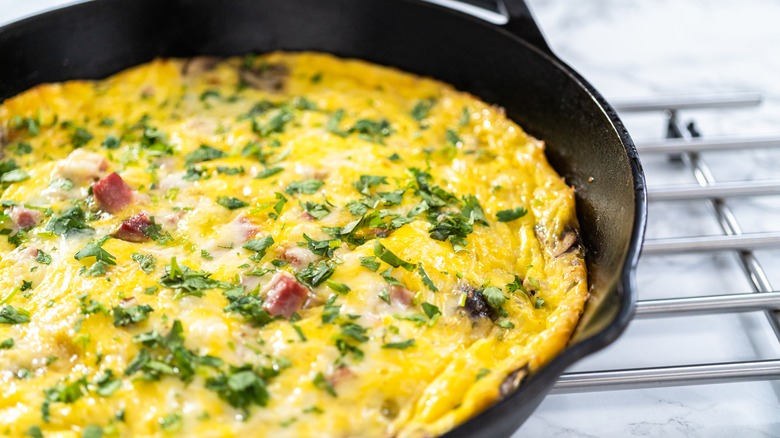
Save your next batch of eggs for the oven. This butter tip for baked eggs from Molly Yeh, cookbook author and host of Food Network's "Girl Meets Farm," is sure to become a breakfast favorite. Not only is it a nifty way to make use of leftover herbs in a pan, but it's also quick, easy, and creates a toasted-crunchy bite.
To begin, whisk together an egg mixture of whole milk, all-purpose flour, and your choice of herbs. The flour helps preserve moisture in the eggs as they're baked, and the milk provides additional fluffiness. Next, remove the baking pan from the oven after it's been preheated to 425 F. Add butter to the pan and let it melt, moving it around until it covers the bottom and sides. Finally, pour the egg mixture in, allowing it to cook for about 30 minutes to a puffed brownness (via The Washington Post).
Likening the dish to a souffle, Yeh considers it more casual and perfect for a Sunday brunch. When eggs are cooked with butter, it prevents the usual rubbery texture, and they become a creamy comfort.