15 Tips You Need When Cooking With Eggs
We may receive a commission on purchases made from links.
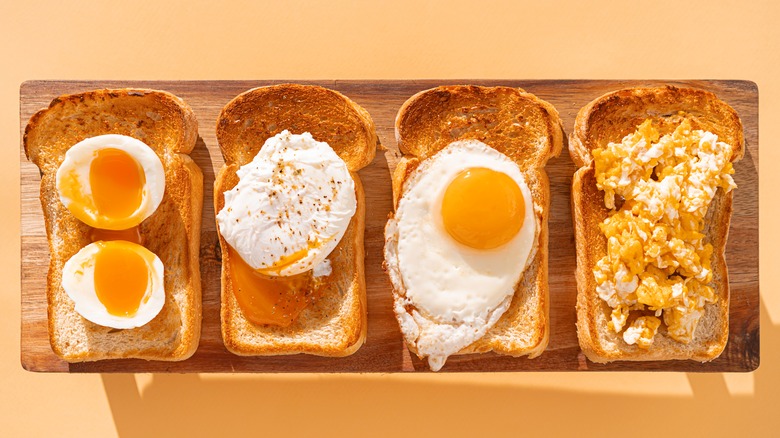
We can assure you that there are no wrong ways to eat eggs, whether you like them poached, sunny-side-up, fried, or scrambled. But there are wrong ways to cook your eggs.
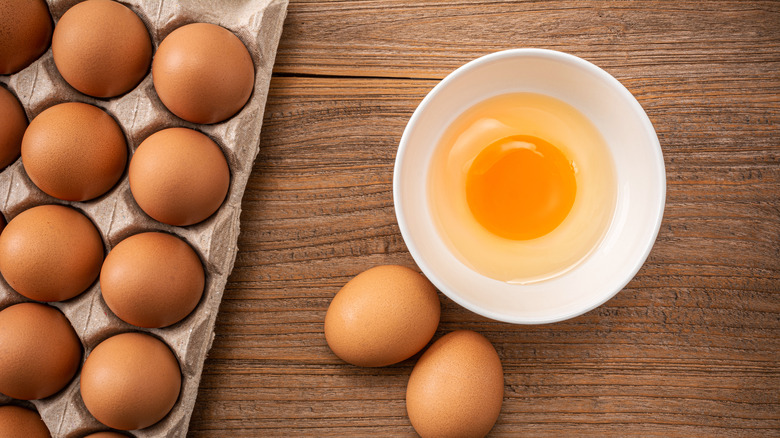
If you're not already eating eggs, you're missing out. These bundles of complete protein and fat contain vitamins A, D, and B12. Data from the Mayo Clinic notes that an individual can safely eat between six and seven eggs a week without significant health consequences. Plus, you can rest assured that eggs do not contain any antibiotics or hormones (via the Egg Safety Center). Besides eating a plain plate of eggs — because nothing beats the simple stuff — you can prepare eggs alongside various proteins, vegetables, or starches. Fire-roasted shakshuka, for example, pairs the richness of eggs with fire-roasted tomatoes, onions, garlic, and herbs. Egg in a basket is a nostalgic childhood breakfast featuring a self-contained egg within a piece of sliced bread.
Here are some tips for making the most delicious eggs out there — no matter how you like your eggs cooked.
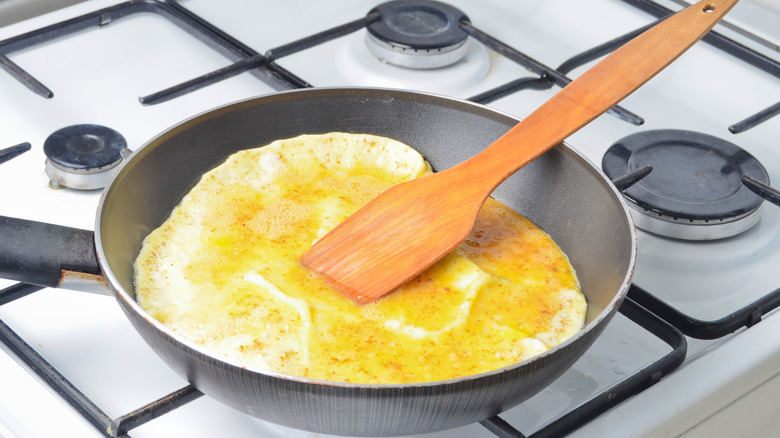
Use water to see if your stainless steel pan is hot enough
Rushing to make fried eggs for breakfast? We've got the perfect simple hack to make the cooking process even easier. This trick, shared on TikTok by Misen Kitchen, uses water to test the pan's heat. Heat your stainless steel pan over medium heat for about 90 seconds before spooning a few tablespoons of water into the pan. If the water does nothing or just fizzles, it means your pan is not hot enough to prevent the eggs from sticking. If the water moves in one bubble around the pan, your pan is optimally heated for cooking. But beware — too many bubbles springing around and "dancing" on the stainless steel surface indicates your pan is too hot and needs to be cooled off before adding your eggs in.
Not only does this trick make your eggs much fluffier, but it also makes cleanup much easier — because who has the time to deal with chunks of egg whites on the bottom of a pan?
Use a sufficient amount of fat to prevent sticking
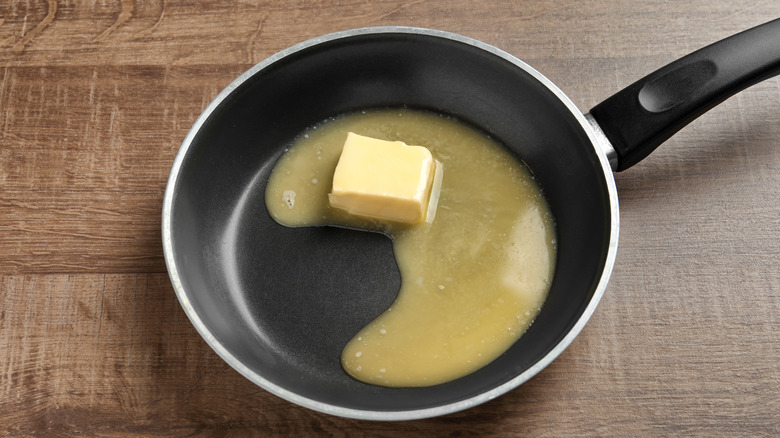
Fat and eggs are best friends when it comes to cooking. The type of fat you use is really up to your tastebuds. A light vegetable oil, per Help With Cooking, does not disrupt the flavor of the egg and will not result in bitter notes if heated to a high temperature. Olive and avocado oil are also popular for cooking eggs because the flavor is slightly, but not overpoweringly, nutty. But the favorite? It's a slab of good butter. You'll need to allocate time for the butter to melt before adding the egg if this is your fat of choice. Be sure to add roughly 1 tablespoon of fat per egg you plan to cook.
If you use a non-stick pan to cook your eggs, you will not need to add as much fat because of the protective coating already on the pan. Non-stick pans typically lend easier to cleaning as well, because the egg just slides right out of the pan.
Allow hard-boiled eggs to cool before removing shells

If you hard-boil eggs in water and try to peel the shells off right afterward, you will find that your efforts will be in vain. Chunks of the egg will come off and you'll find that your fingers just can't get at all the pieces of eggshell that you need to.
Giving your hard-boiled eggs ample time to cool first is the first step towards easy peeling. After your eggs are done, we recommend adding the eggs directly to an ice bath to stop the eggs from cooking further and speed up the cooling process. You'll need to leave the eggs in an ice water bath for about 15 minutes before peeling them or placing them in the refrigerator. When you're ready to peel your hard-boiled eggs, start at the top of the egg where the air pocket is. We should also note that older eggs are usually easier to peel because the yolk and whites are firmer, so save those farm-fresh eggs for scrambles or frying.
Whisk and season your scrambled eggs prior to adding to the pan
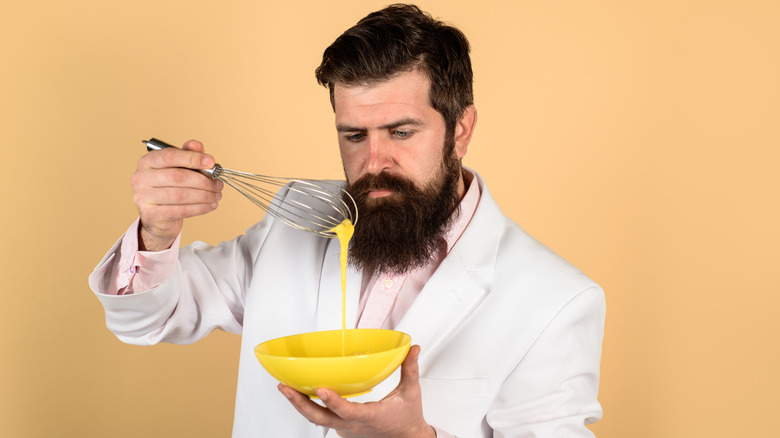
Whisking eggs prior to cooking is a critical step in breaking apart the proteins. If you add eggs directly to the heat and scramble them in the pan, you will find the eggs rubbery. Whisking your eggs with a fork rather than a balloon whisk (which can beat too much air) traps air inside of the eggs and results in a fluffy, soft scramble. Even whisking for 15 seconds can make the difference between sub-par scrambled eggs and eggcellent ones.
Whisking your eggs also allows time to add your seasonings into the mix. After all, nobody wants a chunk of peppercorns or a ball of garlic powder to appear on a plate. The ideal time to add salt to your scrambled eggs is about 15 minutes before you're going to cook them. This window of time might not be convenient, but it's key to softening and flavoring the eggs.
Crack eggs on a flat surface and into a separate bowl
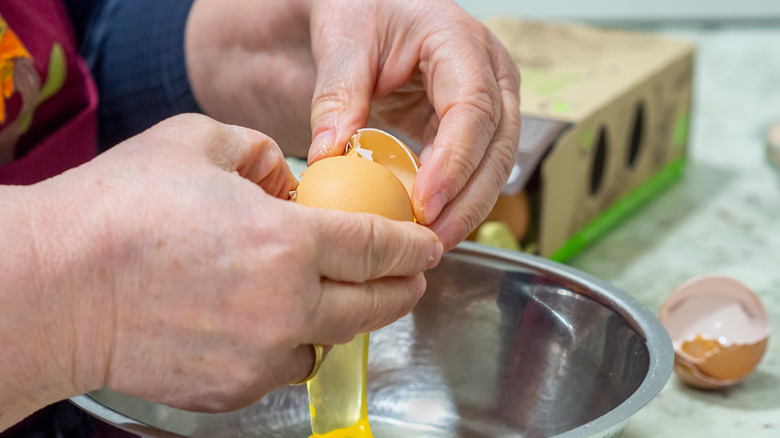
If you watched your parents cracking eggs as a child, you probably saw a lot of cracking on the edge of a mixing bowl or pan. Although this strategy for cracking eggs may have been ingrained in time, it is not the most effective way to crack an egg. If you crack an egg on a flat surface like a countertop, the membrane will hold together, meaning when you crack the egg, pesky shell pieces that would otherwise drift off into your bowl will remain attached to the shell.
To further increase the efficacy of your egg-cracking, always crack eggs into a separate bowl rather than whatever pan you're planning to cook the eggs in. If an eggshell drops into the bowl, it will be easier to see and extract. From a food safety perspective, cracking eggs on a separate surface also prevents the transfer of salmonella, foodborne illness that lives on the exterior of eggshells.
Wet your fingers to remove pesky egg shells
Accidentally dropping an eggshell piece into your bowl isn't uncommon. If you reach into the bowl unprepared, you may find your fingers are like an arcade claw machine: chasing something without actually grabbing it. The simple hack to remove eggshells from a bowl is dipping your fingers in water before dunking them in. Without added moisture, the egg whites will stick to the dry surface of your fingers and prevent you from grabbing the eggshell piece. The watery film on your fingers after dunking prevents the egg whites from sticking.
Another method that has been tried (but is not as successful) is using another piece of eggshell to rescue the rogue piece. The risk of that, though, is having the eggshell splinter or having your fingers accidentally drop the eggshell into the bowl. We recommend avoiding this sticky situation and staying with the wet finger technique.
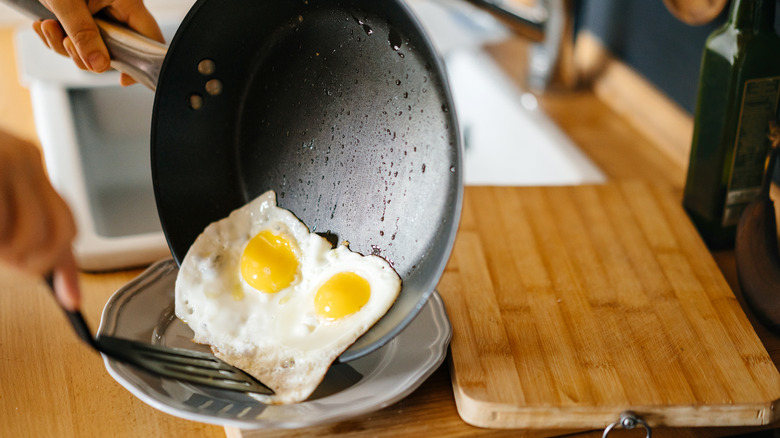
Use a fish spatula to scoop underneath fried eggs
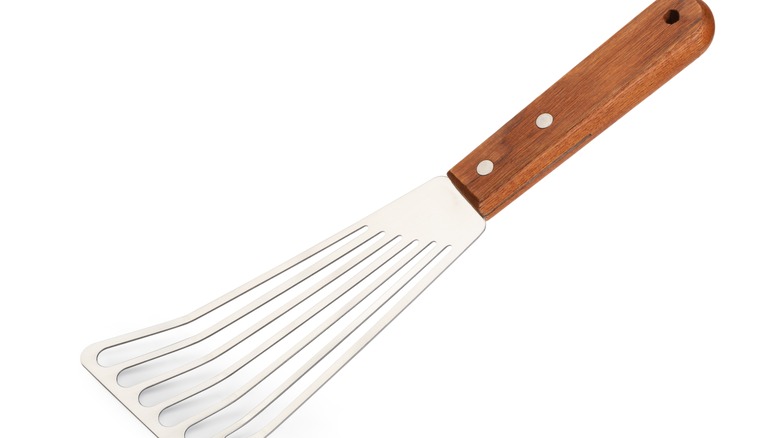
Fish spatulas might just be one of the most underrated kitchen tools you can own. Ted Allen, host of Food Network's "Chopped," recommends always having a fish spatula handy. The thinness of this spatula allows it to easily pass underneath fish fillets, scoop out lasagna from a dish, and, for our purposes, delicately remove fried eggs from a pan without puncturing the yolk.
We recommend using a fish spatula rather than a plain-old plastic or metal spatula because the shape and the curvature make it much easier to maneuver in a small pan. You can purchase fish spatulas with wooden, plastic, or metal handles for less than $20 on Amazon. To clean your fish spatula, you can either hand-wash it (which is preferable for those with wooden handles, per Dalstrong) or place the spatula in your dishwasher for quick cleaning and efficient sanitizing.
Remove eggs from heat after cooking
We already know that leaving poached eggs in the shell for too long after cooking can cause the eggs inside to overcook. But what about scrambled eggs?
Metal pans are naturally highly-conductive, so leaving your eggs in the pan for too long after you shut the heat off the stovetop may render your eggs overcooked and rubbery. According to the American Egg Board, you'll know your scrambled eggs are finished cooking when there are no visible liquid whites and the egg appears firm. After you notice these indicators, you should immediately move your eggs from the pan to a separate bowl. For fried eggs, the American Egg Board recommends following similar indicators. The whites in the egg should be set while the yolks are thickened, but not hard. These indicators are more reliable than temperature or time because the material of the pan can impact how long to cook the eggs.
Constant movement is your best friend when making scrambled eggs
If you're cooking scrambled eggs, you might be faced with the question of when to start stirring and flipping your eggs. The answer is simple: You should always keep stirring the eggs to prevent ensure one part doesn't cook more quickly than another, per Chef Works. Your arm will ache, but it will mean that your eggs will be fluffy and evenly cooked. After about 10 minutes, you'll find small curds will start to appear. Keep stirring and keep your eyes on the curds to prevent burning.
For soft and fluffy scrambled eggs, use a rubber spatula to keep the sides and the bottom of the pan clean while the eggs are cooking. As per our last tip, it's also important to take the eggs off the heat early to prevent overcooking. Scrambled eggs will continue cooking with the residual heat from the pan for about 30 seconds after you've pulled them off the stove.
Never drop poached eggs from the shell into boiling water
Poached eggs may appear to be an intermediate or advanced-level egg preparation technique, but with a few simple steps, you too can make these eggs at home. One of the biggest mistakes people make when poaching eggs is dropping the eggs from the shell directly into the pot of boiling water. First off, this is risky — you don't want to have a rogue eggshell floating around in your pot. Plus, if the egg breaks apart from the yolk with the force of the drop, it will result in watery poached eggs. One of the easiest ways to prepare poached eggs is to break the eggshells in a separate bowl. Once the poaching water is boiling, bring the heat down to a quick simmer and swirl the water in a whirlpool shape — then add your eggs.
The American Egg Board notes that poached eggs usually cook in about five minutes. If you use a poaching mold, the eggs will have to cook for six to nine minutes, or until the whites are set and the yolks are firm.
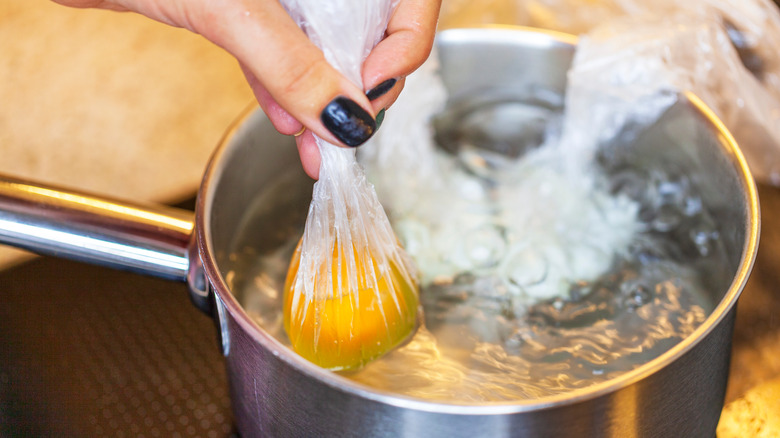
Instead of adding eggs to the poaching water, add water to the eggs
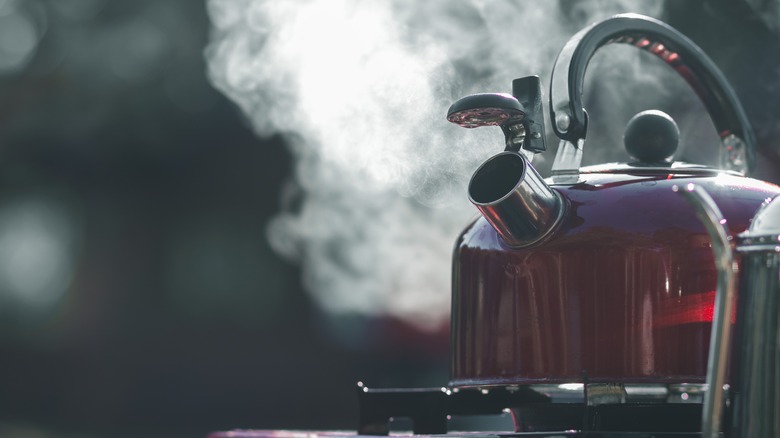
Worrying that your eggs will split when adding to the poaching liquid seems like a logical concern. Fortunately, it's one that can be avoided by switching what ingredient gets added to the other. Instead of dropping eggs into the water, try to add the poaching liquid to a bowl with the eggs. The Food Network recommends cracking the eggs into distilled white vinegar before stirring and circulating them in the pot. Vinegar helps the whites come together more easily. Then, pour hot water from a teakettle into the pot until the eggs are submerged by roughly 2 inches. The eggs will need to simmer for about five minutes, covered, before the temperature is brought up to a boil and the heat is immediately turned off. Then simply remove the eggs with a slotted spoon. They should come out with a solid white and runny interior. For a firmer egg, allow the eggs to simmer for a few extra minutes.
Keep the heat relatively low when cooking eggs
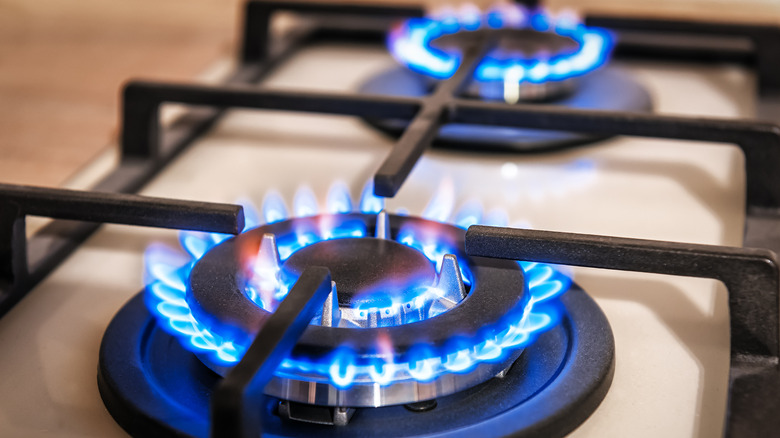
If you're short on time while cooking eggs, your first inclination will likely be to rush and increase the heat. However, this will leave your eggs scalded and ruined. Keeping the heat low and cooking slowly will retain the moisture in the eggs, thus preventing dryness. This steadfast rule is applicable to all kinds of eggs including scrambled, fried, and sunny-side-up. You should never fry eggs on too high a heat — if you do, you'll notice that the white of the egg will cook because it is so thin and closest to the heat. While your yolk will remain soft, you'll find the white to resemble an unappealing, cracker-like texture.
Stick to cooking your eggs over medium heat at max and taking the time to cook your eggs. The results will be much more satisfying — even if it can take upwards of 20 minutes to prepare a simple plate of eggs.
Bake your frittata in a cast iron pan
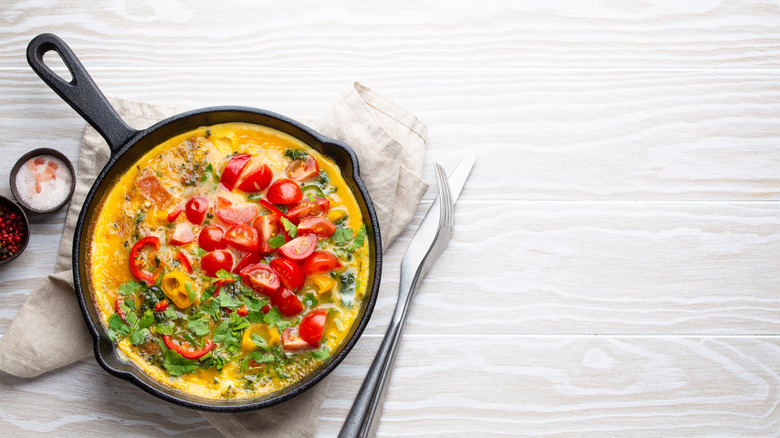
A cast iron pan is an essential tool for any home cook. While you can bake giant cookies, broil steak, and cook fish in your cast iron, it's also one of the best pan options for making a frittata because it's oven safe. Frittatas are essentially quiches without a pie shell. The perfect frittata is soft and flavored with a variety of cheeses, meats, and vegetables.
The cast iron skillet is ideal for cooking a frittata because there are no wooden or plastic pieces to melt. If you use a cast iron pan, you'll want to be sure it's adequately seasoned before adding the eggs. Properly seasoned cast iron pans allow the edges to perfectly cook and slide out of the pan easily. The Italian method of making a frittata involves cooking eggs separately from the pan in which eggs are eventually baked and finished, per The Petite Cook. If that seems like a bit too much effort, our method of making a frittata in a cast iron pan is much easier and just as flavorful.
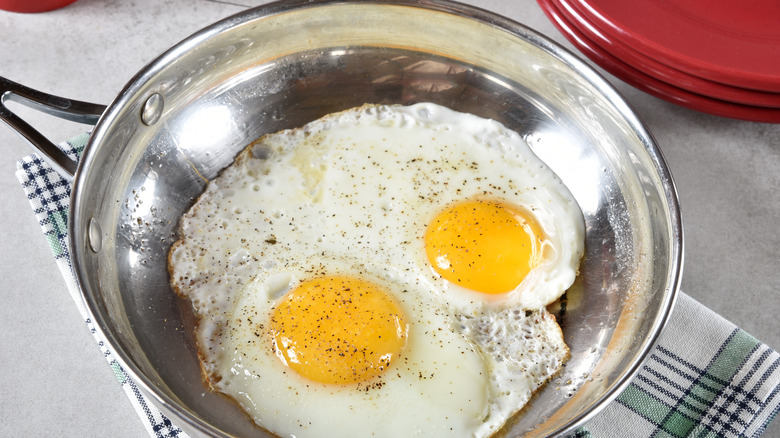
Baste your fried eggs in oil for optimal flavor
The perfect fried egg is deliciously crispy with a soft yolk. One of the best ways you can get a truly crispy fried egg is to baste the egg with oil while it's cooking. The secret is to get the oil in a pan to a hot enough temperature, add the egg, and then tilt the pan to concentrate the oil in one part of the pan. While the egg is cooking, baste the oil over the tops of the eggs. If you're working with butter, you will need to lower the temperature to prevent it from burning. You can use infused and aromatic flavors in your butter for an even more flavorful fried egg.
Once the egg has finished cooking, you can blot the egg with a paper towel to remove excess oil. But with the amount of flavor infused into the eggs because of the fat? We recommend just keeping it on.
Cook sunny-side-up eggs in a covered pan
For folks unfamiliar with sunny-side-up eggs, this soft, delicious preparation process is complete with a firm white and soft, buttery yolk on top. The biggest problem with making sunny-side-up eggs, though is making sure the egg yolk is not overcooked while keeping the egg whites firm. From a scientific angle, setting the perfect yolk and white can be especially tough because the egg whites are fully cooked at 180 degrees while the yolk is firm at 158 degrees.
Instead of crossing your fingers to ensure that you have both the perfect yolks and whites, using a lid to trap the steam in the skillet is a much safer — not to mention easier — option. The lid steams the egg from both the top and the bottom, fully cooking all sides of the egg. When you're keeping a watchful eye on your eggs, you should try to slightly undercook the egg, shut off the heat, and keep the lid on the eggs to steam the eggs the rest of the way.