16 Mistakes Everyone Makes With Sous Vide
Sous vide is, according to Serious Eats, a form of cooking that involves taking vacuum-sealed bags and submerging them in a "temperature-controlled water bath," thus creating a slowly and gently cooked food, be it red meat, fish, chicken, or even vegetables. The cooking method was once only reserved to chefs and professionals because of the techniques and precision that it requires, for the guarantee that the final food result comes out perfectly. Of course, as with any cooking technique, there's going to be a certain learning curve as you get used to using it and perfecting your method. With more and more home cooks adopting the practice, it's important to identify and address some common mistakes that can be made to ensure you get the best dish each and every time.
Whether not using the right type of bag, or not correctly submerging your bag in the water bath, there are a lot of spots along the way where things can go awry.
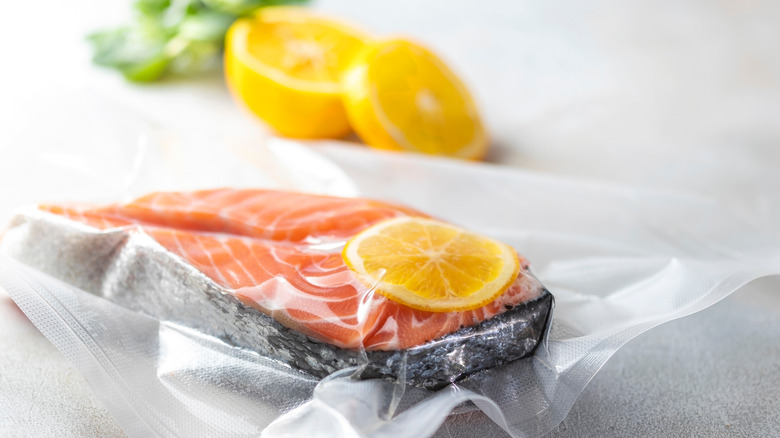
Not fully submerging food and making sure it stays submerged
The magic of sous vide is that it's going to cook your food perfectly all the way through, but — it won't always if you don't do it right. "If it's not fully submerged in the temperature-controlled water bath, the piece sticking out of the water will be cooked differently (and worse!)," Chelsea Cole, the food blogger behind A Duck's Oven, author of "Everyday Sous Vide," and founder of Sous Vide School, told Tasting Table.
Not to mention, the temperature of the air above the water bath could be in the "unsafe zone" Cole said, and this creates some bacteria issues, especially when cooking for longer than three hours. There is a remedy for this, though. "I love silicone-coated sous vide magnets to help keep my food submerged," Cole said. "One magnet is outside the container, one is inside and the bag is in between the magnets, so you can keep it held in place wherever you'd like inside the container." Other people love ping pong balls, or keep things simple: Put a ceramic plate or bowl on top of your food.
Assuming that time doesn't matter with sous vide cooking

This is tricky because part of the beauty of sous vide cooking is that time kind of doesn't matter. "You can cook a steak for 1-4 hours, and no matter when you pull it out in that time frame, it's going to be fantastic," Cole told Tasting Table. But the thing is, time also kind of does matter. Yes, it won't be "overcooked", but the longer food is exposed to heat, the more the texture will change.
"There's no need to overstress about time, but it should be taken into consideration and you can learn to use it to your advantage!" Cole said. "If I want a super meaty, juicy steak, I'm going to cook it for as short a time as possible. If I want a shreddy, fall apart pork shoulder, I'm going to cook it for about 24 hours." Yes, sous vide gives you so much flexibility when it comes to time, but it's also a tool to be used.
Assuming sous vide cooking is only good for cooking meat
Yes, sous vide is good for cooking meat, but there's a whole world of foods you probably never thought to sous vide. "My motto is if it's hard to cook, sous vide will probably make it easier," Cole told Tasting Table.
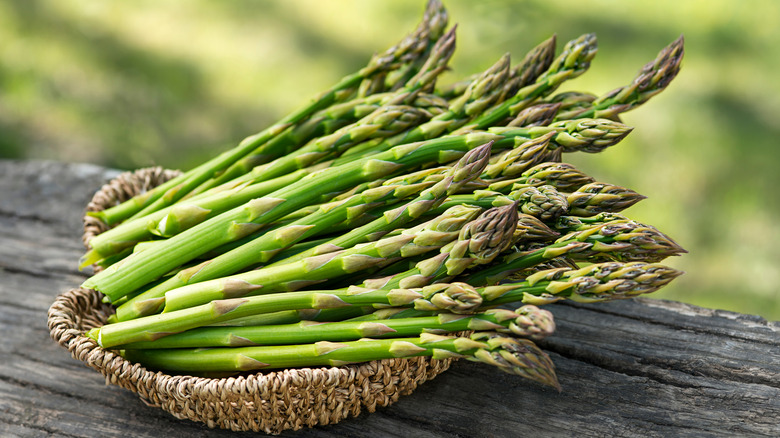
Precision cooking is perfect for helping you nail anything finicky, though, so it's a great asset at your disposal for a wide range of cooking possibilities."Try cooking things like sous vide hollandaise, creme brulee, or even veggies you're afraid to overcook, like asparagus," Cole advised. You'll be blown away by the number of ways sous vide will change how well you can cook. Remember though that much like an oven, a steak will require a different cooking time than some broccoli, so while you can cook many things in the sous vide, you won't want to cook them together simultaneously.
Considering that perspective, the potential dishes really do seem rather endless, and half the fun is experimenting and see how various dishes work out along the way.
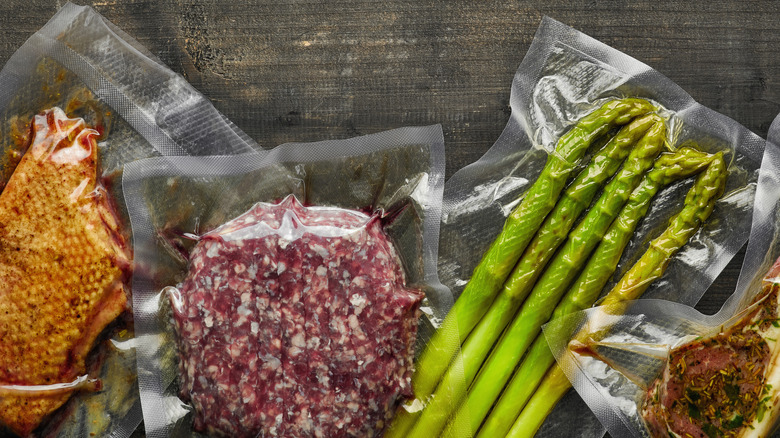
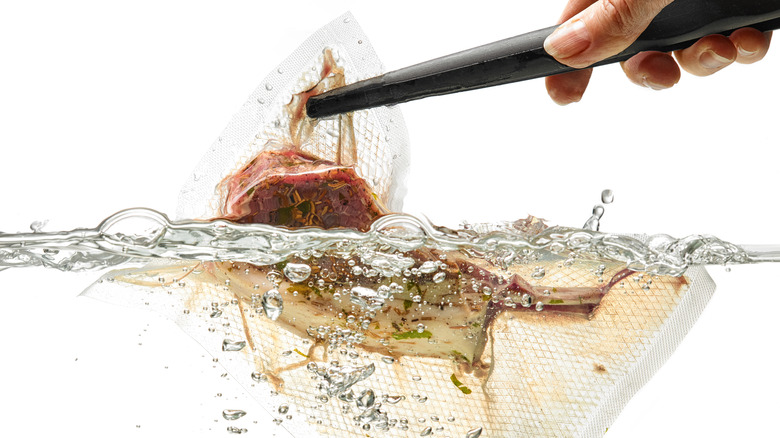
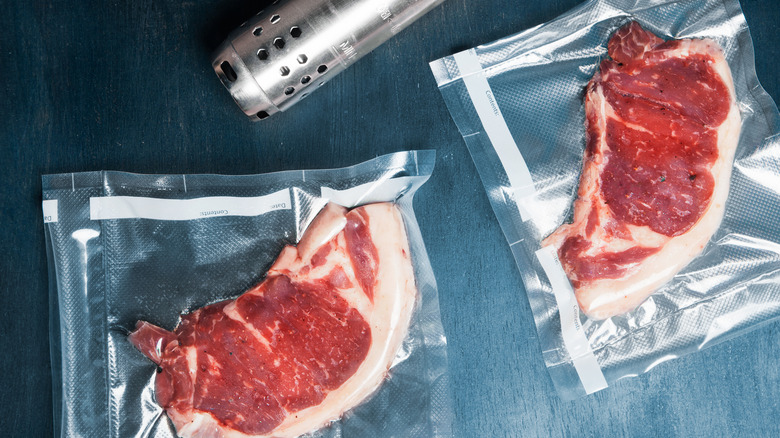
Mishandling bags
A big mistake that people make while trying sous vide is that they may be mishandling the bags. The answer to that is, for starters, to confirm that seal is sealed. "First and foremost, not double-checking or even triple-checking the seal on the bags before submerging is one common way of abusing the bags," Jessica Randhawa, the head chef and recipe creator behind The Forked Spoon, told Tasting Table.
Also, keep in mind that if you use sharp utensils like forks or tongs, these tools can easily puncture the bags, allowing the juices to mix with the warm water. At the same time, though, cautions Randhawa, using tongs with more delicate fish filets can easily break up the tender meat. So, neatness counts — and just be careful! Otherwise some good meat or fish may end up completely soggy and ruined (and that could be quite a mess as well).
Using the wrong bag
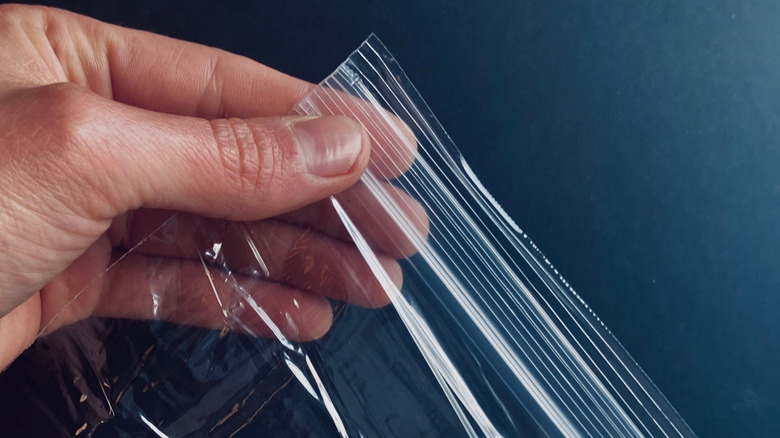
Ziploc bags are useful for all sorts of kitchen needs, from food storage to leftovers, but it's not really meant for sous vide. So, what do you use if you shouldn't use a Ziploc? The answer is to get a vacuum sealer!
"Ziplocs will work for the sous vide process, but they won't give you the optimal results," ButcherBox head chef, Yankel Polak told Tasting Table. A vacuum sealer gives you the best possible results, so don't skimp.
If you are in a crunch and have no choice but to use that Ziploc, don't worry. It's not ideal, but there are no safety or food quality concerns. Research has found that it is actually the temperature you cook and store your food at that prevents issues like bacteria growth, not necessarily the type of vacuum sealing. And there's little worry of the chemicals in the plastic getting into your food, either. The Ziploc website actually points out that all of its bags are BPA and dioxin-free.
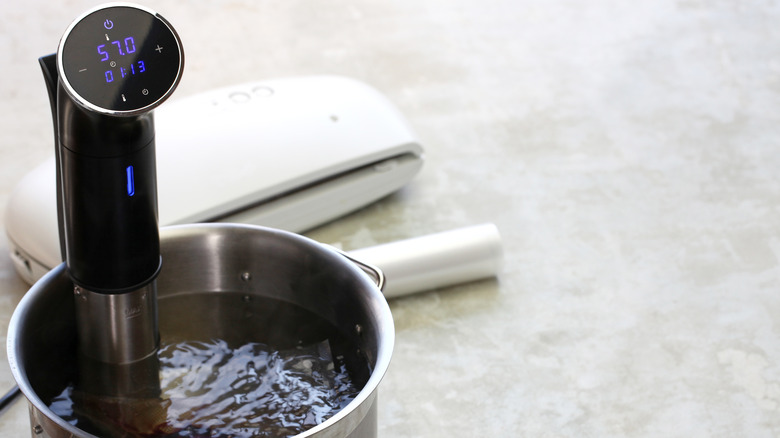
You used the wrong temperature
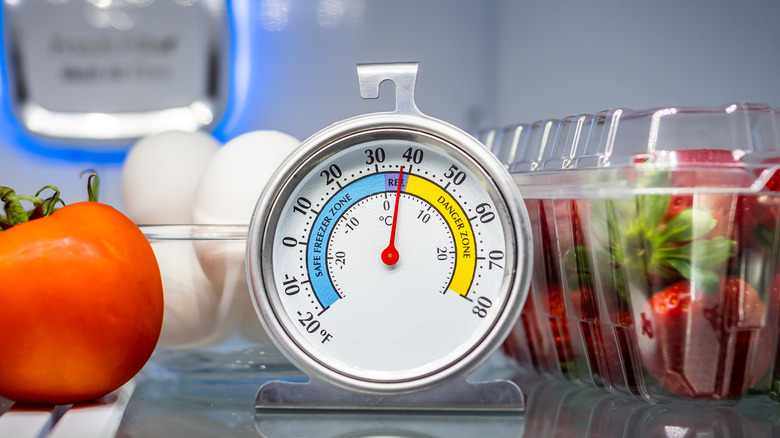
Choosing the right temperature is key with sous vide in the same way it would be for any other type of cooking. "Sous vide food temperatures translate to any other temperature when grilling or cooking meat," Polak told Tasting Table. People don't always account for reheating something that has been cooked with the sous vide process or take into account the resting period, so it's important to make sure to give yourself a buffer when you choose your cooking temperature.
So keep the temperature in mind every step of the way. "Shoot for 5 degrees below your favored temperature for a rest, and about 10 degrees if you plan to reheat and not eat immediately," Polak said. While it's not easy to overcook meat when doing sous vide, it can happen, and that can lead to tough, unsatisfying meat, no matter what sort of cooking method you may be using.
You had the wrong water level
One of the mistakes that can easily be made by a chef or home cook is inaccurate water level when submerging the ingredients into the sous vide.
"In order to properly prepare sous vide recipes, the aim is to have your pouch or jar completely submerged in boiling water," Chef Wayne Sharpe of Jrk! the Jamaican, health-conscious modernized restaurant in Miami, Florida, told Tasting Table. "As the temperature rises, the water level will continue to lessen due to evaporation."
The goal when doing sous vide is to have enough water to last until your recipe is fully cooked and Sharpe recommended a few easy ways of accomplishing this. "It is a simple mistake that sometimes happens unintentionally but a few ways to prevent that are by either using a bit more than the required water level or just simply cover your pot or boiler with a pot cover or a cling plastic wrap." Easy, right?
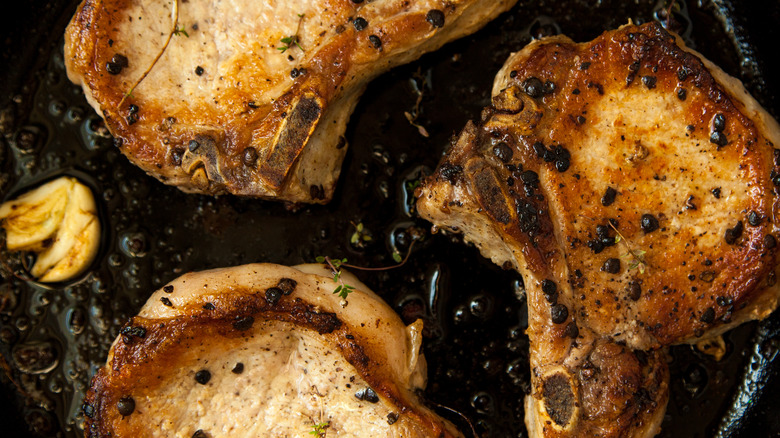
You didn't sear the meat
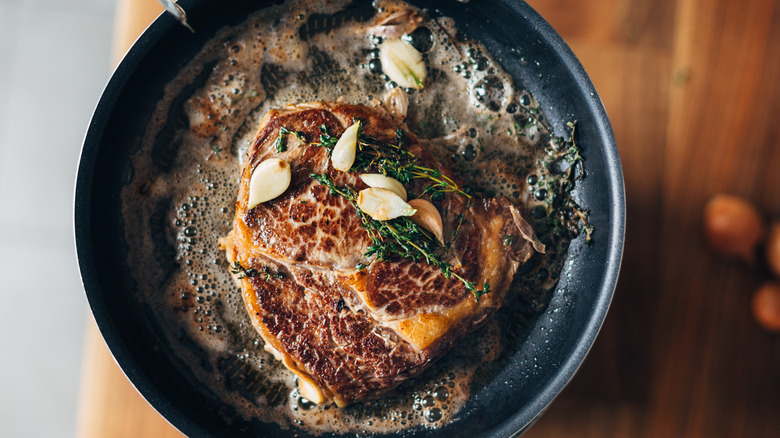
If you're cooking steak with the sous vide method, it may be a good idea to do both a pre-sear and post-sear. That's actually searing twice! There's a reason this works out well, though.
"The pre-sear will develop flavor, kill bacteria and ensure a stronger second sear," Herve Malivert, Director of Culinary Affairs at the Institute of Culinary Education –- who recently helped revamp the sous vide curriculum at ICE, told Tasting Table. When cooking sous vide the steak won't have a crisp exterior, according to Malivert, because there's no Maillard reaction, so that's why you should do a post-sear.
"For the post-sear, let the meat cool in temperature after sous vide for about 15 minutes, then sear quickly in a super-hot pan or cast iron," Malivert said. The Maillard reaction is a chemical change, that causes browning of food, which imparts color and flavor. So, be sure to sear your steak to get that great browning that everyone loves, and twice is even better at once.
Not drying the meat between sous viding and searing
While it's very important to start with meat that is dry, it's also crucial to get a good sear. When cooking meat, it can be beneficial to try to get a great sear after it's done sous viding. But, proceed with caution, because how you sear does matter and will impact the ultimate results you get with the dish. "If you try to sear wet meat, that crust is going to be underwhelming," Cole told Tasting Table.
According to Cole, water is not of any help when trying to produce a Maillard reaction. Here's what to do: Use clean dish towels or paper towels to pat the meat super dry between sous viding and searing. "I also take this opportunity to season the meat again. Make sure your skillet is screaming hot, and sear away! In order to ensure a fantastic sear, I usually use a grill press, too," Cole said.
You shouldn't have cooked various ingredients together

One mistake people can make with sous vide is cooking two ingredients together that don't cook at the same temperature. For example, if you want to cook garlic with steak, you need to cook the garlic first. Otherwise: "If you put it in raw, you'll have uncooked and raw garlic flavor. After you pre-sear your steak, remove it from the pan and then cook the garlic," Malivert told Tasting Table. It's little things like that which can make difference between a successful sous vide cook and a dismal one.
The same issue is actually a problem when braising. "If you want to include carrots or other vegetables, make sure to cook them first," Malivert recommended. So, give each ingredient its own consideration when cooking to help ensure a fantastic final product. That'll result in everything tasting its absolute best when it comes together at the end.
You didn't let your protein rest

We all know that meat should rest when coming out of the pan or after taking it out of the grill. But what about when we're searing meat after sous vide cooking?
Actually, the same rule does still apply. "The biggest mistake is when you don't let the protein rest out of the vacuum bag before you sear it," New York City-based Clinton Hall and Slate Executive Chef Darryl Harmon told Tasting Table. "It's a mistake because you won't get a nice hard sear to lock in the flavors."
So what is the best way to handle our meat if we want optimal end results? "I usually let the protein rest on a cooling rack for a couple of minutes before searing," Harmon said. Seems easy enough, and the results will make it well worth giving the meat that bit of extra time to do its thing.
Forgetting fat cooks differently
Making steak is probably one of the most common uses of the sous vide method. People love that when done correctly, a steak cooked in water retains all its juices. Using sous vide is a way to amplify your steak's flavor rather than overwhelm it with oil, heat, and salt. What you're left with is a steak for steak lovers; something that's tender and juicy.
What could be wrong with that, right? Well, fat begins to render at a very specific temperature, and not rendering — or over rendering — will result in a lackluster piece of meat. On average, fat will begin to render around 130 F and, if not done properly, is the real reason your sous vide meat is rubbery. Because you're cooking the steak low and slow for that optimal tenderness, it's easy for temperatures to not become hot enough to get that crispy edge you crave. A quick solution is to sear your steak before popping it in the sous vide bag, which will kickstart the fat rendering.
Not cooking eggs with care
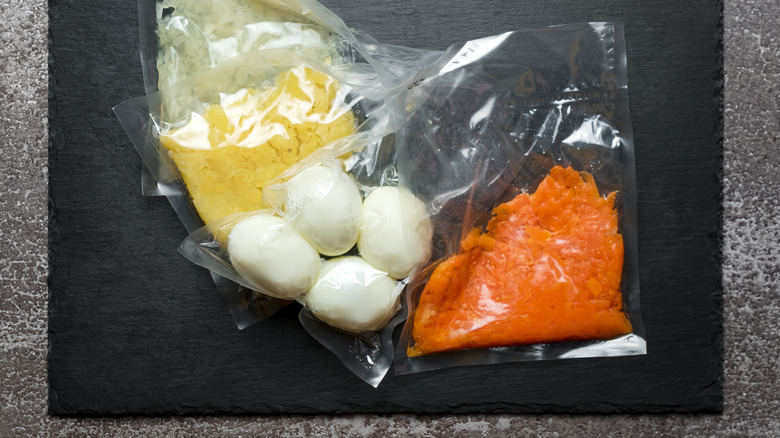
Sous vide eggs can be delicious when made properly — just look at this sous vide egg bites recipe, which creates perfectly side portions with an extra velvety texture. Something like the egg bites are hard to mess up, right? Though eggs are marketed as a can't-fail option, these small but mighty protein sources are ultimately delicate ingredients depending on how you choose to cook them. It's when we get to boiling eggs that things can get tricky. If you're not careful, your eggs can crack in the sous vide bag from built-up pressure and overcrowding.
Yes, sous vide is ultimately a careful and slow method, but you're still using boiling water for cooking. Essentially, this means that if you put too many eggs in at once, the shells will bounce against each other and crack. A great trick to prevent your sous vide eggs from cracking is to simply treat eggs like anything else when it comes to sous vide: place them in a bag and vacuum seal them, a process that will remove free space. This will keep them in one place, gently nestled into the sous vide, and out of harm's way.
Seasoning too much

When you cook on a grill or even in a pan, it's inevitable for some of your seasonings to fall away. Not every flake of salt or smidge of paprika will end up on the final plate. That doesn't happen, however, in sous vide. Everything is trapped in the bag, so over-seasoning can ruin the final product. There's nothing worse than patiently waiting while your meat or vegetables slowly cook to perfect tenderness, only to bite into your food and gawk at the saltiness.
To be successful here, keep things minimal. "Less is more" typically doesn't apply to salting foods. But here, it has to. According to Sous Vide Wizard, hitting that perfect mark is really up to personal taste and trial and error. However, there are some tips you can use in the meantime. For instance, a marinade will work much better in sous vide than a dry rub, as dry rubs tend to stay on the surface instead of penetrating beneath the surface. And to omit the possibility of mistake altogether, season afterward, once the meat or vegetables are removed from the sous vide.
Overpacking the bags

This is a tricky one because some people may suggest you overpack your sous vide bags as a way to prevent them from floating, which is another common mistake made when using this cooking method. However, as seen with our eggs tip, overpacking can lead to many issues, including: not allowing for even cooking, damaging the bag, or damaging the contents inside. Sous vide can be simple, but the few rules are essential. A big one is that the meat or vegetables inside must have even access to the heated water. When overpacked, things smushed into the center often don't get warm enough.
As Sous Vide Wizard writes, try an alternative correction method if your sous vide bag is floating. Perhaps your vacuum seal isn't locking out enough air which would cause an unnecessary buoyancy. You can also experiment with using mason jars which not only stay at the bottom, but enable you to make bite-sized snacks. Finally, you can add a weight on top — something like a canning or fermentation weight would be perfect for this (and can be found on Amazon).
Not reading your sous vide instructions
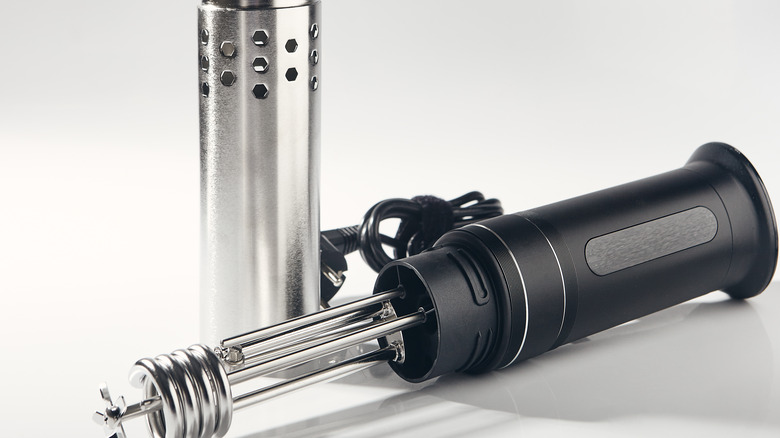
This is perhaps a given but important to mention nonetheless. Read your instructions. Every sous vide is made differently, and comes with specific steps to make the process easy. As we've detailed in our sous vide machine buying guide, there are so many things to consider when purchasing your chosen water cooker, which means there is an abundance of distinct and subtle differences between each model that can make or break your final product. Some sous vide devices offer temperature control for beginners, while others give all control over to you. This is important to consider as it may require you to do more research before getting started, less you're under the impression that temperature management is automatic.
Another difference between models is whether it comes with its own water unit or if it can be submerged into any already purchased pot. All these little differences add up, and can completely alter how you prepare to sous vide. Instructions are never fun, but for something like this, reading them is necessary so that you can be successful and satiated in the kitchen.