Herby Spring Pea Dip Recipe
Spring brings longer days, warm sunshine, gentle rain, and a bounty of vegetables and fruits for a new season of cooking. Fresh peas are one of the loveliest and most versatile springtime veggies. This herby spring pea dip, courtesy of recipe developer Julie Kinnaird, showcases shelled fresh English peas in a creamy and flavorful preparation, enhanced by tangy goat cheese as well as springtime staples like fresh mint, dill, and chives. The dip is served with an assortment of baby spring vegetables and crunchy baguette toasts to create a bright and satisfying seasonal spread.
This vibrant dip comes together in minutes in a food processor for an easy and eye-catching dish you can use as an appetizer when entertaining or as a light lunch or dinner. Unlike guacamole or other green avocado-based dips, the color stays true and won't turn brown as it sits. This is a perfect make-ahead recipe that keeps well in your refrigerator and is useful to have on hand as a quick and nutritious snack.
Gather the herby spring pea dip ingredients
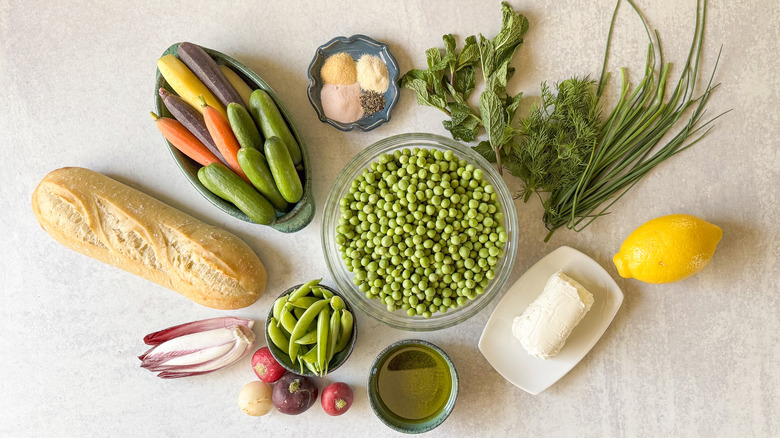
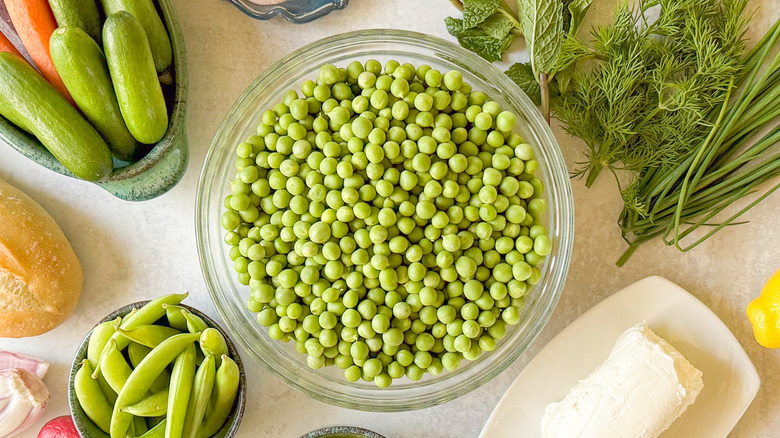
Shelled fresh English peas are cooked lightly to make up the base of the dip. Fresh goat cheese adds a creamy texture and tangy flavor, while extra-virgin olive oil gives the dip a bit of richness. The olive oil is also used in toasting baguette slices for dipping or spreading. Lemon juice and zest, along with fresh mint, dill, and chives give the dip a bright springtime taste combined with a bit of garlic powder, onion powder, sea salt, and black pepper. You will need an assortment of baby springtime vegetables for dipping, such as multi-colored carrots, tiny cucumbers, snap peas, radishes, and Belgian endive leaves.
Step 1: Boil water for the peas
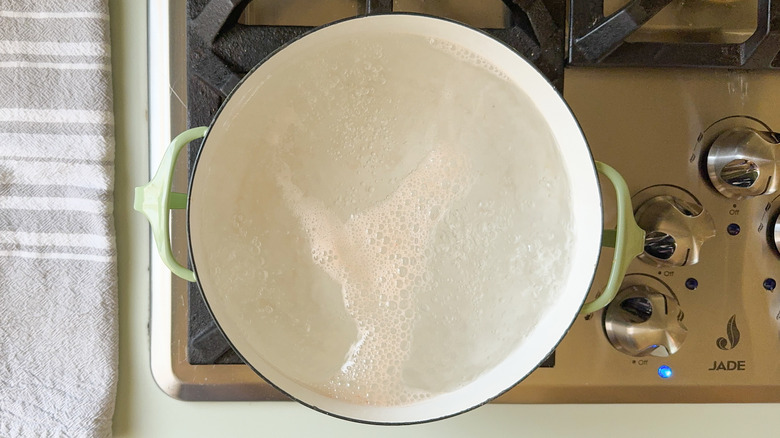
Bring a large pot of water to a boil with 1 teaspoon sea salt.
Step 2: Cook the peas
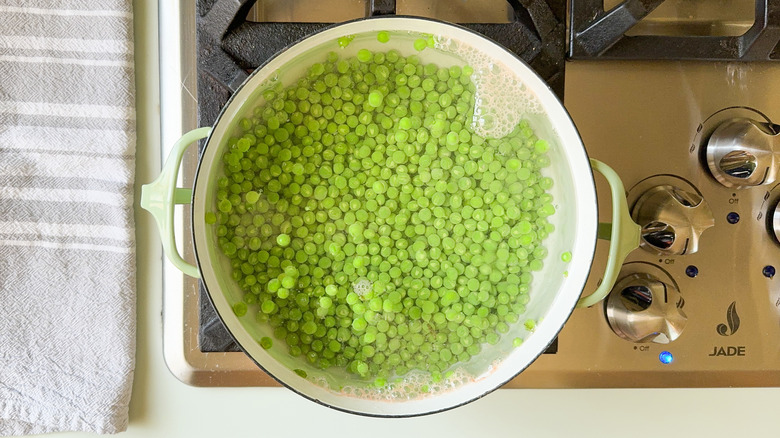
Add the peas, stir, and cook for 8 minutes.
Step 3: Drain and rinse the peas
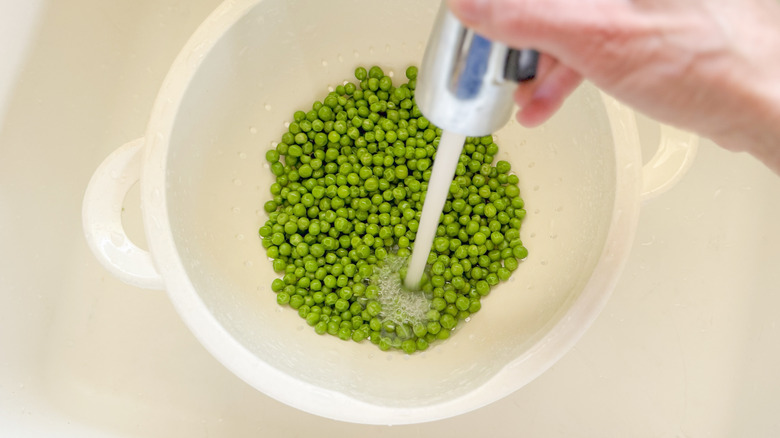
Drain the peas and rinse with cold water until cool. Set aside.
Step 4: Preheat the oven
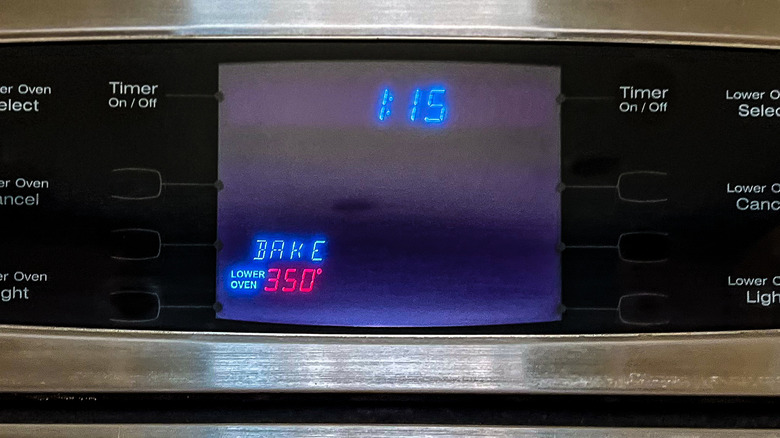
Preheat the oven to 350 F.
Step 5: Prepare a baking sheet

Line a baking sheet with parchment paper.
Step 6: Slice the baguette
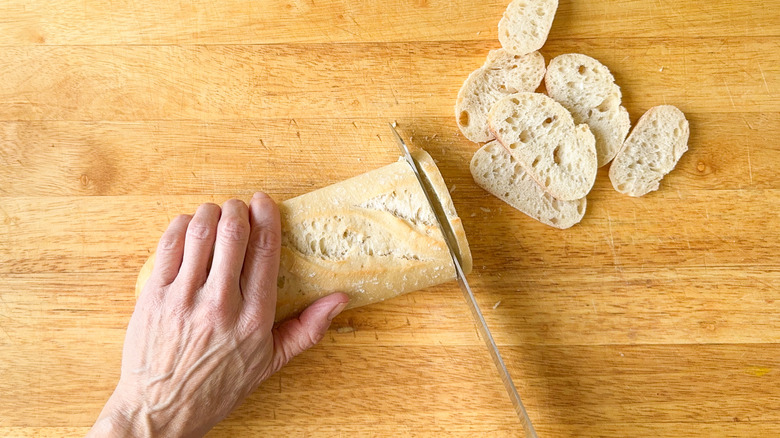
Slice the baguette into 24 thin slices.
Step 7: Brush the baguette with olive oil
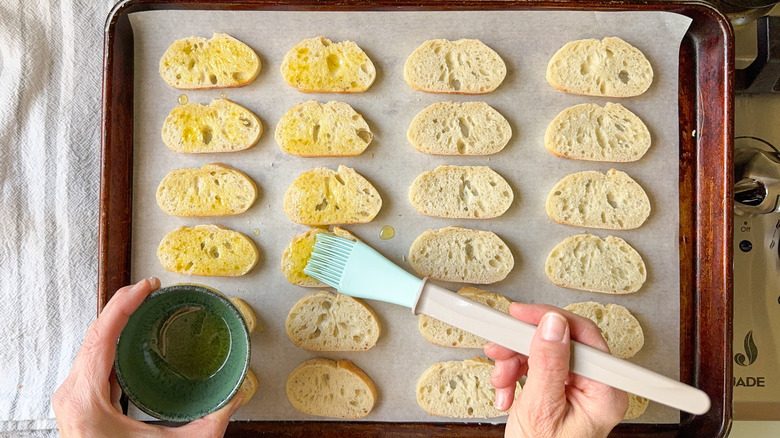
Place the baguette slices on the baking sheet and brush with 2 tablespoons of extra-virgin olive oil.
Step 8: Bake the baguette slices
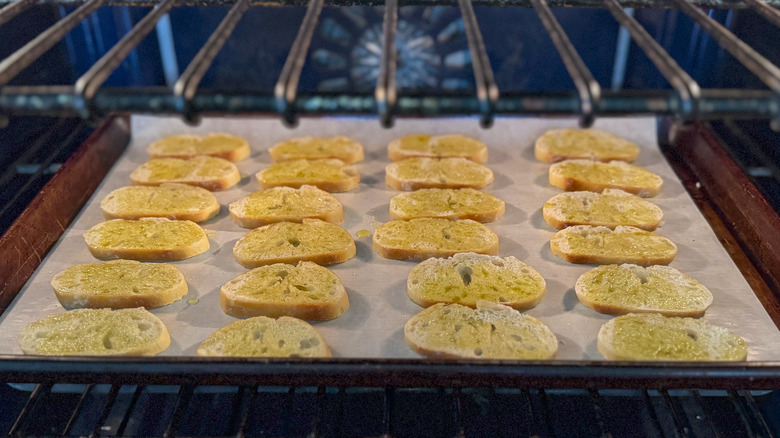
Bake the baguette slices for about 15 minutes until golden and crisp. Cool and set aside.
Step 9: Place peas in a food processor
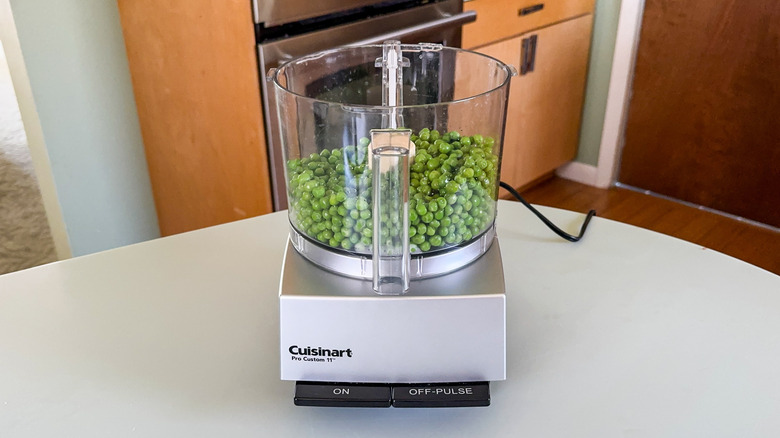
Add the cooked peas to a food processor bowl.
Step 10: Add the goat cheese
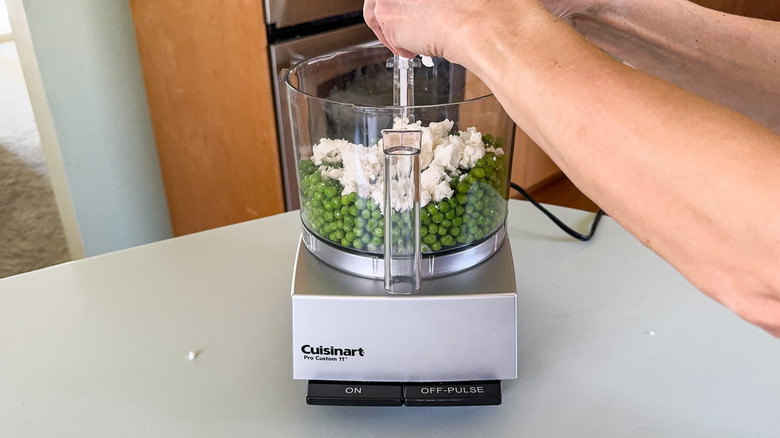
Crumble in the goat cheese.
Step 11: Add the seasonings and olive oil

Add the lemon zest and juice, mint, dill, chives, garlic and onion powder, black pepper, ⅓ cup olive oil, and the remaining teaspoon of salt.
Step 12: Process the dip
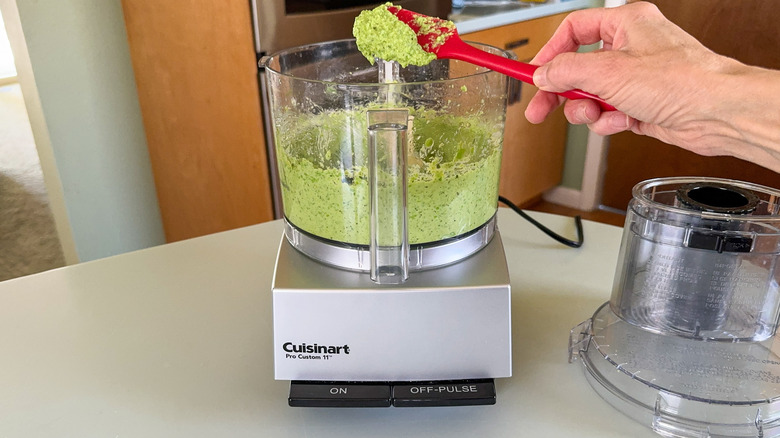
Process the mixture until smooth, but still with a bit of texture, scraping down the sides of the bowl once.
Step 13: Transfer the dip to a serving bowl
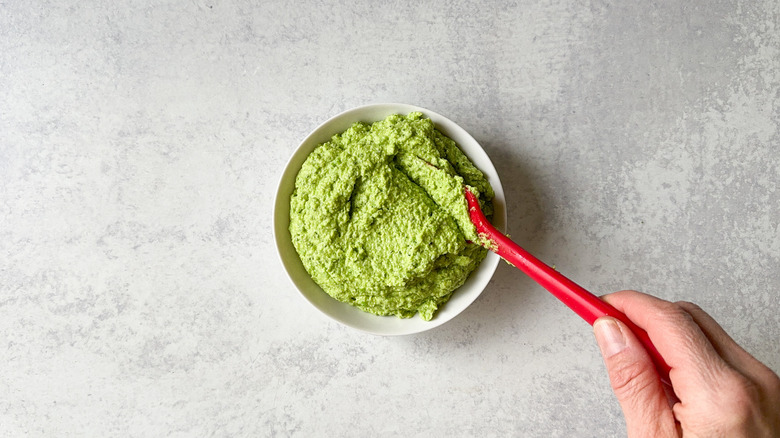
Transfer the dip to a serving bowl and refrigerate while preparing the vegetables.
Step 14: Cut the carrots
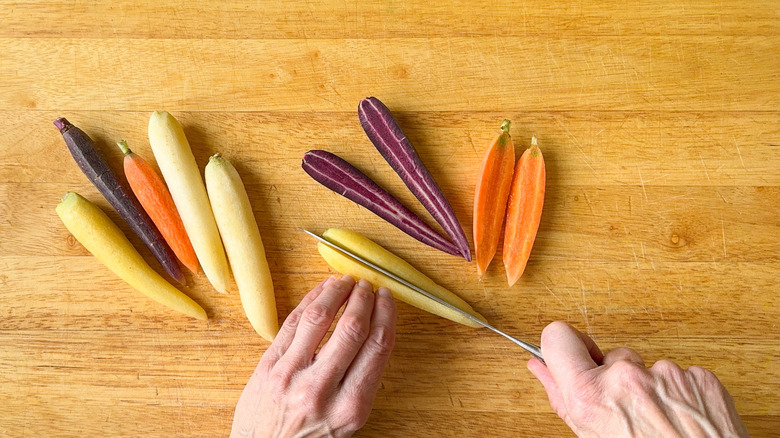
Cut the carrots lengthwise into halves or quarters, depending on their thickness.
Step 15: Cut the cucumbers
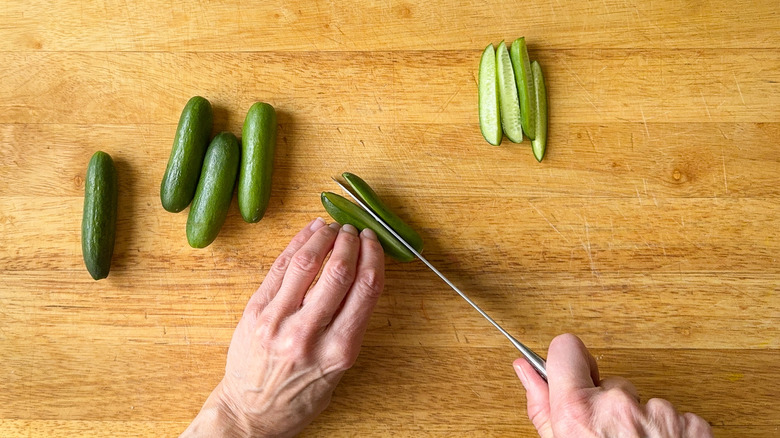
Cut the cucumbers lengthwise into halves or quarters.
Step 16: Trim the endive
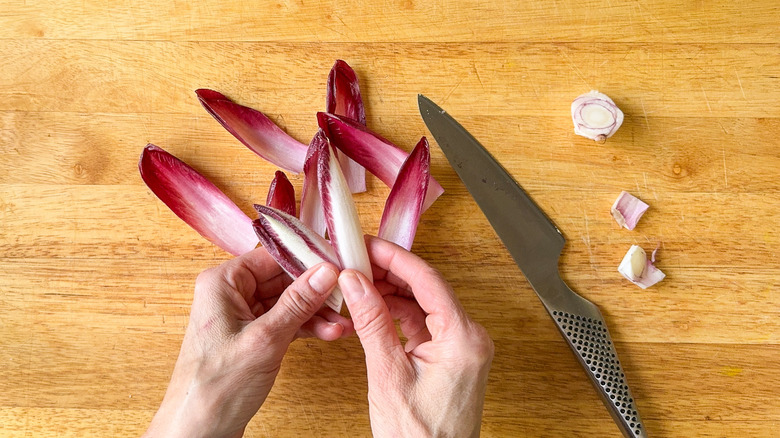
Trim the stem from the endive and separate into leaves.
Step 17: Cut the radishes

Halve or quarter the radishes.
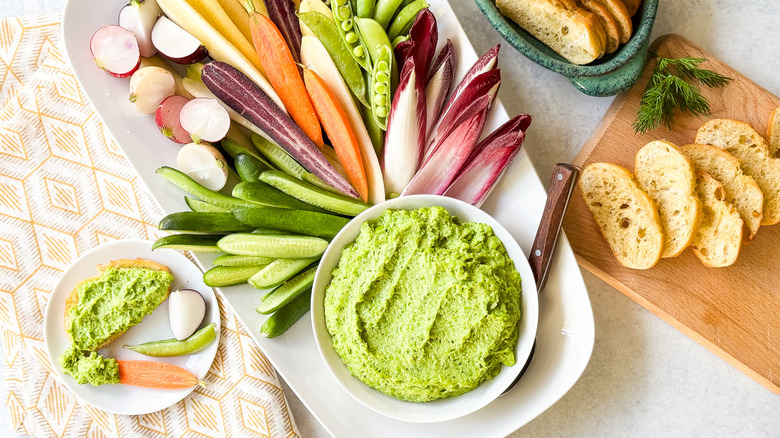
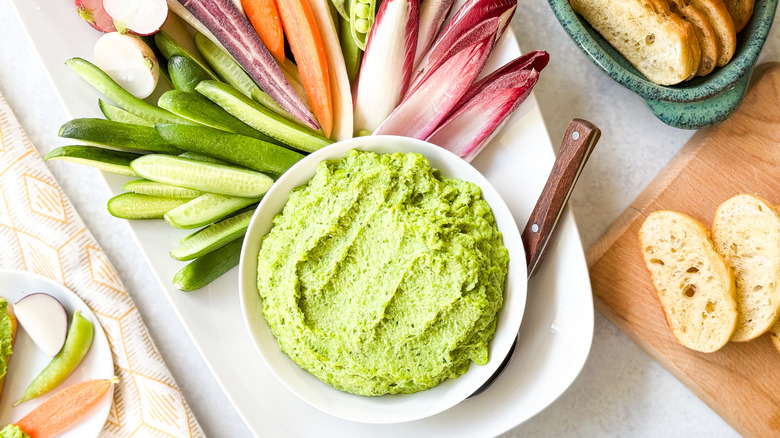
Step 18: Serve the herby spring pea dip
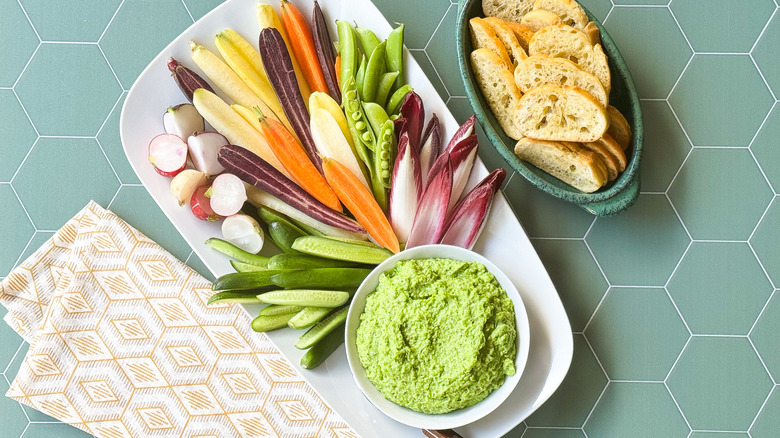
Arrange the herby spring pea dip, vegetables, and baguette slices on a platter or in separate dishes to serve.
What are English peas and what is a substitute for them?
Of the three main types of peas, English peas fall into the category of "shelling peas," meaning you must first remove them from the pod before eating them. Unlike snap peas or snow peas, which have tender, edible shells, English pea pods can be quite tough and bitter. Once they are shelled, English peas just need a quick blanching before they are ready to enjoy or use in recipes.
Fresh English peas have a sweet flavor, slightly al dente texture, and vivid green color. The key to working with English peas is to avoid overcooking. Too much time in the pot can turn the peas from tender to mushy with a drab off-color. English peas are also the variety most used for frozen peas. Although the recipe for herby spring pea dip calls for fresh English peas, you can also substitute frozen if fresh is not available in your market. Simply thaw frozen peas by briefly running them under hot water in a colander, pat them dry, and proceed with the recipe. The texture of the dip will be a bit looser, but it will still have the wonderful springy sweet pea flavor.
How long will this dip last and are there other ways to serve it?
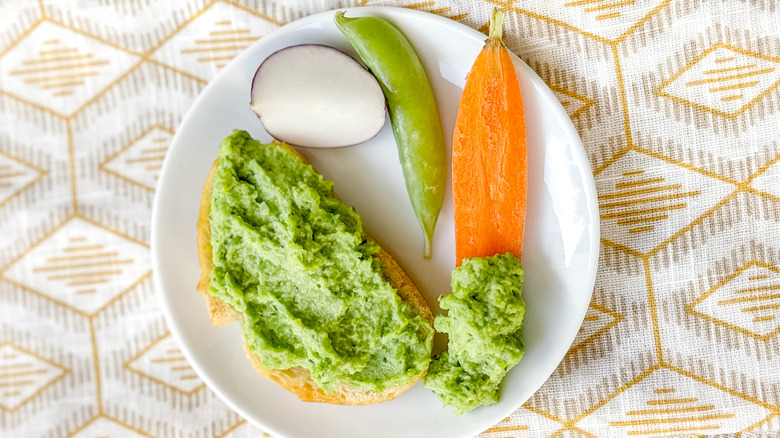
This dip has a hummus-like texture and thickness that makes it equally delicious as a spread. Try using it in sandwiches and wraps or as a base for veggie pizza or flatbread. Stir a large spoonful into a pasta salad or add it to deviled egg filling. This dip is delicious in hollowed-out cherry tomatoes, atop a turkey or veggie burger, or added to an omelet. You can also vary the flavor of this dip by switching up the herbs and cheese. Instead of mint and dill, try some fresh basil or chervil. In place of fresh goat cheese, use feta for a bit more savory flavor.
Herby spring pea dip will stay fresh if stored in an airtight container in the refrigerator for up to a week. To ensure the life of your dip, use the freshest herbs and cheese you can find. Lemon juice will also help maintain the quality, brightness, and flavor of the dip.
Herby Spring Pea Dip Recipe
Vibrant pea, goat cheese, and herb dip, made with fresh English peas, captures all the brightness of spring and comes together in under an hour
Ingredients
- 2 teaspoons sea salt, divided
- 1 pound fresh, shelled English peas
- 1 small baguette (6 ounces)
- ⅓ cup plus 2 tablespoons extra-virgin olive oil, divided
- 1 (4-ounce) log fresh goat cheese
- 2 tablespoons lemon zest
- 2 tablespoons fresh lemon juice
- 2 tablespoons chopped fresh mint leaves
- 2 tablespoons fresh dill fronds
- 2 tablespoons chopped fresh chives
- ½ teaspoon garlic powder
- ½ teaspoon onion powder
- ¼ teaspoon freshly cracked black pepper
- 8 ounces multi-colored baby carrots
- 6 baby cucumbers
- 1 small head Belgian endive
- ½ cup small multi-colored radishes
- ½ cup snap peas, strings removed
Directions
- Bring a large pot of water to a boil with 1 teaspoon sea salt.
- Add the peas, stir, and cook for 8 minutes.
- Drain the peas and rinse with cold water until cool. Set aside.
- Preheat the oven to 350 F.
- Line a baking sheet with parchment paper.
- Slice the baguette into 24 thin slices.
- Place the baguette slices on the baking sheet and brush with 2 tablespoons of extra-virgin olive oil.
- Bake the baguette slices for about 15 minutes until golden and crisp. Cool and set aside.
- Add the cooked peas to a food processor bowl.
- Crumble in the goat cheese.
- Add the lemon zest and juice, mint, dill, chives, garlic and onion powder, black pepper, ⅓ cup olive oil, and the remaining teaspoon of salt.
- Process the mixture until smooth, but still with a bit of texture, scraping down the sides of the bowl once.
- Transfer the dip to a serving bowl and refrigerate while preparing the vegetables.
- Cut the carrots lengthwise into halves or quarters, depending on their thickness.
- Cut the cucumbers lengthwise into halves or quarters.
- Trim the stem from the endive and separate into leaves.
- Halve or quarter the radishes.
- Arrange the herby spring pea dip, vegetables, and baguette slices on a platter or in separate dishes to serve.
Nutrition
| Calories per Serving | 280 |
| Total Fat | 16.3 g |
| Saturated Fat | 4.0 g |
| Trans Fat | 0.0 g |
| Cholesterol | 6.5 mg |
| Total Carbohydrates | 26.2 g |
| Dietary Fiber | 5.7 g |
| Total Sugars | 7.4 g |
| Sodium | 545.4 mg |
| Protein | 9.1 g |