Why Your Steaks Never Look Like The Ones On TV - A Professional Food Stylist Reveals All
We may receive a commission on purchases made from links.
We've all had the experience of cooking a special meal and wanting to document it for posterity (and social media likes), only to discover that it looked less than scrumptious on camera. The food stylists employed by the film and TV industry have a bevy of tricks they use to make food unrealistically photogenic.
Tasting Table spoke to Megan Potthoff, a pastry chef who worked for Wolfgang Puck for years before transitioning to a career in food styling. Her credits include shows like "MasterChef" and films such as "Babylon." Most recently, she styled the food in the Amazon original film "Sitting In Bars With Cake," which premieres on Amazon Prime Video on September 8. In our exclusive interview, Potthoff revealed some of the food styling secrets she used in her work on the film, as well as techniques she's employed elsewhere in her career.
The good news is that many of these techniques are easy for home cooks to replicate. The catch is that some of them come at the expense of cooking food that looks better than it may taste.
If nobody has to eat the food, it might not be real

Megan Potthoff told Tasting Table that when styling for film and TV (as opposed to photo shoots), the food often has to be real, as actors need to eat it in scenes. However, if the food is just a prop in the background, there's a good chance it's a phony, typically made of styrofoam.
Styrofoam cake solves one of the main problems with styling food for film, which is that food degrades quickly under the hot lights of a movie set. This was a constant challenge during the filming of "Sitting In Bars With Cake." The frosting on the actual cake would begin to melt after just a few takes, turning a beautiful dessert creation into a sloppy mess.
If you'd like to make a "cake" centerpiece at home that can stand up to being photographed for a long time, you can purchase your own styrofoam cake dummies and decorate them however you please. Rather than buttercream frosting, use fondant, which doesn't taste as good but is more moldable, durable, and heat-resistant.
Food needs to be shot when it's fresh
When Megan Potthoff didn't have the luxury of working with imitation cakes, she had to make sure that the real cakes she made looked the same during every single take. That meant having replacement cakes at the ready for when the cake they had been shooting started to wilt. "We always had five identical cakes, so we were always able to swap it in and change it if we needed to."
Food almost always looks best if it's photographed immediately after cooking, so swaps and reheating are key to on-set food styling success. For hot, savory foods, Potthoff kept cooking tools on hand to reheat and freshen dishes between takes. "We'll bring a flat-top or a toaster oven or anything we need to sort of refresh. Or if they've been shooting awhile and the food's been sitting there, we'll scrap the plate and put a new one out."
Dishes sitting out too long and starting to look old was also an issue Potthoff faced when styling beauty shots for reality shows like "Iron Chef." She often had to swap out delicate garnishes like microgreens to make the plates TV-ready.
Secret ingredients are used to add shine

When you try to make an attractive dish, what aspects do you think about highlighting? Color, certainly, and probably also shape and composition. Food stylists have to pay attention to another factor: shine. A beautifully styled piece of steak will glisten with what looks like its own natural, fatty juices. Glasses of cold, refreshing beverages also need to have a glossy, dewy look.
Of course, food stylists often use tricks to get the perfect level of sheen they're looking for. Although Megan Potthoff revealed many secrets in our interview, she was cagey about what she uses to add gloss. "That's a secret I'm not going to share, but I'm sure my fellow food stylists will know the answer to that."
We can't know for certain what Potthoff's preferred food polish is, but other food stylists are known to use inedible sprays like WD-40, hairspray, or Scotchguard. If you want an option at home that won't render your food inedible, try loading a clean spray bottle with drinking water. A couple of spritzes can add the professional gloss to the pictures that you're looking for. Painting an edible oil like olive or canola onto the food can achieve a similar effect.
Bowls include false bottoms to make them look extra full

If you ever see a bowl of food in a magazine or on TV, the contents are always about to burst over the sides. Nobody wants to look at a sad puddle of cereal or a little limp pile of salad, so these foods tend to be styled to emphasize volume. While that looks great on camera, it can be hard to achieve in real life, especially if you don't want to use an unnecessary amount of food just for a photo shoot. That's where studio magic comes in. Megan Pothoff told us that the bowls used for food styling are often fitted with false bottoms to make them appear more full.
If you want to test out this food styling hack at home, you don't need any fancy equipment. Potthoff said, "You can use foil or things like that to prop it up, but a big one we use would be instant mashed potatoes, because you can just cover the whole bottom floor with instant mashed potatoes, and it's easy to cover up and holds the food better for camera."
Of course, if you go the mashed potato route, there will still be some food waste, but instant mashed potatoes are dirt cheap, so you can conserve the actual (pricier) food you're styling.
Natural light often gives the best results
When Megan Potthoff is working on film sets, her job is done once the food is styled. It's someone else's responsibility to actually shoot the food and make sure it's lit well. But when she's taking her own photos, she has a distinct preference for natural light. "I do love natural light, and if you can shoot in natural light, that's obviously preferable."
Natural light (that is, sunlight) is a great tool for making your food photos look great if you're a beginner. The sun is free, and especially if you shoot on a cloudy day (or use a diffuser), you can get pro-level, evenly-lit shots easily. Using natural light avoids the undesirable orange/yellow look that indoor electric lighting can give to photos. Of course, this isn't a problem if you have an expensive indoor lighting rig, but most of us don't want to make that kind of investment just to make our food Instagram posts look a little better.
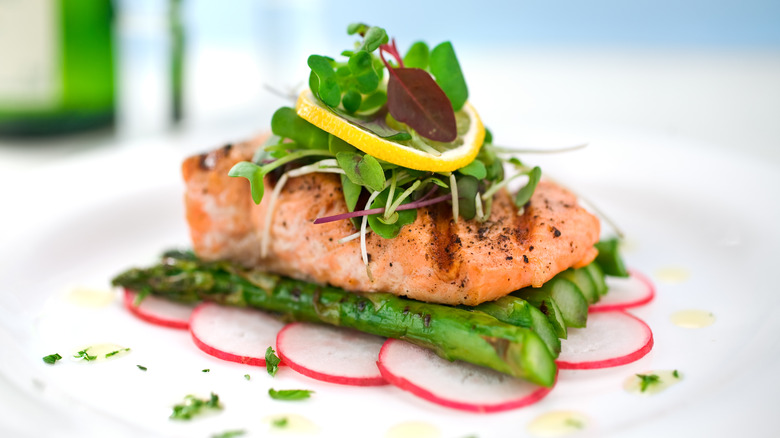
Vegetables and meat can look better when they're undercooked
The saying goes that "you eat with your eyes first," but when you're looking at a food photo, you never even get to the eating with your mouth part. While you may enjoy soft, well-done vegetables, there's no denying that they aren't the most photogenic. Often, by the time the vegetables are tender, they lose some of their color and start to look a little wilted.
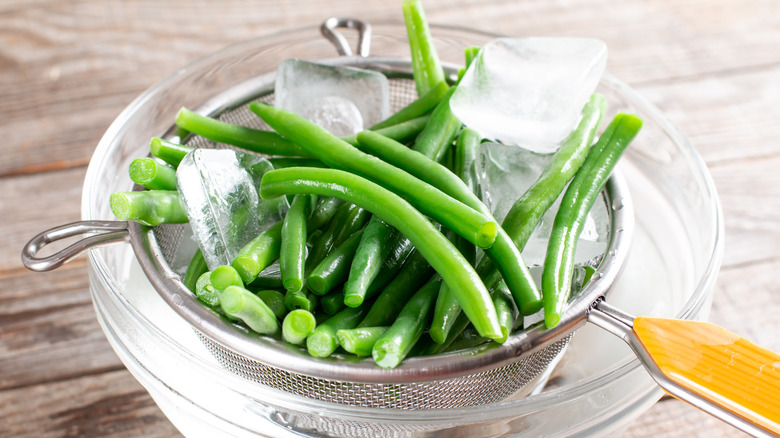
With that in mind, food stylists cook ingredients for visual appeal, not to make them delicious. Food styling expert Megan Potthoff told Tasting Table, "You're under-blanching and making the vegetables look bright green as opposed to overcooked and a little brownish. Just making colors pop and cooking it the way that will look the best on camera, not necessarily cooked all the way through."
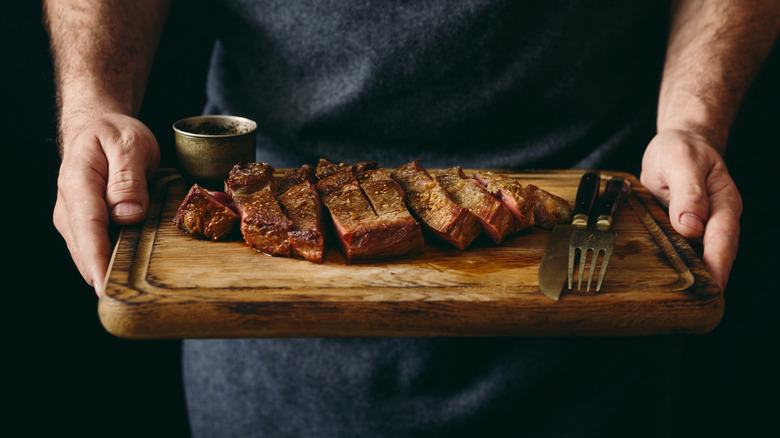
A similar trick can also be used for meat. If all you care about is getting the best photo, the meat will look plumper, juicier, and perkier if it's still basically raw on the inside. Drastically, undercooking something like a steak avoids the natural shrinkage and loss of color that occurs when meat becomes fully cooked. Of course, this only works if you're not slicing into the meat before shooting. If you are, you'll need to cook it to an edible state but use restraint — a nice rare or medium-rare steak will look much better than well-done. Once you slice the meat, take your photos quickly before it starts going gray and dry.
Stylists use tweezers and other tools to make sure everything is perfect
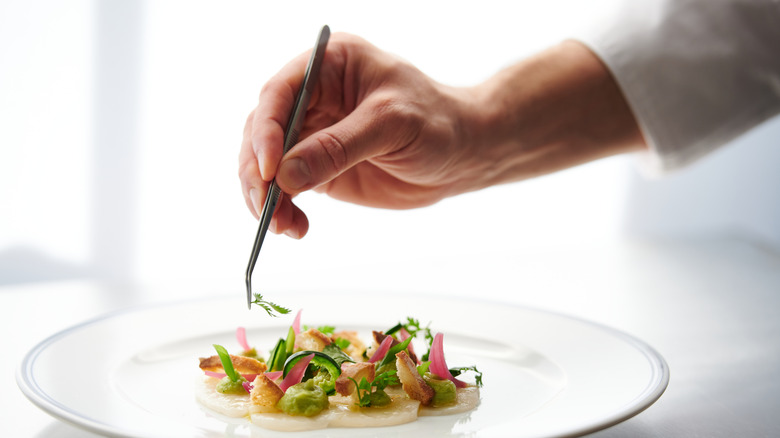
Food styling is an extreme form of plating food, and if you want the best results, you need to use professional plating tools. Just manipulating ingredients with your fingers will never give you the aesthetic perfection you can achieve with the right implements.
Megan Potthoff is a big fan of plating with tweezers. "I'm definitely a tweezer plater. It helps also with really fine details." Tweezers are great for arranging delicate garnishes precisely.
Tweezers aren't the only tools in Potthoff's arsenal. As she told us, "I also have a set of pastry brushes, from regular size to tiny painting brushes. And my baby offset spatula and scissors — those are my top things that I need on me all the time." The offset spatula is a tool Potthoff brings from her pastry background, but it's useful for a lot more than just smoothing out frosting. She also likes to transfer ingredients onto plates with it and use it to move stuff around without making a mess.