13 Important Tips For Brewing Pour-Over Coffee
Many of us grew up in homes with a percolator as a kitchen fixture, but at-home coffee has come quite a long way over the years. With everything from French presses to personal espresso machines now just as easily purchased as any drip machine, plenty of coffee consumers and aficionados alike have changed up their morning method for brewing. Among these many alternative options is the mighty pour-over coffee; an approach that can easily be made single-serving and so might especially appeal when making coffee for one. Pour-over is also said to be one of the most flavorful ways of brewing, making it a solid choice for anyone who loves a nuanced morning beverage.
Mastering the pour-over takes a little time and attention, but once it's in your muscle memory, it's just as intuitive as popping a basket into a percolator is, with the added benefit of granting the individual brewer much greater control over the final product. Not only is pour-over more environmentally friendly than options like Keurigs, it is much cheaper than purchasing an espresso machine or going out for coffee every day, and you usually only need to buy a pour-over device once due to their high reuse factor. With all these plus sides, there are still some tips and tricks that can help you on your journey to creating the ideal cup to get you going.
Make the water as hot as possible

Hot water plays a vital role for most coffee outside of a cold brew, but it's especially key with pour-over, as the wrong temperature can easily ruin your cup. For starters, water that's too hot can cause seriously over-extraction, turning the whole batch bitter, while water that's too cold causes under-extraction, giving you a weaker, more watery cup. It might go without saying that you'll want to avoid both outcomes by simply mastering your temperature right out of the gate, although it will require a steady hand and some attention to detail.
When boiling water for pour-over, it's recommended that you heat your water to between 195 and 205 degrees Fahrenheit, knowing that you'll lose about 10 degrees during the pour. You can use a thermometer to clock this, but there might be an easier approach. Because you don't want your water to be boiling when you add it to your grounds, consider allowing it to boil and then giving the kettle thirty seconds to cool down to an acceptable temperature. This allows you to skip the step of constantly having to gauge the thermometer day after day and focus instead on more important things, like what kind of roast you're going to use.
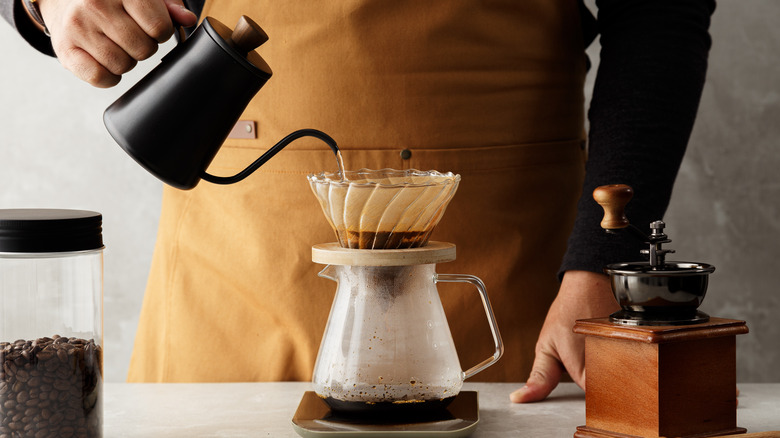
Consider using a gooseneck kettle

Named for its resemblance to, as you might guess, a goose's neck, the gooseneck kettle is a great tool for getting your hot water into the pour-over cone with minimal fuss. Though it might seem like a funny-looking teapot at first glance, the gooseneck's interesting shape has a built-in benefit: it grants greater control of speed and flow than a regular kettle might give. Adding smaller, more disciplined amounts of water will help immensely since pour-over relies on patient, methodical pours. These kettles work equally well for coffee or tea or anything where you need a little extra direction, be that to avoid spills or to precisely add water to your pour-over.
Much like with pour-over kits in general, gooseneck kettles vary wildly in price and quality, so it's up to you what brand you settle on. Still, they are easily tracked down online, and they're worth the extra time it takes. Even if just about any teapot will work great when boiling water, many of them have inconsistent pours due to spouts more accustomed to delivering water quickly rather than methodically. You're looking for a more specific approach, so incorporate a gooseneck into the process and notice the added smoothness it brings.
Measure it out
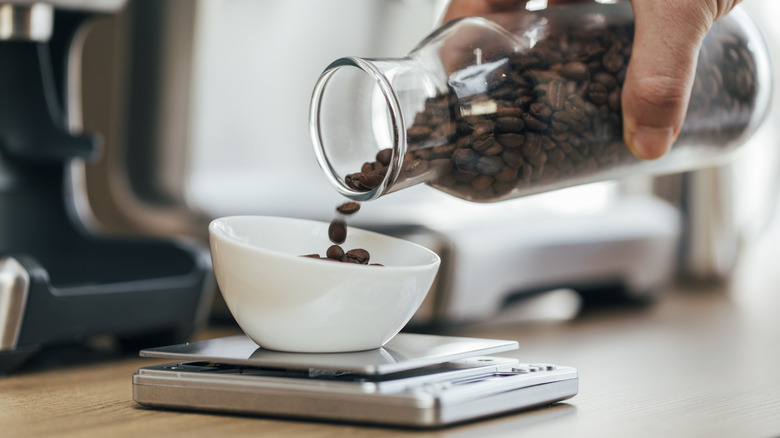
Now comes the time to master the water-to-coffee ratio you're going to be using, which will require a scale or other measurement device. Although this might seem like a tedious part of the process, it goes very quickly, particularly if you happen to have a gram scale easily on hand in your kitchen. Keeping things consistent is key, so even as we encourage a bit of experimentation, once you've gotten things locked in, you'll want to use a similar amount of coffee and water for each cup you make to achieve the best results.
While a classic drip coffeemaker would use a ratio of around one part coffee to 15 parts water, pour-over drinkers are looking for an equation closer to 1:17, or a measurement of 42 grams of coffee to 700 grams of water. However, per pour-over brewing tips from Shark Tank's Margaret Nyamumbo, more coffee always makes for a stronger cup. Getting a great flavor tends to be the most important factor for most drinkers when it comes to pour-over, but if you're looking for an extra bit of high-caffeine kick, perhaps try a nice cold brew, which achieves a ratio closer to one part coffee to eight parts water once diluted.
Perfect the grind
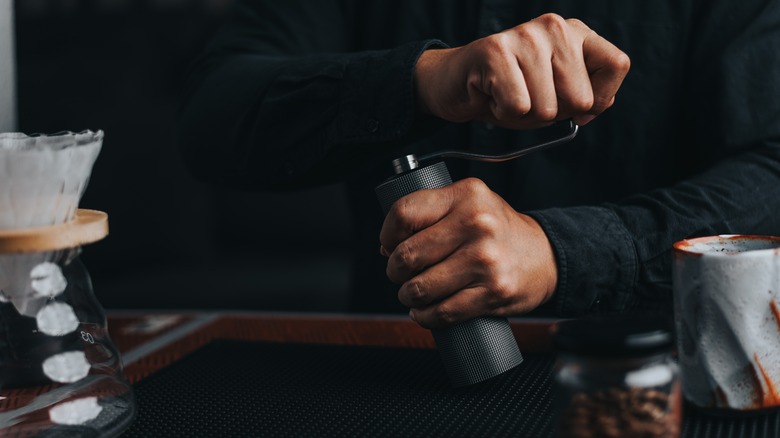
Chances are, anyone who is interested in opting for a pour-over kit over a drip machine is looking to experience a more nuanced taste profile than a drip machine can process. Another way of making sure your pour-over delivers on that front is by being meticulous with the grind. This will vary a bit depending on your unique preferences, and we recommend starting out with a medium grind, which will produce granules roughly the size of table salt. If you choose instead to go coarser, you'll want to brew for a bit longer, while if you go finer, a slightly shorter time is better, depending on the complexities of the extraction process.
If you want to take it a step further and avoid the most common mistakes of making a pour-over, you could always opt for a burr grinder rather than blades, which grind through pressure rather than chopping the beans. This allows for greater command over the size and coarseness of the beans, granting you the choice between what your ideal grind looks like and keeping it uniform. This would be an especially useful tool when adjusting a fine espresso grind, but it also works wonders when it comes to helping you infuse a little extra finesse over your pour-over.
Be mindful of the filter
One recurring cost for this style of coffee preparation is staying stocked up on paper filters, which can be purchased cut into a cone shape for a pour-over kit. Buying the proper size helps to prevent any wrestling with the basket, which you might have to do if you try to use a regular coffee filter. Ordinary paper filters are shaped to fit coffeemakers but not necessarily a pour-over. One important step for pour-over coffee is to use a bit of water on the paper filter before you put the grounds in. This will eliminate the papery taste and ensure the filter keeps its shape during the pour. Anyone who has ever lost control of a filter knows it's something you want to avoid by any means necessary.
Many metal pour-over cones come with a filter built into the basket, and in that case, feel free to skip this step. Not only does that process allow for more of coffee's aromatic oils to come through in the final result, but it causes less waste by eliminating the need for paper filters. However, there will generally be more micro-grounds that make it through, which is why some opt to use metal and paper together. In which case, you'll want to wet the coffee filters. A good mid-way compromise on this would be to use cloth filters, which last longer than paper filters while stopping micro-grounds and preserving the oils.
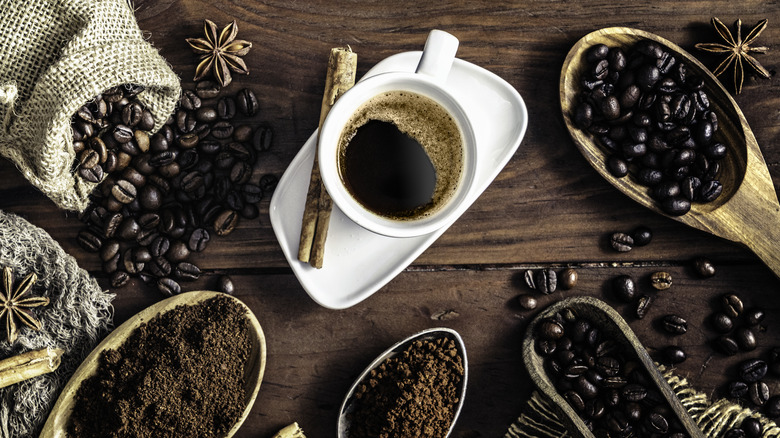
Choose the right beans
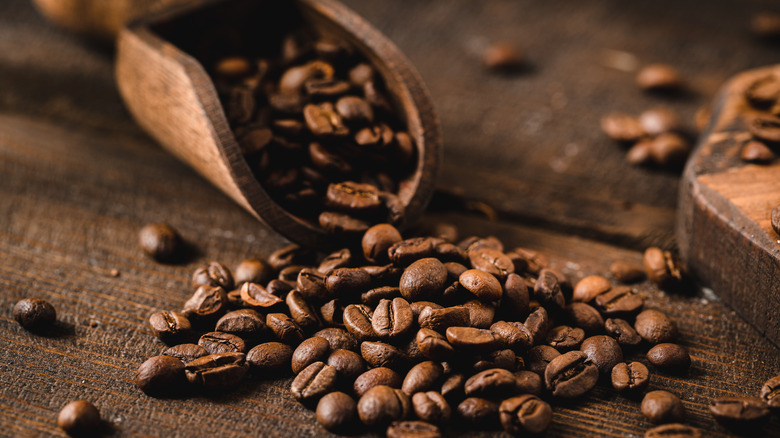
Regardless of how you choose to make it, which kind of beans you gravitate toward will likely make up the bulk of your decisions around coffee. Whether making it at home or ordering it out in the world, if you know the specifics, you'll always be able to order something that fits your unique preferences. Some might choose a dark roast for the deeper, bolder taste. Others are fond of light roasts due to their flexibility and comparative tanginess. Even if you take your coffee with heavy sugar or cream, the underlying profile will be there, meaning it's a good thing to get a handle on right from the start.
Generally speaking, we suggest sticking to light or medium roast coffee beans for pour-overs. Opt for single-origin African beans like Ethiopian Yirgacheffe, Kenya peaberry, or Burundi kavugangoma, which all tend to make for a brighter tasting cup, which is why they're all recurring favorites for many pour-over coffee fans. There are a lot of brands out there, so be aware of what degree of smoothness and complexity you're getting when trying out a new one. For better quality control, buy freshly roasted beans and wait to grind them until right after you start your kettle.
You don't need fancy equipment
It's good to be particular when perfecting your technique with pour-over, but once you've got all the steps down, it's one of the fastest and easiest ways to make great-tasting coffee. There is a reason that this remains such a mainstay for coffee connoisseurs despite the introduction of so many new ways of making coffee over the years. Nailing your time and measurements is important, but owning the latest pour-over model from your favorite coffee equipment brand? Not so much, at least not when it comes to how your coffee tastes.
Even something so seemingly essential as a cone is pretty negotiable, considering that plenty of people simply make use of a cheap, ordinary sieve for making pour-over coffee. These handy tools can be picked up anywhere that sells kitchen supplies as their main tool for making pour-over. Cool new gear can certainly help; the fact is that you don't need much to become a pour-over coffee master. In fact, if you've got a fine strainer, a cup, a kettle, and some ground coffee beans, you've got what you need to get brewing. Everything else is just icing on the coffee cake.
But you can always expand your gear
With everything we said in the last entry in mind, we will admit that fancy coffee gear can be pretty cool to play around with and might help you dialing in your pour-over process. We've already extolled the virtues of the burr grinder and the gooseneck kettle, but even if you just want a nice, individualistic cone, plenty of artists around the world make unique kits sold through online marketplaces like Etsy that can add a lot of color to your morning routine. When shopping for aesthetics, the options are many, so consider taking a little extra time to choose one that works for you.
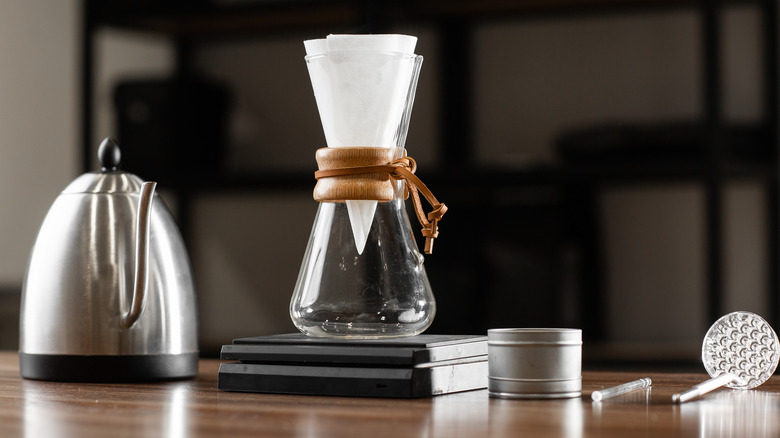
If you plan on making multiple cups, you could spring for a larger Chemex. These devices are simple in design and can easily fit with any kitchen decor. Meanwhile, a V60 prides itself on not only making a quicker cup but for allowing an even flow through the center of your grounds, which gives the preparer a lot more control over the drink. No matter how sophisticated your pour-over gear, these neat little rigs can all deliver delicious coffee, so it's up to you to choose which one works right for you.
Water quality matters
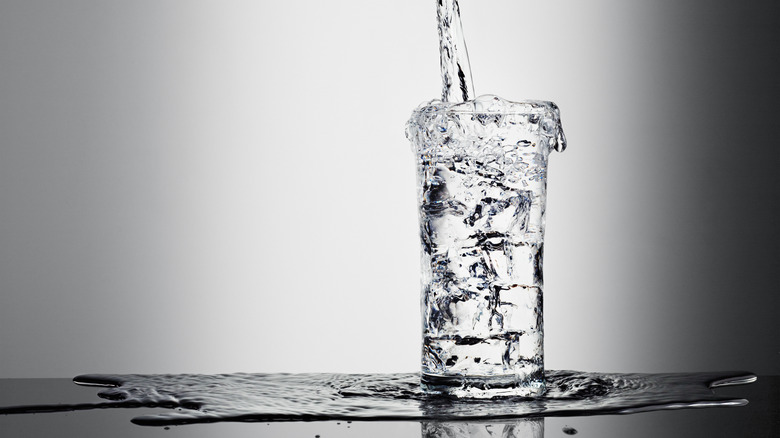
When keeping every other detail you need to know to make your pour-over the best it can be at the front of your mind, don't let your water quality slide. After all, there is no coffee without water, so it deserves to be treated like an MVP. Although even filtering water doesn't always make it safe to drink (filtering doesn't disinfect), filters effectively remove contaminants like dirt, sand, or even some bacteria. Meanwhile, though purified water will make it even cleaner, you also lose many of the mineral values we tend to get out of water.
Further, tap water varies wildly depending on the region, so although some people may feel comfortable simply using water from the faucet, others might reasonably balk at the proposition. Using basic water quality measuring tools like a pH or total dissolved solids (TDS) meter to gauge levels could come in handy. You're looking for neutral pH and around 150 milligrams of TDS when brewing coffee. One water to avoid for coffeemaking is distilled water, which tends not to deliver much of the flavor most drinkers are looking for in their coffee.
Watch it bloom
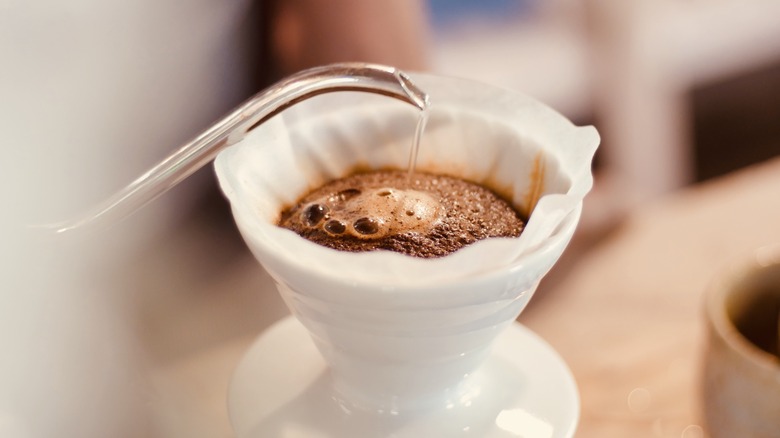
Making sure you've got the right bean, grind, and water temperature for your pour-over can take a lot of thought, but these are all things that will play a role in ensuring that you get a good bloom. The coffee bloom is a physical manifestation of your ground beans releasing left-over carbon dioxide that has gotten trapped during roasting, making it a big part of how you get an ultimately smooth cup of pour-over. It begins as you slowly begin pouring water over the grounds, which should only be enough to soak the coffee grounds at first rather than completely drenching them.
This process generally creates bubbles, but you'll have to wait the recommended 30 to 45 seconds of your initial pour to see them start to form. Skipping this step means that the aforementioned carbon dioxide stays in the beans, making it difficult for the water to fully infuse with the grounds, which makes for a much less satisfying cup. Once it's been degassed, you're free to start adding the rest of your water. For a lot of coffee fans, getting the perfect bloom is the most important element of the pour-over, so take note and include this in your process for the best results.
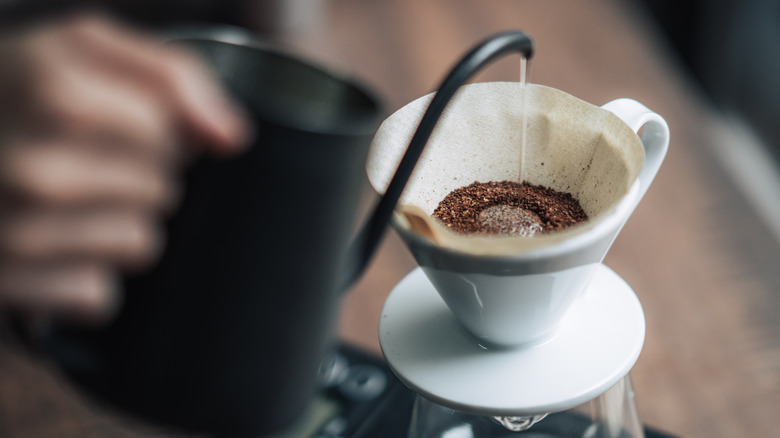
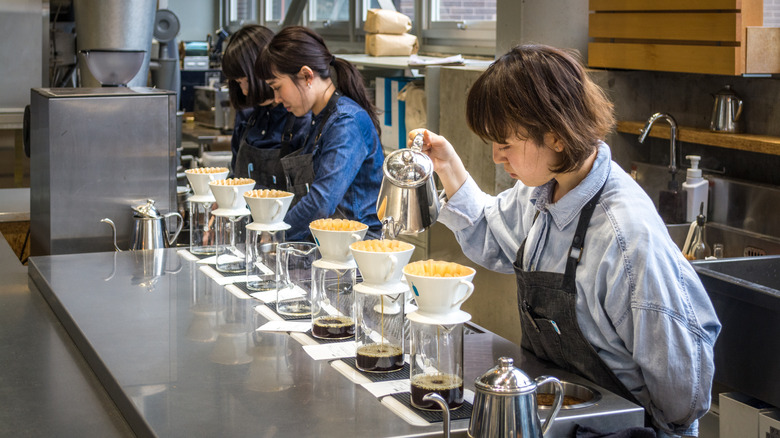
Pay attention to your pour

Even if you aren't incorporating a gooseneck kettle into your method, you need to control your pour when preparing a cup. It's a very short journey from coffee expertise to disaster with pour-over due to the somewhat delicate balance between near-boiling hot water, fragile glass, paper filter, and coffee grounds. As noted, immersing the grounds with water is one of the most important steps in this process, and this can be achieved by starting your pour at the center, then working in a slow spiral to the edge and back again until the coffee is completely covered.
This first pour should take about 30 to 45 seconds to complete, and it'll be what creates the aforementioned bloom. You can follow up with more water depending on how much coffee you're using, how big the pour-over kit is, or how strong you want your coffee to be. It might take a couple of tries to get the hang of the specific timing and technique of this part of the process, but it will quickly become second nature with just a little bit of practice, and that little bit of extra care will go a long way in making a satisfying cup.
Timing really is everything

As you may have guessed by now, timing and precision are your greatest assets when it comes to perfecting your at-home pour-over. As crucial as it is to get it right when it comes to water temperature, grind, and which beans you choose, keeping your eye on a timer and moving quickly but methodically is the key to making all this a smooth endeavor. While it might take a little extra attention to detail in order to nail perfect timing, you'll want to keep the number in mind every time you start your process to keep things consistent from one cup to the next.
The time it takes to make a cup of pour-over varies slightly due to everything from which kit you happen to use to the general atmosphere of the room you're pouring in. Still, you can plan for each completed serving to take about 3 to 4 minutes. This is pretty fast as brewing methods go, but if you're looking for an even speedier approach, you could invest in a V60, which will draw down your time between 90 and 120 seconds. It's not a huge difference, but if you find yourself regularly short on time in the morning, it might be worth the investment to keep your high-quality coffee method in place without running late to work.
Don't be afraid to experiment
Considering how much time we've spent in this article advising you to stay consistent and focused in your pour-over process, this suggestion might seem antithetical, but experimentation is where great things happen when it comes to coffee. Pour-over elements like water temperature and quality need to be consistent; it's also true that mastering one method of brewing sets you up to experiment and explore other possibilities when it comes to grinding and roasting. The fact is that there are endless minor variations to test out, and that can be a big part of the fun of making coffee at home.
Going a little heavier on the grounds could give a stronger, more flavorful cup, but if you feel a little caffeine-fried, you might add more water. Or perhaps you've been drinking dark roast for years and want more subtlety in your coffee's flavor. Even if it's only a matter of what kind of milk you use or whether or not to add sugar, these choices are ones you can easily play around with once you've nailed the basics. Coffee can be a tempestuous drink, but tailoring your cup directly to your unique tastes is where things go from being just another beverage like any other to being something to take pride in.