12 Tips You Need For Roasting Beets
Beets are one of those foods that people either love or hate. And although beets are so sweet they are actually used to make most of the sugar in the United States, some folks think that they taste like dirt. They are root vegetables, meaning they grow underneath the earth's surface in the dirt, so this does ring true to a degree. However, many people enjoy the sweet and earthy flavors of the bright red veggie. While beets can be consumed raw, they are most commonly enjoyed roasted. And in order to achieve a tender, supple, and thoroughly cooked outcome, it's important to follow the tips you need for roasting beets.
If you roast vegetables often, then you already know that there is a right and a wrong way to do it. And when it comes to working with beets, there are several additional steps you'll want to take, especially when it comes to keeping your work area from looking like a murder scene. Beets have a tendency to dye everything they come in contact with, as well as hold onto dirt from the earth, so the prep and cleanup process might vary from your average vegetable. In addition, it's important to not overcook your beets, as the texture can become dry and rubbery. When it comes to roasting the sweet root veggies, stick to the tried and true formula and these tips that work every time.
1. Select fresh beets
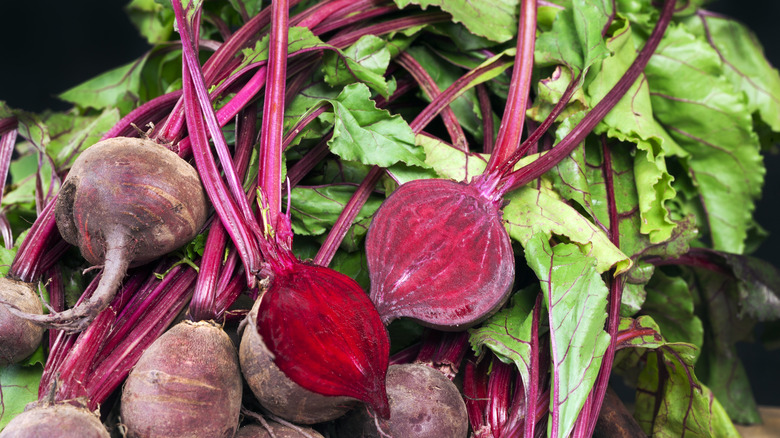
As with any vegetable, it's important to choose the correct variety and to gather the freshest produce you can. Luckily, there are only a few varieties of beets, and really only one that you can find at the grocery store. Orchard beets come in both an orange and red variety, and choosing the color depends entirely on personal preference. However, choosing a sturdy, healthy, and freshly picked beet is not up for debate.
Not only does fresh produce taste better, but it's also more nutrient dense. It often retains more moisture, which can result in a more supple vegetable, especially when cooked. In order to identify fresh beets, you'll want to know exactly what to look for. Firstly, if you've chosen red beets, you'll want to look for deep red coloring. In addition, since most beets are sold with their stems and sometimes greens attached, you'll want to be sure that they are perky, crisp, and bright. Wilted greens are a sure sign that the beets are checking out soon as well. Next, give your beet a good squeeze. If it feels stiff, and the skin is firm then you are good to go. If it has any give, purchase your beets elsewhere. Think of this test like you would when choosing carrots, a similar root vegetable. If they have any give and aren't firm to the touch, then they have since seen their day.
2. Scrub that skin
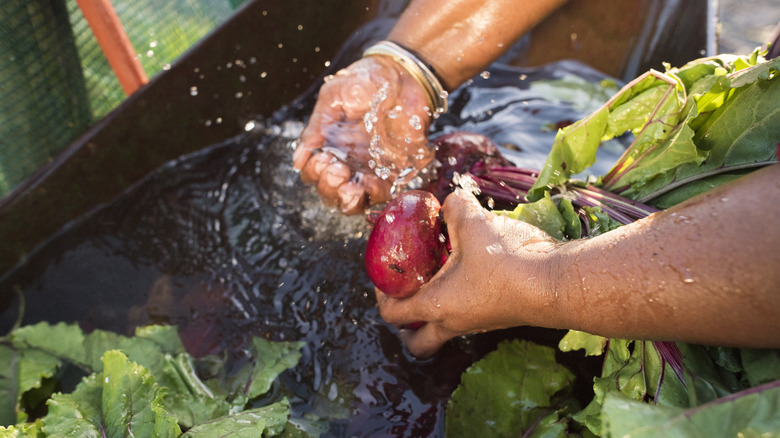
Root vegetables, in particular, tend to cling to dirt with more gusto. Luckily, beets don't have quite as many layers as leeks, for example, so there aren't too many nooks and crannies for dirt to hide. However, it's essential that you use a scrubber to remove any dirt that may be caking the skin, especially where the beet is textured toward the stems. Even if you plan on removing the skin, you do have to wash your produce before peeling it. This rings especially true for non-organic produce, that may have a layer of pesticides on the surface. Even if you believe that the beets are clean, think of how many people have handled them before you selected them at the grocery store or farmers market. Play it safe and give them a good scrubbing. Even if you're not worried about germs, you don't want to end up with a mouth full of grit when you bite into your roasted beets.
Fresh water and a solid scrub brush should do the trick. Forget using harsh chemicals like soap and bleach to get the job done. The porous produce will simply absorb those toxins, and they will eventually make their way into your system. At the very least, they will taste like chemicals and ruin the flavor. Food-safe produce wash is always an option, but water or water in combination with baking soda gets the job done.
3. Don't toss your greens
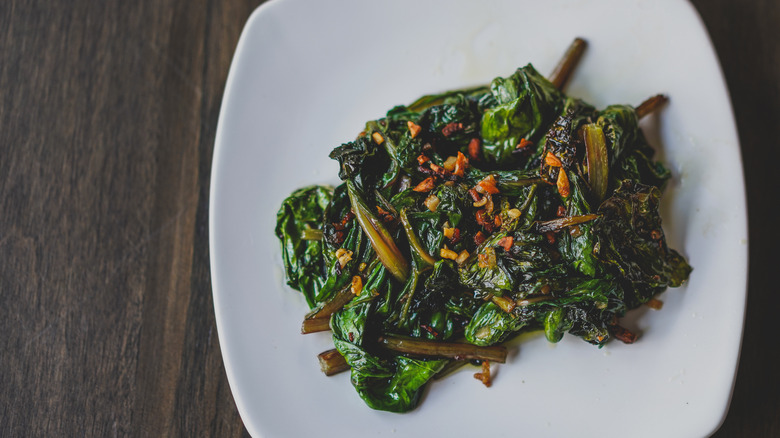
Most beets will come with greens attached. Like onions, carrots, and other root vegetables, those greens are perfectly edible and are not just there for aesthetic appeal. Even if you are just planning on roasting the root of the plant, hold onto the greens because they are a leafy green you should be cooking with, and there are plenty of ways to use them.
Start by separating the leaves at the top of the beet, as the fibrous stems are editable too. Next, just like your roots, it's important to give them a good bath. Use cold water, as greens tend to wilt when exposed to heat. If you're wondering what beet greens taste like and how to cook them, treat them as you would Swiss chard. Beet greens are heartier than lettuce and similar to Swiss chard in texture, sweetness, and even visually. Both have colorful stems and deep green leaves. Beet greens are one of the sweetest varieties of greens and can be eaten both raw or cooked. Simply sauté your greens in a little oil or butter to help the fibers break down, as you might do with kale. Add flavoring like tamari, vinegar, or even a little minced garlic. Salt and pepper are always a safe bet, but you'll find that beet greens are quite flavorful on their own. Chop them up and serve them over your roasted beets for the ultimate dynamic duo.
4. Coat your beets in oil

When roasting any vegetable it's important to coat them in a little oil. Meats contain fat naturally, so their grease is built-in, but vegetables don't have any, or enough to help their outer layer from drying out. Vegetables roasted in oil tend to have a rounded mouthfeel from the added fat, as well as a crispy outer layer, and a moist inside which is exactly the texture you'll want for roasted beets.
Choose your oil wisely. Olive oil's smoke point does differ from other oils, but unless you're planning on roasting your vegetables at an extremely high temperature (or grilling them), you can opt to use olive oil. Its smoke point hits between 350 and 410 degrees Fahrenheit. If you're looking to crank up the heat, opt for coconut oil, peanut oil, canola oil, or even avocado oil. Coconut oil can give your beets a slightly fruity flavor and works well if you plan on using them in a sweet dish. Canola oil has an extremely neutral flavor, while olive oil has that unforgettable richness, and a peppery, grassy, and almost floral note to it. Don't overdo or skimp on the oil. When roasting vegetables, you should use just enough oil to coat the entire surface area without excess dripping onto the pan.
5. Season them with salt
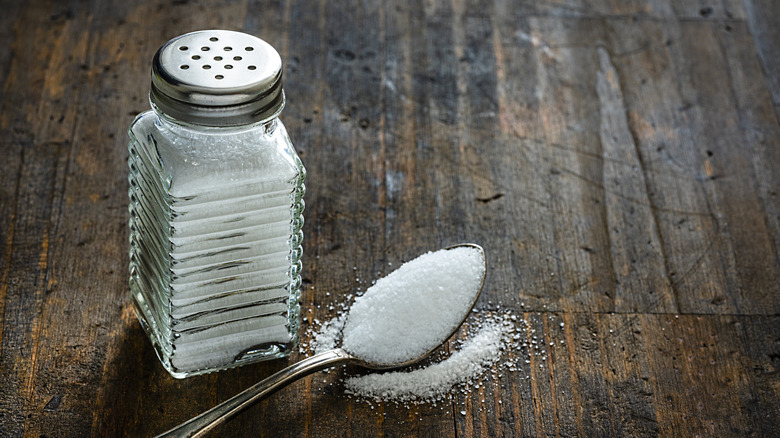
Depending on your long-term plan for your roasted beets, you'll want to season them accordingly. Because you may opt to peel the skin from the beet after it's roasted, you may not want to dedicate too much time and energy to choosing your herbs and spices this early on. However, a simple way to add more flavor to beets is by using just a little bit of salt. By seasoning them with salt and slow roasting them, you can best preserve and enhance their natural flavors.
Salt will help to balance the natural sweetness from beets, and elevate their earthy undertones which can be quite pleasing. Just use a subtle amount of salt, as you can always season the beets after they come out of the oven or have been peeled. Just a light sprinkling, mixed with your oil should do the trick. This technique works even if you plan to use your beets in a sweet capacity, like blending them into a chocolate cake batter or a berry smoothie.
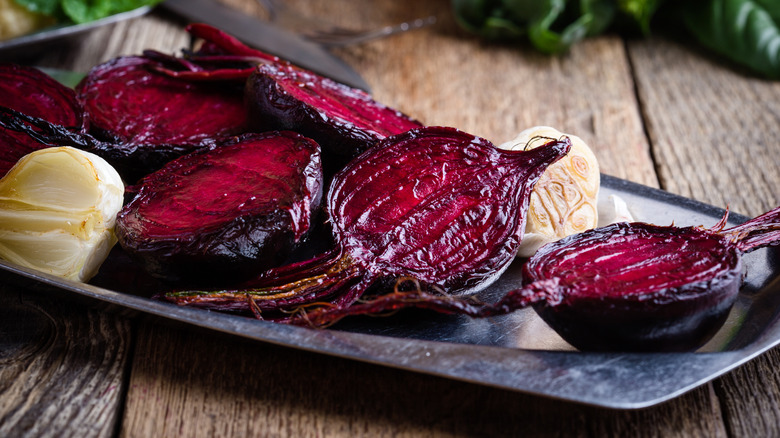
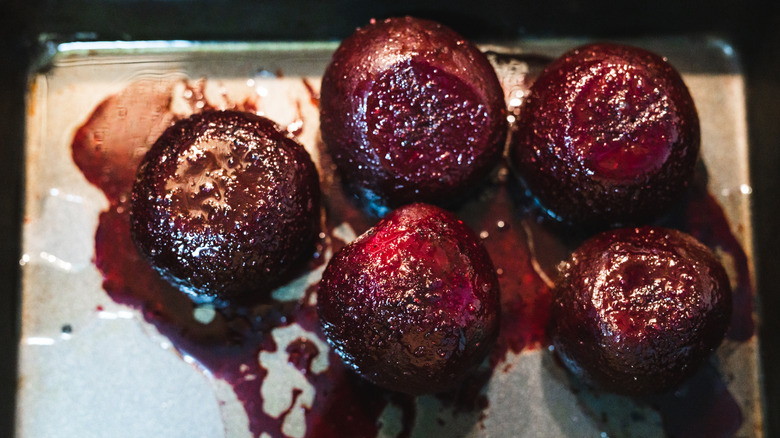
6. Use aluminum foil
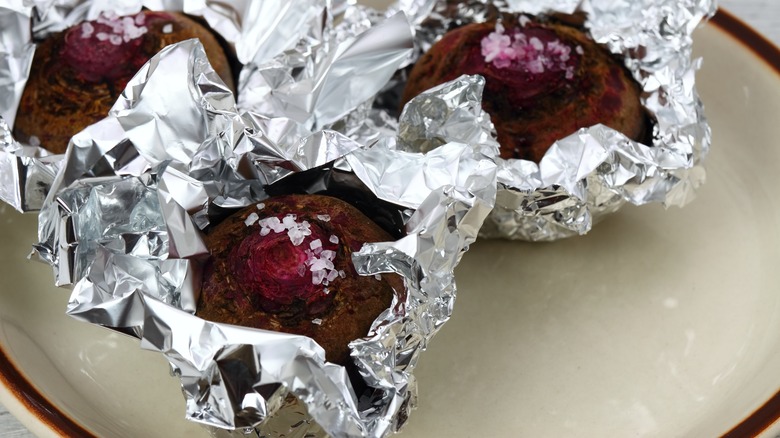
Although it may be tempting to slice up your beets, toss them in oil, and arrange them on parchment paper or a nonstick pan before popping them in the oven as you might do with most of your typical vegetables, beets require special treatment. Yes, if you use your go-to roasting method the beets will turn out just fine, but if you're looking for tender, evenly cooked whole roasted beets then it's worth it to add in one extra step.
Wrap your beets in aluminum foil and keep your beets whole. The skin, along with foil acts as a barrier to keep all of those good juices in, so when you can, opt to keep them intact. Gently wrap the beets individually before placing them on an oven pan. Note that the beets will likely still leak bright red juice when cooked, so you'll want to add another layer of aluminum foil to the bottom of your pan for easier cleanup. If you're unsure which side of your aluminum foil to use, it doesn't really matter. Both the shiny and dull sides have no differing effects. Just be sure the beets are fully encased, which will protect them from burning on the outside, and from drying out. The layer of foil will act as a barrier to trap moisture and cause a degree of steaming to take place. This will result in tender, juicy beets.
7. Roast at the correct temperature

Vegetables, in general, tend to do well at a high roasting temperature which results in a crispy outer layer and a juicy inner layer. A low roasting temperature may dry them out which would make them become rather rubbery, while a high roasting temperature may burn the outside while leaving the inside hard as a rock. Generally, 375 degrees Fahrenheit seems to be the standard when it comes to the best temperature for roasting beets. With the protection of aluminum foil, this temperature allows whole beets to steam thoroughly, and cook until tender.
Of course, the temperature you choose will depend on the results you're looking for. With the protection of aluminum foil, there is a little more wiggle room when it comes to the temperature and length of time that your beets will cook for. Slow roasting does help to preserve flavor and can produce an extremely tender beet. High-temperature roasting is a bit riskier as the beets or juice could burn, and the center could end up crunchy and uncooked, especially for larger, whole beets. Test them along the way if you're nervous, and when in doubt, follow a roasted beets recipe from a trusted source.
8. Keep an eye on your varying-sized beets
As we know, beets come in all shapes and sizes, just like most produce. The standard beet may be smaller than your fist, but they can grow much larger than that, and underdeveloped beets can be as small as a marble, just like potatoes. As we know, anything with a smaller volume takes less time to cook, while larger produce or even cuts of meat take much longer to heat all the way through. This applies to ovens, grills, microwaves, and even stovetop cooking. Because beets vary so much in size, it's important to keep a close eye on the little beets when they are roasting in the oven.
When testing to see if your beets are cooked all the way through, start with the smallest one. To test beets, stab them with a butter knife. The knife should be able to slice the beet fully in half without too much force. You may find that while the knife can easily penetrate the outside of the beet, the core is still tough. In that case, toss those beets back in the oven, because they are not done cooking yet. If you test your smallest beet and it is ready, go ahead and test your largest one. If it's tender all the way though, then you can safely assume that all of the beets in between are just as soft and delicious.
9. Give them a flip halfway through
Unless you're roasting your vegetables on your oven's convection setting, then it's important to recognize that there are only a few heat sources, usually on the top and bottom of your oven, that are producing heat. While some ovens do a great job at evenly distributing this heat, it's never a bad idea to flip your produce part-way through the cooking process. As your beets will be wrapped in aluminum foil, and will likely be producing steam and juice, it's important to use the right tools so you can avoid burns.
When working with liquid-producing foods, it's important not to use oven mitts, as they can absorb the moisture through the cloth and end up burning you. Instead, use tongs to flip those little aluminum foil balls. There is a trick to getting a better grip with your tongs if you're finding the beets are slipping. Simply wrap the ends in food-grade rubber bands, which will produce a grippy, rubbery surface that is easier to cling to than sleek metal. Use heat-resistant, thick rubber bands, and avoid using this method when working with a grill, or any other mechanism that produces open flames. Be sure that your hands don't come in direct contact with the beets or foil until they've had a chance to cool off fully. Even unwrapping them can release dangerous steam.
10. Let beets cool before handling them
Ever bake a pie and decide that you simply can't wait to dive in head first? If that's the case, then you've no doubt experienced a seeping, watery mess, and a burnt tongue. Some things in life take time, and beets are no exception. Once you've tested your beets with a knife and they are supple, tender, and ready to eat, take a beat and wait to handle them (see what we did there?). Instead, set your pan out on a cooling rack or hot pads for at least 20 minutes until unwrapping them from their foil. Even at this stage, it pays to take caution. This will not only give them a chance to finish cooking and steaming but will save your fingertips in the long run.
Once they are cool, slowly peel them with your fingers and let them sit for an additional 10 minutes or so, now that they are exposed to the air. This will also give the skins a chance to cool down, which will make it easier for them to separate from the beet if that's on the docket for you. Practice patience, set a timer, and work on the rest of your recipe until the beets are ready to work with you cooperatively.
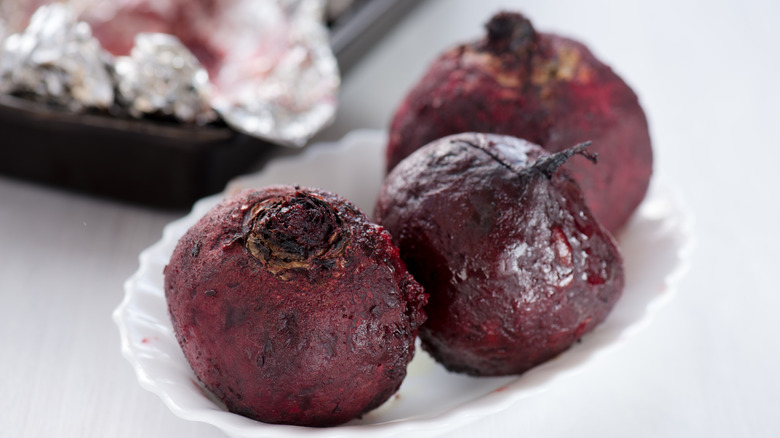
11. Peel them after they roast
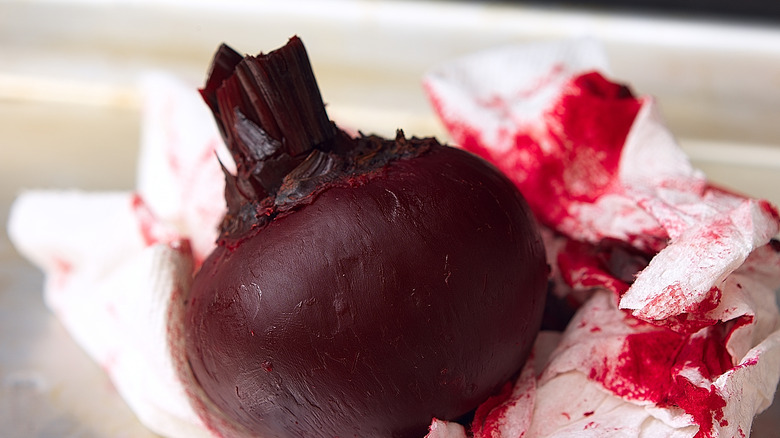
There are some fruits and vegetables in which you'd want to avoid eating the skin at all costs. Spaghetti squash, for instance, would probably eventually break down after chewing, but would not be a pleasant experience, while delicata squash skins are delectable when roasted. Beets, however, leave us with a personal choice to make. Their skins are loaded with fiber, and have a nice earthy flavor to them, but it's quite common to enjoy them after they've been peeled. If you don't like the "dirt" flavor associated with beets then by all means, remove the skin.
If you choose to remove the skin, just note that it isn't hard to do, but can be quite messy as beets produce a deep-colored juice that stains everything in sight. Work in an area that you don't mind getting messy, and simply use your fingers to gently rub the skins off of your roasted and cooled beets. The skins should separate easily, and the process is much less messy than trying to hack away at them with a peeler while they are still raw, which is why you should wait to peel beets until they are cooked. Keep your beet skins for smoothies, blend them with water and freeze them to make colorful ice cubes, or use them as food coloring in frosting, or even for tie-dying t-shirts.
12. Clean your hands and surfaces
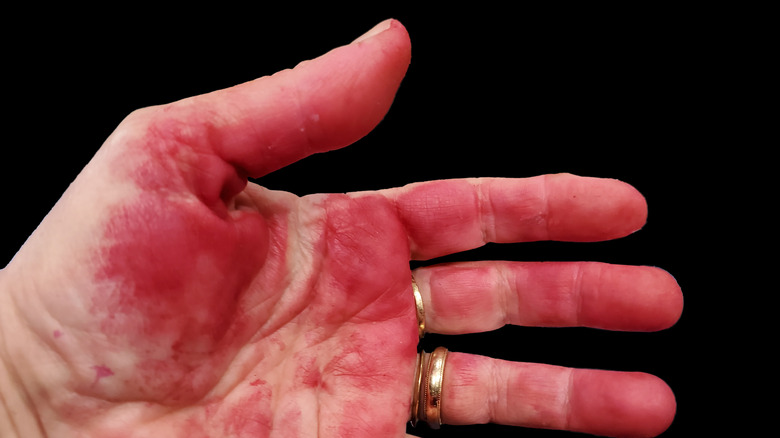
The one downside to cooking with beets is that their bright red juice is difficult to remove from wood, countertops, clothes, and even skin. Talk about getting caught red-handed! As a first line of defense, avoid beet prep mistakes that will leave stains everywhere. Don't use wooden cutting boards, try covering up clothes with an apron, and if you'd like, opt for wearing gloves when cutting the vegetable. However, it's inevitable that at least some of the beet juice will find its way around the kitchen, so it's always nice to have a backup plan.
As it turns out, you don't always need harsh chemicals to remove beet stains. If you catch them early enough, you can use lemon on both cutting surfaces and your hands. Simply cut a lemon in half, and rub it on the affected area. If your hands are particularly stained, and the lemon juice isn't getting the job fully done, try scrubbing them with salt before rinsing with warm water.