15 Mistakes You're Making With Homemade Ice Cream
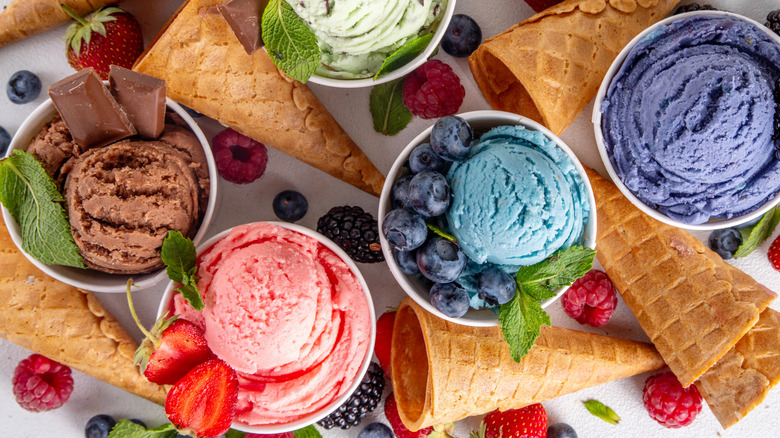
Summertime might be best spent by relaxing poolside with a fruity drink in one hand and a copy of the newest must-read summer romance novel in the other. But, besides an opportunity for relaxation and trips to the beach, summertime also means the resurrection of many of our favorite foods like pesto made with basil from the garden, a plethora of zucchini and watermelon, and our favorite — homemade ice cream.
If you've ever tried to make homemade ice cream, you likely understand how difficult it is to master the science, and the art, of this frozen dessert. And if you've tried to make this concoction before, you've likely had several trials of your ice cream coming out too icy, too dense, lacking flavor, or facing another unfortunate frozen conundrum. We're here not only to explain why your ice cream is coming out poor but also to share ways to help correct these mistakes for your next ice cream-making adventure.
Neglecting the salt
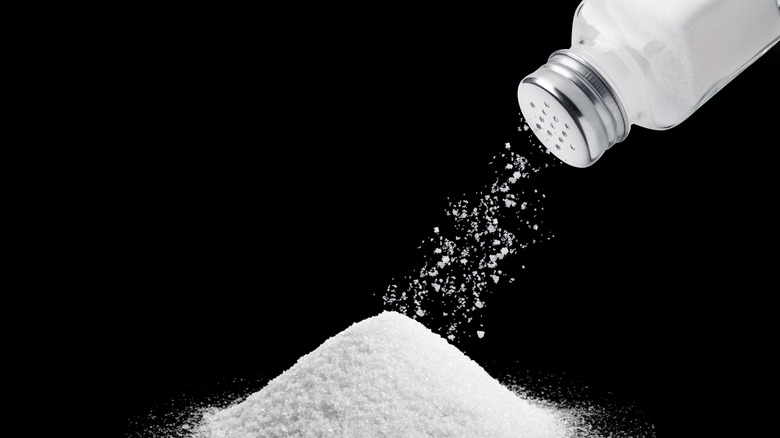
What is a savory ingredient doing in your otherwise sweet ice cream? While we often think of salt as an ingredient for cooking applications like sprinkling on roasted potatoes or rounding out a pasta sauce, this ingredient also plays a vital role in sweet applications.
You need salt to make ice cream at home with an old-fashioned churn because the ingredient helps freeze the cream and the butterfats faster. These old-fashioned churns don't look like the modern ice cream machines that you can plug in and forget about; they are made with a wooden bucket filled with ice water. Cranking the churn moves the cream throughout the steel vessel it's sitting in on top of the ice, which causes the ice cream to freeze. Adding salt to the ice mixture helps lower the melting point of the ice, which in turn allows it to absorb more heat from the cream. This chills the ice cream faster and produces smaller, more desirable ice crystals. If you're using a modern machine that doesn't require any manipulation of the coolant, you should still keep salt handy; it helps mellow out the sweetness of your ice cream — meaning that your dessert will have a more diverse flavor profile to enjoy.
Omitting stabilizers
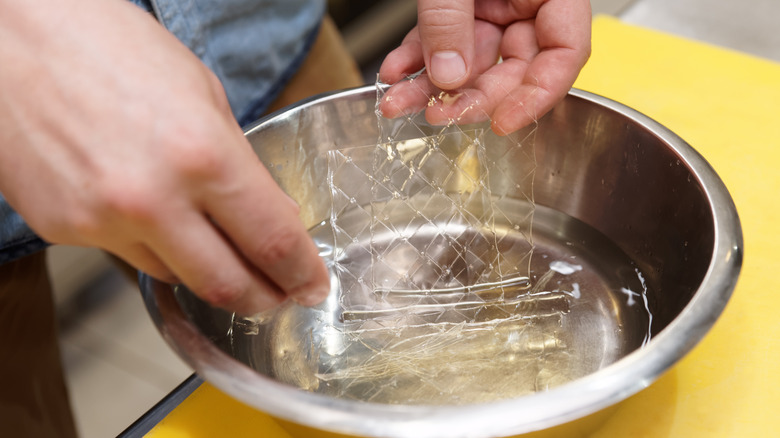
Have you ever wondered why homemade ice cream doesn't soften as fast as store-bought? It's because most homemade varieties do not contain commercial stabilizers, which help keep the ice cream soft. There are several different stabilizers that you can add to your ice cream to help keep it silky smooth, like gelatin or agar agar. If you are avoiding this animal-derived product, you may consider Alton Brown's ingredient swap for perfect homemade ice cream. The "Good Eats" host swaps three tablespoons of sugar in his ice cream recipe with peach preserves.
Peach preserves? Not only does this ingredient impart a fruity flavor to the ice cream, but the pectin in the preserves also helps stabilize the ice cream. If you don't have access to peach preserves (or are making an ice cream that doesn't mesh well with the flavor of preserves), Brown notes that you can substitute liquid pectin into the recipe instead.
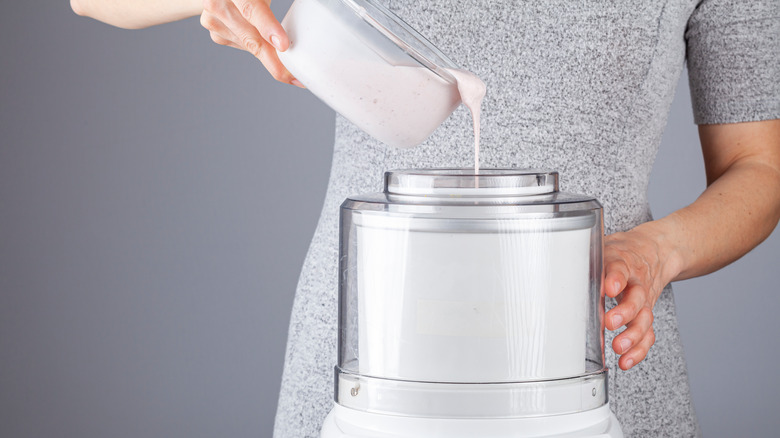
Not resting your base

If you're a veteran cook or baker, you're likely familiar with the all-important resting step. Many homemade ice cream recipes call for letting the ice cream base rest before adding it to the churn. The resting time can range anywhere from a few hours to overnight, which might be a bit mind-boggling if you just wanted a relatively quick dessert.
You need to let the base rest for homemade ice cream because the step will allow the flavors to develop more — and it will dramatically improve the texture of your ice cream. One of the biggest mistakes people make is putting warm custard straight into the churn; this disrupts the proper ice crystal formation and negates the reason for freezing your churn in the first place. Churned ice cream comes out fluffier and holds air better, too, meaning that you can get more volume of ice cream for the amount of cream you use. If you absolutely don't have time to chill your base before adding it to the machine, be sure to chill it in an ice bath until the temperature dips below 40 degrees Fahrenheit before proceeding with your churn.
Only using an ice cream churn
Why would you buy an ice cream churn if you only concoct this dessert once a year? If you're looking to save money (and not have yet another appliance in your small kitchen space), you don't need a special homemade ice cream appliance.
You can make homemade ice cream without using an expensive churn in many different ways. Instead, you can use a pre-chilled pan, bowl, stand mixer, or hand mixer to make your homemade ice cream. These recipes typically use heavy cream, whipped until stiff peaks form, and sweetened condensed milk. Once the mixture is combined, the base is set to freeze overnight. If you want a single-serving option for this hack, try mixing the heavy cream and adding the condensed milk to a mason jar. You can freeze the jar overnight and have your perfect-sized ice cream ready for the next day — with several fewer dishes involved.
Always using heavy cream
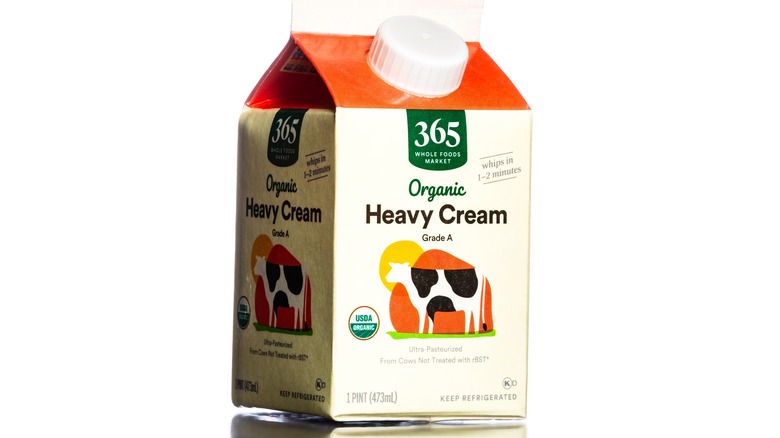
One of the staple ingredients you'll see in homemade ice cream recipes is heavy cream. This dairy product contains between 36% and 40% milk fat; this composition allows the fats to trap air bubbles and hold their shape after being whipped or churned. Plus, the fatty flavor of the cream produces the most unctuous ice cream imaginable.
Despite its utility, there are some downsides to using heavy cream in your homemade ice cream recipe. If you overwhip your heavy cream, you'll find that it starts to resemble the taste and texture of butter. If you have a tendency to over-whip your homemade ice cream, you can make an ingredient swap with half-and-half. Replace some of the heavy cream with half-and-half to avoid developing a buttery film on your tongue while also not sacrificing the texture of delicious, creamy ice cream. And as always, keep an eye on your churn to prevent ruining your ice cream's texture.
Making a recipe without egg yolks
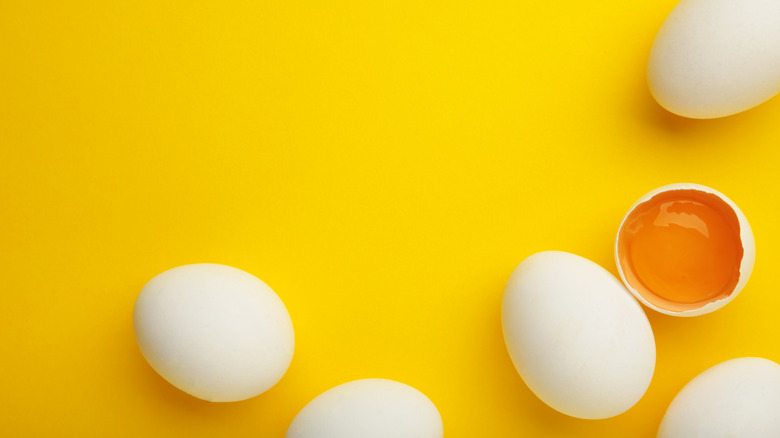
An ice cream made with eggs is called a custard — and there's a reason why it's the superior way to make ice cream. You should always add eggs to homemade ice cream because the yolk provides a distinct flavor, creamy texture, and better emulsion of the ice cream base. On a chemical level, egg yolks are comprised of proteins and fats. Since the fat will freeze softer than icy water, adding egg yolks to ice cream will help boost a creamy consistency. Egg yolks also contain lecithin, an emulsifier that helps bind the water and the fat together.
So how much egg yolk should you add to your recipe? This depends on what you're trying to achieve from the mixture. If you want to just get the emulsifying qualities from the yolks, you'll need to aim for around 1% of your mixture to be made of egg yolks. If you want thick ice cream with the help of the yolks, you might strive for 3 to 4%. And for a distinct yellow hue and eggy flavor, you might add around 8% to your ice cream base.
Not trying other dairy products
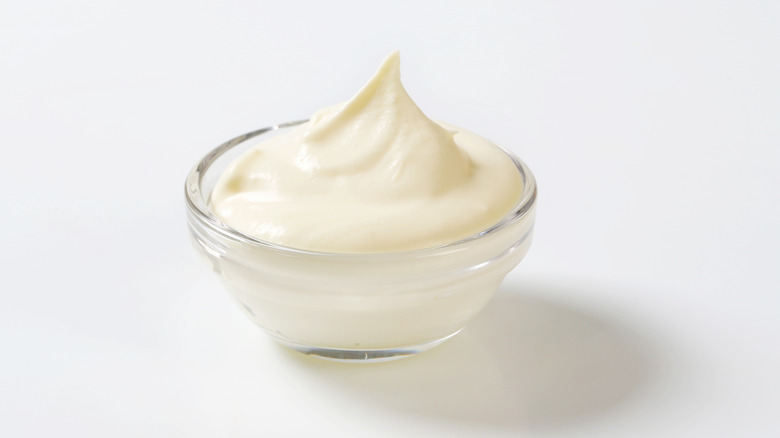
There wouldn't be ice cream without the wonderful world of dairy products. And there are a ton of different dairy products, outside of the standard heavy cream and milk, that you can use to enhance your ice cream. Sour cream is the tangy ingredient you should be adding to the ice cream base because the high-fat content helps make your dessert super-rich. The cultures in this ice cream also help add a distinct tangy flavor increasing the complexity of an otherwise overtly sweet treat.
Cream cheese is another ingredient that will otherwise change your homemade ice cream forever. Its thick consistency helps trap air particles as the ice cream churns, thus resulting in an ice cream that has a distinct chewy texture. In addition, this ingredient has a mild tang compared to sour cream — and it meshes well with whatever flavor profile of mix-in ingredients you choose to add to your ice cream.
Skipping your liquor cabinet

One of the most beneficial ingredients you can add to your homemade ice cream isn't found in your kitchen per se — it's in your liquor cabinet. Adding alcohol is one of the easiest ways to help make your ice cream softer and more scoopable. This is because alcohol has a significantly lower freezing point than water, so the more alcohol you add to your ice cream, the lower its freezing point will be. Since the alcohol won't freeze, it will just add to the mixture's liquid composition (that stays liquid after freezing), thus resulting in softer ice cream.
Despite its merits, you need to be very careful not to add too much alcohol so that your ice cream won't freeze at all. It's also important to remember that when you decrease the freezing point, you'll also decrease the melting point of the ice cream. Therefore, removing the ice cream from the freezer, scooping it, and returning it back to the freezer opens up the opportunity for ice crystals to form and your ice cream to become unpalatably icy. If you're adding liquor to your ice cream, cap it at two to three tablespoons to add a notch of flavor but not to jeopardize the consistency of your ice cream.
Using low-fat dairy products
If you're trying to make foods lower in calories and fats, you should avoid sacrificing your batch of homemade ice cream. While there are low-fat ice creams out there like Halo Top and Nick's, they are prepared using industrial processes (and ingredients) that allow the ice cream to form a seemingly passable rendition of ice cream (even though we all know the taste isn't quite right).
If you're making homemade ice cream, you must stick with high-fat cream. This is because the fat in the cream provides a scaffolding for the partial coalescence (reforming of structures) in the ice cream as it churns. If you use a low-fat cream, you won't have any structure for the air bubbles to hang onto. Milk fat also makes ice cream seem creamier and more buttery on the palate — meaning that you'll get a more well-rounded flavor profile of your ice cream that will linger on your palate longer than if you used a low-fat base.
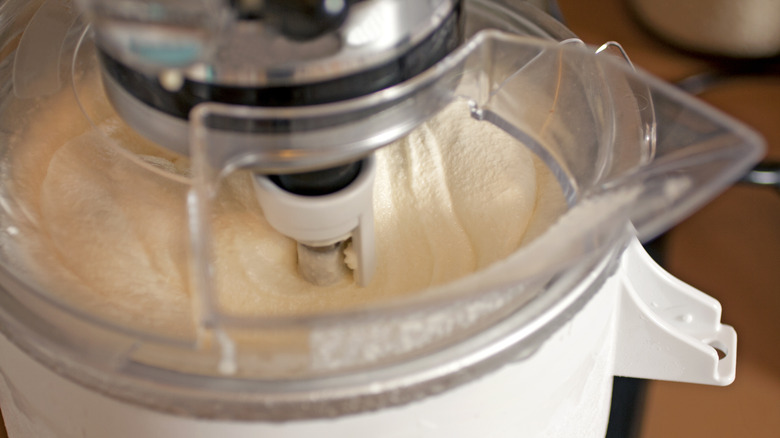
Overfilling your ice cream churner
Once you've perfected your ice cream base, it's time to add it to the machine. Naturally, you'll want to get the most out of your ice cream machine, but we can assure you that filling it all the way to the brim with your ice cream base is not the way to go. You should only fill your ice cream churn between two-thirds and three-quarters of the way full of ice cream. If you add too much cream to the device, the ice cream won't aerate properly — not to mention it will take significantly longer to churn.
Once you've added your ice cream to the churn, how do you tell if it's finished? Not all machines are the same — and it's best to go by the look and sound of your ice cream to determine if it's ready for the freezer. Ice cream that is finished will resemble the texture of soft-serve; if it's looking like hard ice cream, you've likely over-churned it. If you add the correct amount of base to your ice cream maker, you'll also notice that the machine sounds like it's working hard to dash through the ice cream. This time window is around 15 to 25 minutes for many conventional machines.
Adding whole fruit
One of the most popular ingredients you can add to amp up the flavor of your ice cream base is fruit. But, not all fruits are created equal and some are more conducive to making ice cream than others. Fruit is often full of water, which can lend itself to an icy ice cream. This is why you must be deliberate in what kind of fruit you choose and how you prepare it.
If you're working with a non-delicate fruit (like peaches, pineapple, or kiwi), you're best off cooking it down over low heat to help soften it. Then, blend the fruit using a food processor or blender, strain out the seeds or undesirable textural components, and add the purée to your ice cream base. This will give you a more well-distributed fruity flavor compared to adding chunks to your ice cream. If you like fresh, chunky fruit only, consider adding it to the top of your ice cream instead.
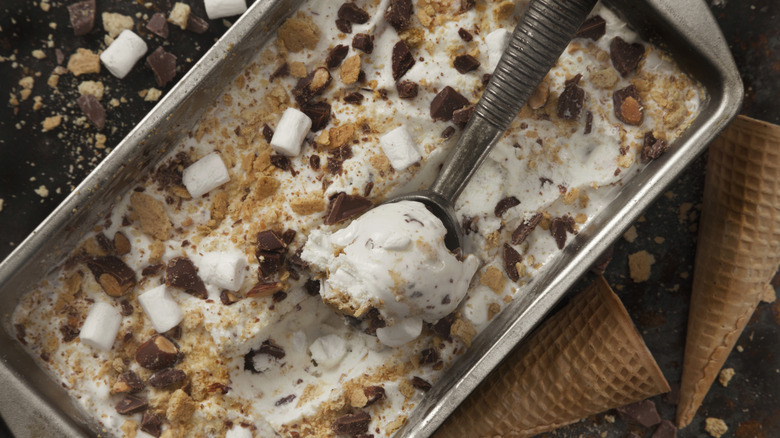
Not correctly prepping your mix-ins
One of the best things about making ice cream is adding almost anything (emphasis on the "almost") to your base without disastrous consequences. But for your ice cream to truly shine, you're going to have to take some necessary preparation steps to ensure that the texture is optimal for freezing and eating. For example, if you're incorporating cake pieces into your homemade ice cream, you'll want to add the pieces to the mixture after it has churned but before you put it into the freezer to set. You'll also want to be sure to pre-freeze your cake pieces to ensure they are sturdy enough to withstand the weight of the ice cream.
If you're adding cookie pieces or any add-in that tends to be dusty, you can run it through a sieve to remove some of the smaller particulates. This will keep your ice cream base smooth and creamy.
Forgetting to chill your ice cream churn
One of the biggest mistakes in making homemade ice cream occurs the night before. If you want to prevent ice crystals on homemade ice cream, you'll need to pre-freeze your ice cream churning container and lid the night before you make your ice cream. And we're not talking about just chilling your bowl; your ice cream machine must be adequately frozen to ensure that your ice cream comes together during the churning stage. Of course, the exact amount of time it will take for your vessel to reach frozen will depend on how cold your freezer is. The best test to determine if your bowl is adequately frozen is to shake the bowl. The coolant has frozen if you do not hear the liquid sloshing around.
If you forgot to put your churning bowl in the freezer in the first place, you can cut your losses and pick up a pint of ice cream instead.
Incorrectly making your custard
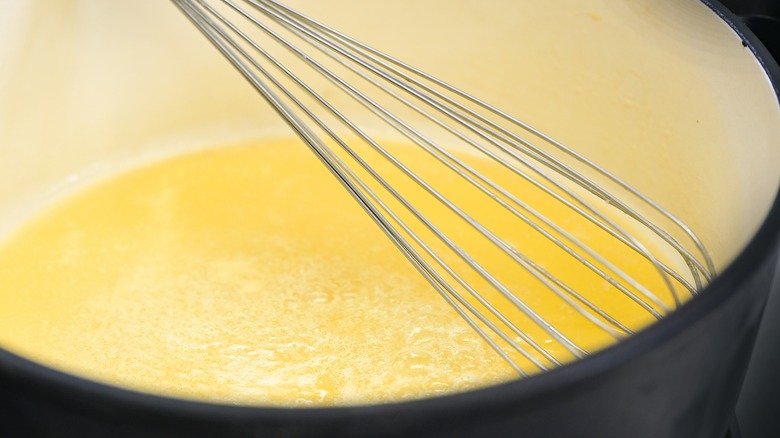
We personally think that the custard route is the best for making ice cream. Including the eggs makes the custard silky smooth, and you'll get a brush of the ingredient paired with whatever flavors and extracts you decide to add to your custard base. But making your custard base does come with some learning curves.
You'll want to start by cooking the heavy cream, vanilla, and milk together in a saucepan until small bubbles form at the edges. Then, incrementally add your steamed milk concoction to a bowl with whisked egg whites and sugar. It is essential to whisk this quickly to ensure the custard is well incorporated. Once the mix has been combined, you can add your new mixture back into the pan, cooking only until you get a temperature reading between 180 and 185 degrees Fahrenheit. If you cook the custard any higher, you risk your entire ice cream tasting like scrambled eggs. After you've finished making your custard base, transfer it to an ice bath for chilling. This step will ensure that your custard mix is cool enough to be transformed into ice cream in your machine.
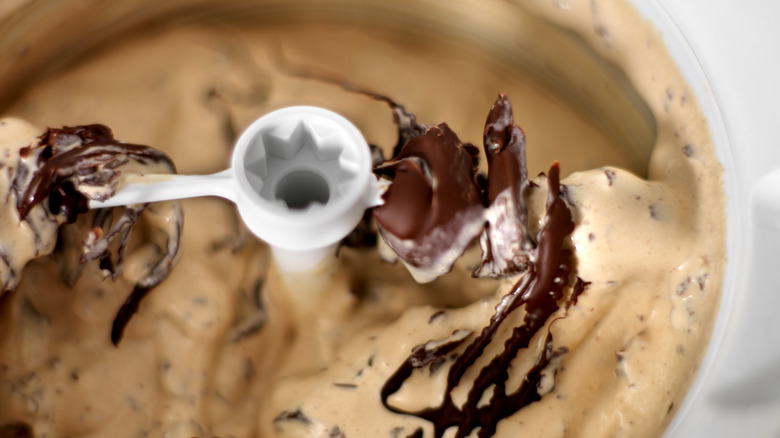
Not getting creative with your add-ins
The best thing about making homemade ice cream is all the weird and wonky things you can add to it. If you love the holiday season and can't get enough of all things candy cane, try making a peppermint ice cream recipe with crushed peppermint candies and peppermint extract. Or, if you love the taste of caramel, you can try to make a vanilla dulce de leche homemade ice cream recipe with crushed mini pretzels. Some ingredients work better in homemade ice cream than others. Chocolate, for example, gets gritty when it's chilled down. To prevent this from happening in your homemade ice cream, you'll want to add a bit of neutral oil to the chocolate and swirl it into your ice cream during the last few minutes of churning.
There are so many flavor possibilities for mix-ins, but how do you decide how much to add? If you want an average chunk ratio, add a half-cup of mix-ins per quart. For extra chunky fans (you know who you are), stick to a cup of mix-ins per quart.