12 Essential Tips For Frying Fish
Spring is the time of year when flowers bloom, the sun reemerges, and fish fries pop up all over the place — at least they do during Lent. Religious practices prevent Catholics from consuming warm-blooded animals on Fridays during Lent, and there is a long-standing tradition of eating fish in its place. Friday fish fries are a popular Lenten activity all over the country.
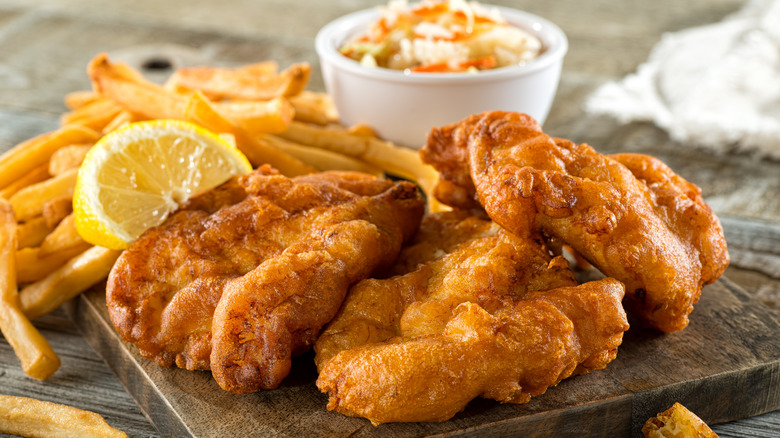
You don't need to be Catholic, however, to enjoy fried fish. It's a common comfort classic food for a reason. Crispy fried fish often paired with fries just hits a spot like nothing else. You can certainly find restaurants that will give you that perfect platter of fish and chips, but what if you want to make fried fish at home? Frying your own fish is not an overly difficult task, but you want to get all the details right so that you end up with crispy golden brown, tender fish instead of a soggy or overcooked mess. Follow these tips and you will be on your way to the best fried fish of your life.
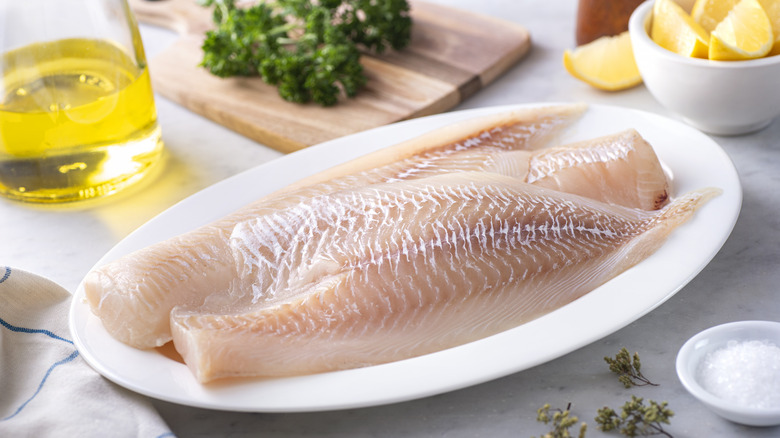
Choose the right fish
If butter on a stick can be deep-fried, then you can fry anything, right? Well, just because you can fry something doesn't mean you should. Fried chicken is delicious, but let's not go back to trying to deep-fry water.
When picking out fish to fry, keep in mind that not all species do well with this cooking method. For example, salmon (which is a very fatty fish) is too oily for frying. The breading tends to get gummy and soggy instead of crispy. Expensive tunas, like bluefin, should also be kept away from the fryer. It'd be a waste of money to fry such a high-value item. It is best for raw preparations like sushi and sashimi. Tuna is another fish that in general can leave you with flimsy, oily coatings due to its fat content.
Instead, aim for fish that holds up well to frying. Flaky white fish like cod and haddock are favorites for classic fish and chips where the fish gets battered and fried. Other good choices include anything from the flounder, perch, and bass families, where you can fry just the fillets or the whole fish. Fish that is on the leaner side and milder in flavor is the best for frying.
Pick the best pan for frying
Frying can be a messy and dangerous activity. You want a cooking vessel that minimizes splatter.
First, you need to decide on what style of frying you want to do. For deep frying, a 6-quart to an 8-quart dutch oven or stock pot will be your best choice. You'll have room for at least a few inches of oil, plus it'll be deep enough for a thermometer to sit in it to monitor the oil temperature. Be careful to not fill the pan too high with oil, or it will bubble over when you add fish to fry.
For pan frying, find a pan with some depth such as a cast iron skillet or a deep-sided sauté pan. With deep frying, the food gets fully submerged in oil, but for pan frying, you only need a small amount of oil, negating the need for such a deep pot. However, you still want to make sure your pan has high walls and is not a shallow-sloping pan. You are still putting a layer of oil in the pan, and you won't want it to splatter all over yourself as the fish fries. Hot oil burns can lead to serious injury.
Decide on your coating
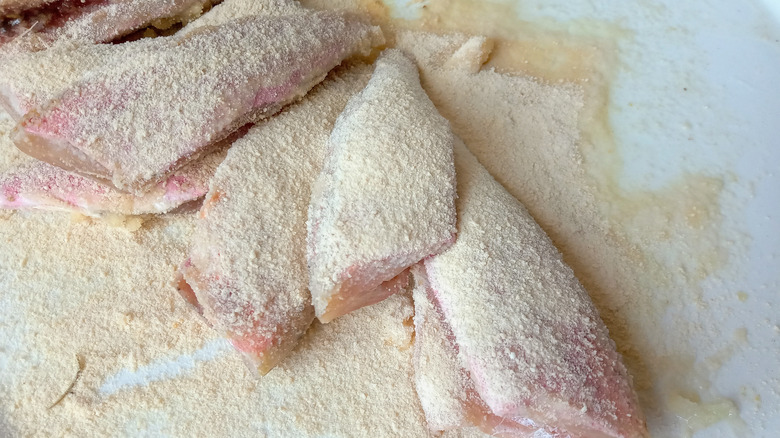
Before your fish heads to the hot oil bath, you need to give it a pre-spa treatment. Fried fish is going to get one of three coatings before hitting the oil: batter, breading, or dredge.
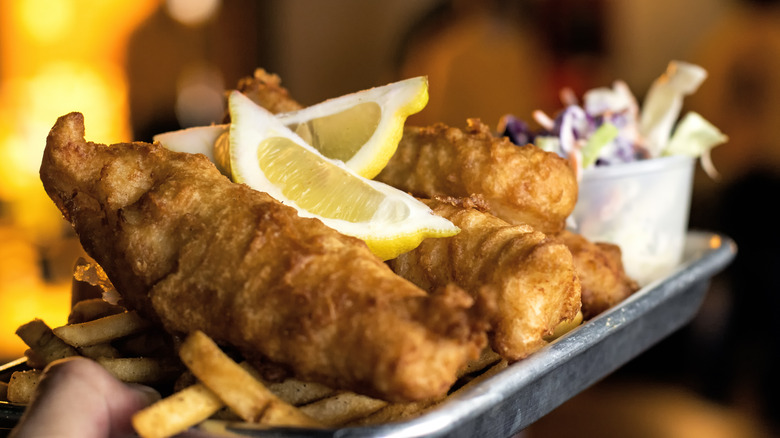
Batters are a liquid coating. All the ingredients (flour, eggs, liquid) get mixed together in one bowl, and you dip each piece of fish into the batter before frying. Fish and chips are an example of battered fish. Batters should primarily be used for deep frying.
For a breaded fish, you will keep liquid and dry components separated. You first dredge the fish in flour, then coat it in eggs or buttermilk (sometimes a mixture of both) before applying the final layer, which is a coarse breading (breadcrumbs, cornmeal, cracker crumbs). Breading can be used for deep or pan frying, but if you are going to use it for deep frying, make sure you aren't using a fish that easily falls apart like tilapia. Dredging is the simplest coating. You just dip fish in flour, like in the first step of breaded fish. You should use dredging just for pan frying. It's great for when you just want a very light crust on the fish.
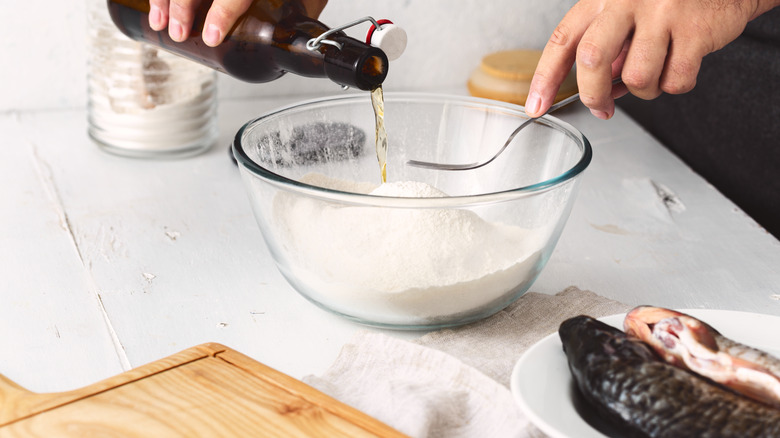
Don't make batters too thick
When you bite into fried fish, you shouldn't see more batter than fish, but this is a common mistake. The best battered fish will have a light coating that crisps up in the fryer. It provides texture and satisfies the cravings for fried food, but the highlight should still be the fish.
There are two major types of batters used in frying fish. Beer batters use beer (traditionally a lager or pilsner) as the liquid component. Tempura, which is a batter in Japanese cuisine, uses club soda. In either case, the batters get their lightness from the carbonation in the drinks.
The issues arise when people think that batters need to be thicker than necessary. If your batter looks like pancake batter, it is way too thick. You can thin the batter by adding more beer or club soda. The proper texture for a fish batter is roughly the consistency of heavy cream. Not so thin that it will slide right off the fish, but not so thick that it puffs up like a pancake. That sweet spot will leave you with an irresistible crunch but you'll find you are still mostly eating fish. Fish is not a cheap protein. You don't want to bury it in breading. Let the flavors of the sea shine by getting the proper consistency for your batter.
Consider pan frying
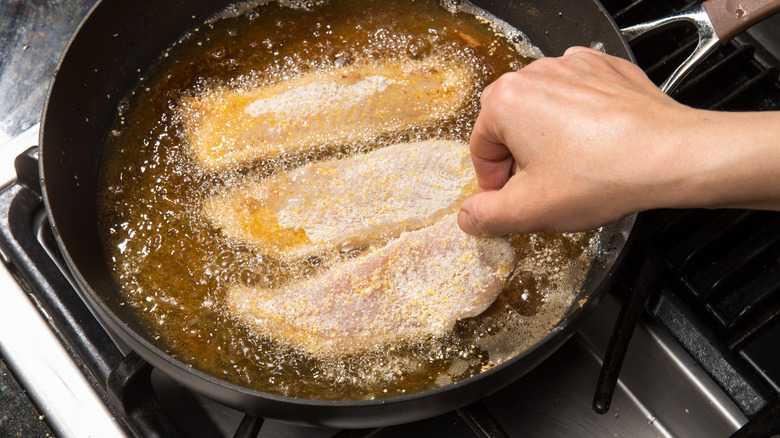
When working with a batter, deep frying is your best option. If the oil is too shallow, you risk the fish sticking to the bottom of the pan before the batter sets. However, not all fish needs to be deep-fried. Sometimes you want a simple pan fry.
What are the benefits of pan frying? It requires less oil, for one. You also don't need a whole pot of oil or any special equipment, and it's generally considered healthier than deep frying, as the fish will absorb less oil this way. Also, if you use the right amount of oil, you will have little to no waste in the end.
Pan-frying is great for fish that has been breaded or dredged in flour. You won't be submerging the fish in oil. Instead, pour enough oil to go ⅓ of the way up the fish (about ½ inch of oil depending on thickness). Get the oil hot in a wide but high-sided pan and fry your fish for about three to five minutes per side, although bigger pieces may take longer. Keep in mind that many of the fish species you might be pan-frying are delicate and can fall apart easily, such as tilapia. This is why it is best to not move your pan-fried fish in the pan too much. Only disrupt the fish when it's time to flip.
Season batters or breading

The same age-old wisdom about seasoning the flour for fried chicken also applies to frying fish. Whether you are using a batter, breading, or a simple dredge, if your coating is not seasoned, the first thing that interacts with your taste buds will be lackluster.
Make sure to salt your coatings whether wet or dry. Salt is the one component that will ensure that every layer of your dish is properly seasoned. You can add other seasonings to your coatings, such as pepper, paprika, or cayenne, but don't skimp on the salt. You should still season the fish itself before applying the batter or breading, but be careful not to season it too heavily or too far in advance. Salt draws out moisture, and it can dry out your fish. A dry surface may seem ideal for getting the batter to adhere to the fillets, but when you go to eat them, you still want to enjoy a moist piece of fried fish.
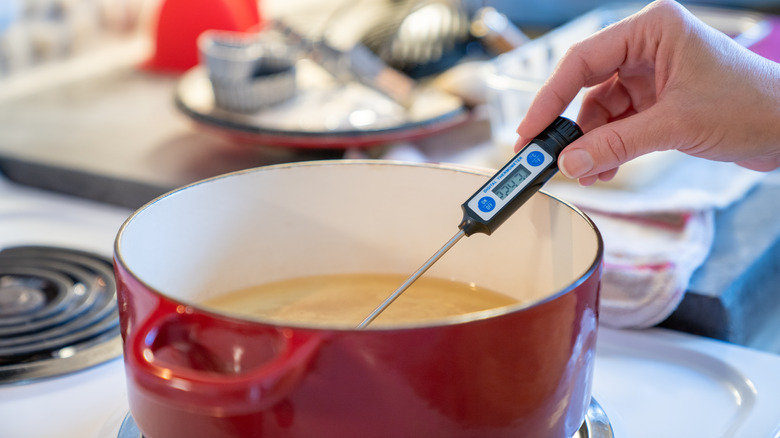
Monitor oil temperature
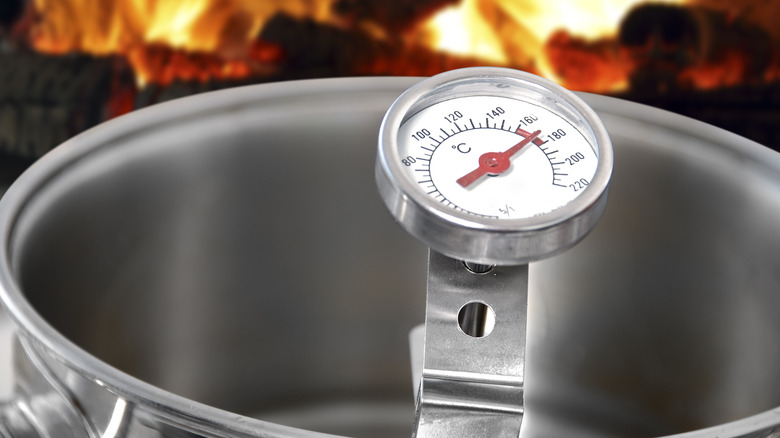
One of the hardest parts of deep frying is maintaining the oil temperature. It's important to keep the oil at a consistent temperature throughout the cooking process for the most oven fry. There are naturally going to be some variances when you add food to a pot of hot oil, but if the temperature lowers too much, you run the risk of not being able to brown and crisp the fish. That dreaded blonde, soggy fried fish is what you'll get.
Factors like the temperature of the fish and how much you add to the pot at once can drastically change the temperature of the oil. To keep an eye on any major fluctuations, it is best to keep a thermometer in your pot throughout the process of deep frying. A candy thermometer with a mechanism for resting on the side of the pot is a great option, but there are also good digital probe thermometers now that can withstand high temperatures. Many have settings that will beep if the temperature dips below a certain level. Aim to keep the temperature at 375 degrees Fahrenheit.
Fry in batches
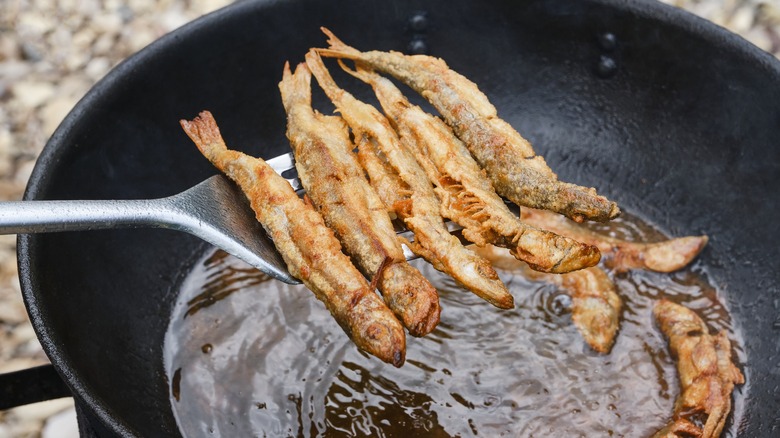
One of the ways that your oil temperature can drop too quickly with deep frying is when you overcrowd the pan, which is a mistake everyone makes when frying food. You have very hot oil, and then when you throw in a bunch of fish at room temperature or colder, that is going to drive the temperature down rapidly. Plus, the colder the fish is the further the oil temperature will drop.
To avoid lowering the temperature too much, fry your fish in batches. Depending on the size of your fillets, start with two to three pieces at a time and see if the temperature remains stable. If there is still room in the fryer, you might be able to add another piece to the next batch. If you are frying much smaller pieces, such as the fillet cut into little chunks, you can fit more into the pot, but still, be cautious of how much you put in that first batch until you know how much the oil can handle.
Don't overcook it

If your fish is too cold when it hits the fryer, there is a big risk of dropping the oil temperature, even if you fry in batches. It's best to bring fish to room temperature for 15 to 20 minutes before cooking.
Allowing the fish to warm up slightly won't just help with the oil temperature, but it will help prevent overcooking. When the oil temperature lowers, it takes longer to see any browning. Seeing a nice brown crust is a sign that your fish is done cooking, but if the oil temperature went astray, the outside color is not going to be a good indicator. If you wait until the fish browns in this case, the flesh will already be overcooked and dry. That is why maintaining the oil temperature is so important. It helps ensure even cooking so you can get that golden brown crust but a tender interior that just flakes apart.
Skip the paper towels
How many times have you read a recipe for fried food and one of the last steps is to drain your finished product on paper towel-lined plates? This advice at one time seemed as ubiquitous as the internet itself. However, we question this long-trusted guidance.
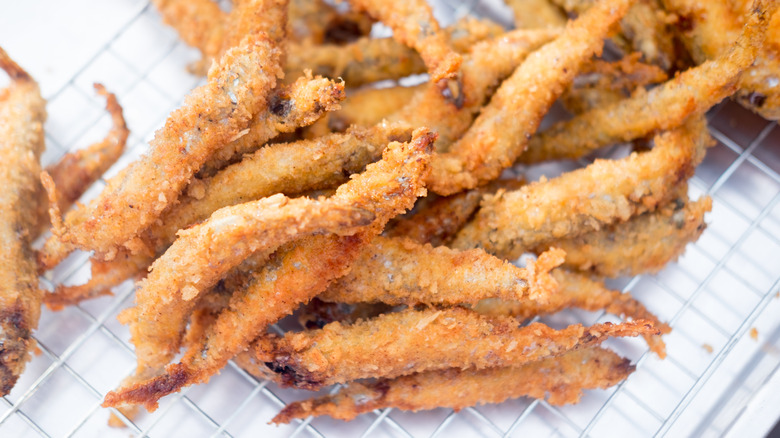
The intention behind this practice is to drain the excess oil from foods as they come out of the fryer so that they are less greasy. The unintended consequence is that the paper towels sitting under the piping hot food create pockets that trap the steam, leaving the crust soggy. The best way to drain the oil without making your fried fish soggy is to lay a wire cooling wrack on a sheet tray. As pieces of fish come out of the fryer, lay them on the wire rack. The oil can drip, but there is room for hot air to escape.
Don't save the frying oil

Did your grandma always have a conspicuous container of an oily substance sitting on the kitchen counter? The substance is probably cooking oil already used for frying but still clean enough for another round. It's very natural to want to reuse oil as cooking oil is a pain to discard. You don't want it going down your drain, so you have to put it in something to toss it in the trash anyway to prevent a mess. Who really wants to throw away an ingredient that still seems perfectly fine? But you should throw it away when it comes to fish-frying oil.
After making fried fish, try to resist the urge to repurpose the oil for everyday frying. No matter what you fry in that oil, it is going to taste and smell like fish. This is why you shouldn't save the frying oil after making fish, that is, of course, unless you plan to fry more fish with it later. If you are going to save it, make sure to strain the oil through a fine mesh sieve and keep it in a tightly sealed jar until your next use.
Serve fried fish immediately
You've done all the right steps to make sure you get the perfect fried fish, so don't let your hard work go to waste. Fried foods shouldn't sit around. When your fish is piping hot out of the fryer, that's when it's at its best. You should serve your fried fish as soon as it's cooked, or at the very least while it is still hot and crisp.
Plan your meal prep accordingly. When you are serving fish to a crowd, try sending it to the table in batches. If you don't want to send the fish out in rounds, at least make sure the fried fish rests on wire racks while the rest of the pieces cook. Remember to skip the paper towels, have your side dishes all ready to go, and make frying the fish your last task. That way when the fish comes out of the fryer, everyone can be ready to eat.