14 Mistakes That Are Ruining Your At-Home Sushi

Lots of home cooks have tried their hand at making sushi with excellent results. It's not as hard as you might think, but there are still a few things you should know, especially if you've had less-than-stellar results in the past. We've outlined 14 of the biggest mistakes people make when attempting sushi at home and given you some ways to improve your skills and reduce frustration. Making your own sushi is a learning experience but definitely a worthwhile one. Rarely will your first roll be perfection, but with a little practice, you can be dining on a stunning array in no time.
Japanese cuisine relies on balance by carefully considering the interplay of texture, nutrition, and aesthetics in each dish. This means that some thought should be given to the combination of umami, sweet, salty, sour, and bitter flavors when you're deciding on ingredients and combinations. That's not to say that you can't just roll up some smoked salmon and an asparagus spear and call it a day, but the beauty of sushi is learning how to use gorgeous components simply and effectively. Read on to find out how to improve your sushi skills and get ready to roll.
Not using the right rice
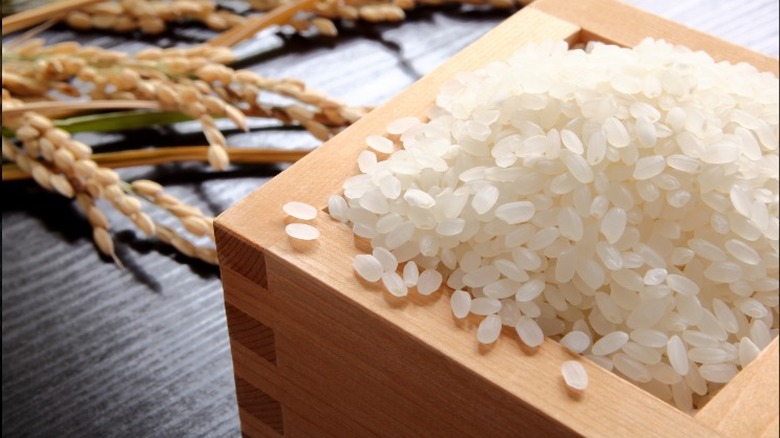
If you've tried your hand at making sushi in the past, you probably already know how important it is that you use the right rice. Japanese short-grain rice (also called japonica) is really about the only kind you should be using. Japanese short-grain rice is shorter and plumper than most other rice and has quite a bit more starch than the other varieties. It's that starch that makes sushi rice work so well, giving the grains just enough stickiness to hold everything together, especially when mixed with seasoned rice vinegar.
If you think you can just sub in whatever rice you have on hand, you will have a disappointing and hugely messy sushi rolling experience. Long-grain rice varieties definitely won't work, and even medium-grain rice might be risky. Brown rice was popular for a time, mostly in California, but know that it is definitely never used in traditional sushi. In the US, Calrose rice is a terrific substitute, but you can also give risotto or Arborio rice a try or any other short-grain rice you can get your hands on. However, any grocery store that carries nori sheets and rice vinegar will likely also have a couple of varieties of sushi rice for you to try.
Not rinsing the rice enough
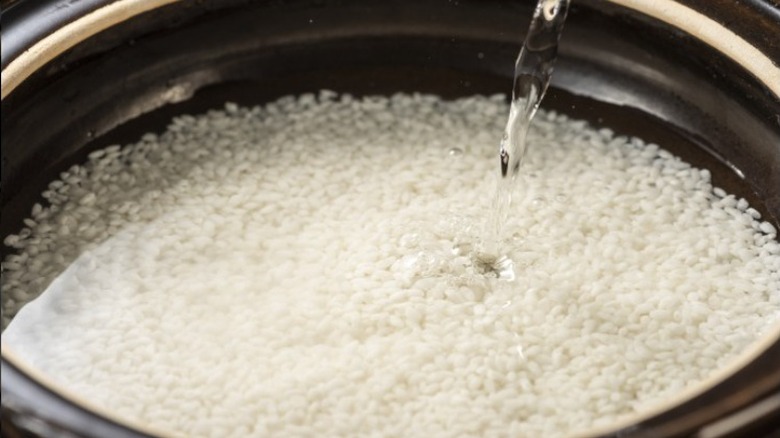
Now that you understand what makes sushi rice so special, you'll understand why it also needs to be rinsed more than regular rice (it's all that starch, remember). Get ready to get your hands wet because those grains need some attention. Dump the dry rice into a bowl and add just enough cool water to cover it; using too much water means that you won't have enough friction to make a difference. Now, start swishing your hand around in there. You'll notice the water quickly becomes milky as you swirl. Drain the water and start again, rubbing the grains between your fingers to remove the excess starch. This process is called 'sharpening' the rice. Continue, slightly increasing the amount of water that you add to each rinse.
Once the rinse water appears fairly clear, after about 10 minutes of rinsing, leave it in the bowl and cover with lots of cool water. Let sit as directed on the package for at least 15 minutes. At that point, the grains should be solid white with no gray spots in the center. This indicates that the rice has absorbed as much water as it can. Drain well.
Not preparing the rice correctly
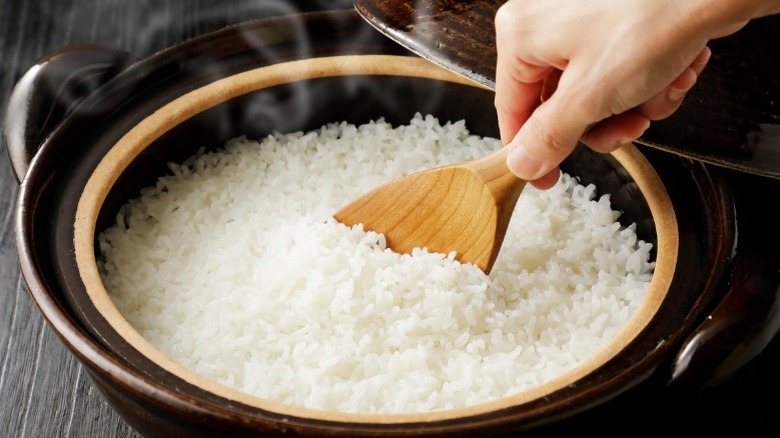
Once your rice is cooked, it still needs a little more work before it's ready for rolling and devouring. As soon as your rice has finished cooking, move it into a bowl with a fairly wide base. You're looking for something with space to spread those grains out, so they cool quickly. In Japan, a hangiri (or sushi oke) is a flat cypress bowl with shallow sides used specifically for this, but anything that has a decent surface area works. You'll also need a rice paddle, but a large wooden spoon or a spatula will do if you don't have one.
The technique for mixing and cooling requires a delicate hand. Slice into the rice at a 45-degree angle with your spatula, lifting and folding the rice rather than just smooshing it. If you have a helper, enlist them to fan it as you're folding. This helps cool it quickly, as well as encourages steam to escape, drying the rice out a little bit. Add rice vinegar (see the tips in the next step before proceeding!) and cover with a damp towel until it's almost at room temperature.
Not using rice vinegar properly
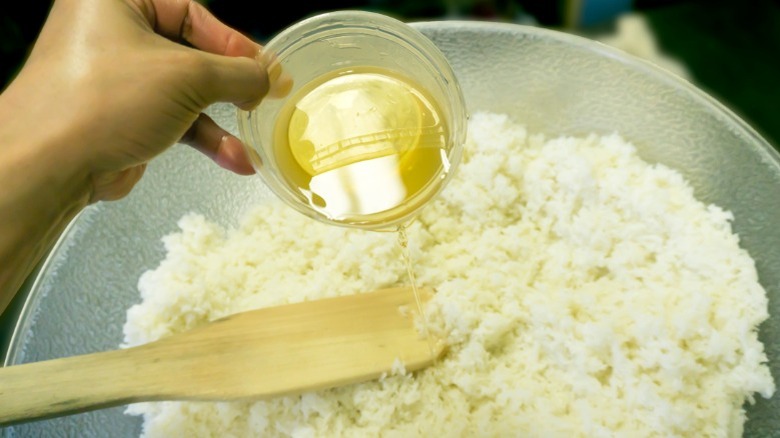
Rice vinegar is used in sushi in a few ways. It flavors the rice (sushi, after all, means 'it is sour') but also works like a charm to keep the rice from sticking to everything. Seasoned rice vinegar is available in most grocery stores, but if you can find unseasoned, it's worth tracking down so you can adjust the flavor to your tastes — seasoned rice vinegar is often too sweet and can contain stuff other than just vinegar, sugar, and salt. Once you find a recipe you like, mix it and add to the rice as you're folding and cooling, tasting as you go.
When it comes time to spread the rice on your seaweed sheets, keep a little bowl of rice vinegar nearby. Dipping your fingers in it helps to keep the rice from sticking, making it easier to spread over the nori. You might be tempted to use water, but vinegar is the way to go here; water makes the rice and nori soggy because you'll need more of it to temper the stickiness of the rice. A quick dip of your fingertips into rice vinegar is all you need.
Not having your ingredients at the right temperature

Since you'll mainly use fresh, raw ingredients in your sushi, knowing how to store and handle them is in your best interest. Veggies can be kept in the fridge but are also fine to sit at room temperature while you're preparing and serving. Most sushi should only sit at room temperature for four hours or less.
It would be best if you had the luxury of letting your rice cool adequately before using it. Don't put it in the fridge, as that will lead to a chewy texture that isn't desirable. Once you've mixed in the rice vinegar, spread the grains out in your bowl and cover with a moist towel until it comes to room temperature (slightly above room temperature is fine, too). As for your raw fish, once thawed, keep it cool and avoid letting it sit out for long. Most experts agree that raw fish shouldn't sit at room temperature for more than two hours (or more than two days in the fridge). This is part of the reason that sushi is made to order — to highlight the best ingredients at the peak of freshness.
Buying fish that isn't sushi-grade
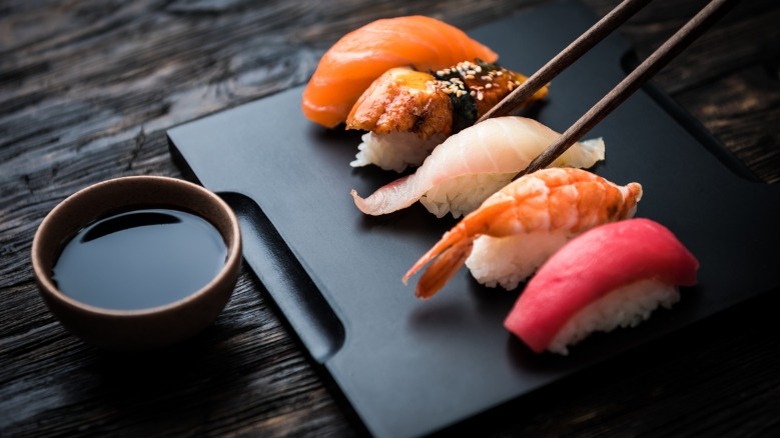
If you're ready to really get into at-home sushi, you might want to add some raw fish to your maki or even give nigiri (raw fish draped over a mound of sushi rice) a spin. But how do you know what to buy? If you're eating it raw, only buy fish labeled "sushi grade." Sushi-grade (or sashimi-grade) fish has been cleaned while still on the boat, packed in ice, then flash-frozen to kill any parasites. This also means that you can't do this at home, as most home freezers don't get cold enough for this purpose.
However, there is no real governing body in the US or Canada that oversees the grading of seafood like beef or eggs. That means you'll have to trust that your fish market has prepared your sushi supplies properly. Tuna and farmed salmon are your best bets if you're still worried about parasites because they're usually the safest. You can also find raw mackerel, seabass, halibut, eel, squid, yellowtail, and many others. No matter what you're using, all raw seafood is only good to sit at room temperature for two hours before it should be discarded.
Not understanding how much time you need
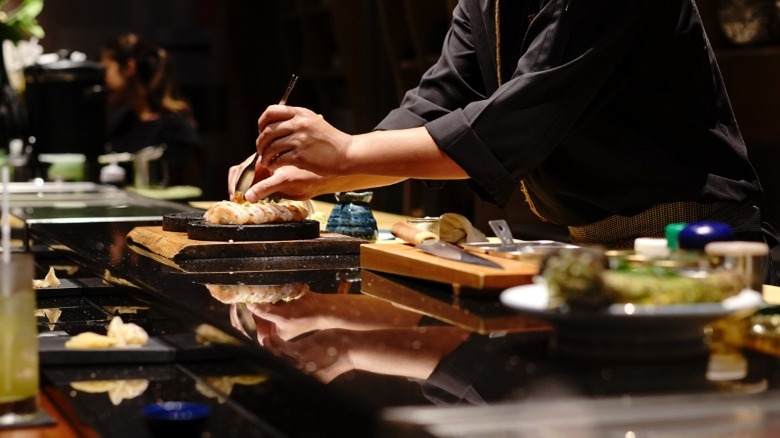
Thinking that you can just start whipping up your sushi an hour before you're planning on eating is another huge mistake. Those tasty fillings take a lot of time to prepare. Luckily, lots of them can be made in advance. However, once you've started filling and rolling, it's a bad idea to let anything sit in the fridge for more than four hours. And once it's put together, sushi is best eaten as soon as possible — that's why sushi chefs make everything to order. Nori gets soggy, and the balanced textures disappear, creating a pretty disappointing pile of leftovers.
There are a few things you can do to help keep your sushi tasty for longer, especially if you know you'll be making it ahead of time. Make sure that your rice is cool before starting, as warm rice still retains some moisture that will get into the nori. You can also individually wrap each unsliced roll tightly in plastic wrap and store it in an airtight container, unwrapping and slicing everything right before serving. This will also help to keep your leftovers from getting hard and dry in the fridge after the feasting.
Adding too many fillings
Filling rolls up too much can happen more easily than you think. Faced with all those gorgeous ingredients, it can be hard to know when to stop. Piling the fillings up too high not only makes it hard to roll but also gives you pieces of sushi that aren't exactly bite-sized. While it's okay to eat a piece of sushi in a couple of bites, you shouldn't need to hold it in two hands to manage it. And it'll be even harder to eat if you can't even get the roll closed in the first place. And, to be honest, sushi is better when you focus on a couple of ingredients that work exceptionally well together rather than just jamming everything in there all at once.
Another way to ensure you have enough room is to use only as much rice as you need. A thick layer of rice will take up space that could instead be used for delicious fillings. Spread a thin layer of rice over your sheet of nori, leaving an inch at the top of the sheet, so it closes properly.
Not properly rolling your sushi
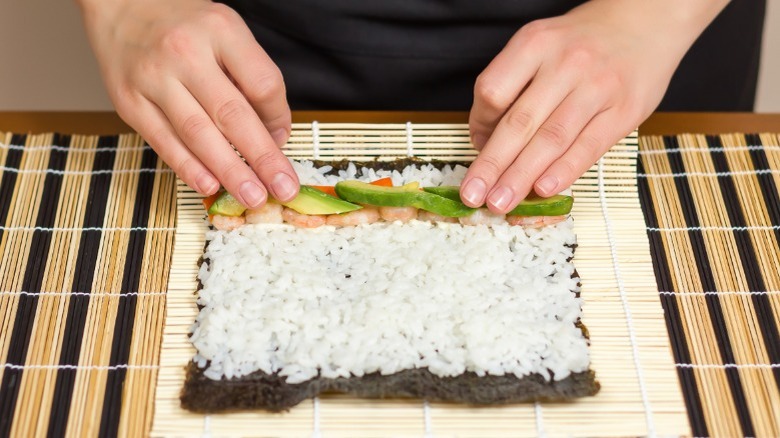
Investing in a decent bamboo mat will make all the difference; even the good ones are pretty inexpensive. You don't necessarily need one — in a pinch, a kitchen towel will work — but you might find using a bamboo mat just works better. Place your mat with the strips running horizontally and the string knots at the bottom, facing you. If your mat has a flat side, that side goes on the table. Next, lay the shiny nori side down (for most rolls). Just remember that the rough side always touches the rice. As well, the lines on the nori must be horizontal.
Slowly roll, squeezing gently as you do, pulling the bamboo mat away as you roll. Don't add moisture to the edge of the nori to get it to stick; it will adhere on its own. Once the roll is complete, give it a slight squeeze to shape it and leave it to sit on the mat for a minute or two, letting it settle. Slice into eight to 10 pieces, eating the ends or discarding them. Some rolls, like uramaki, are easier to slice with the plastic wrap still on. These should be removed before serving.
Sticking to just maki sushi rolls
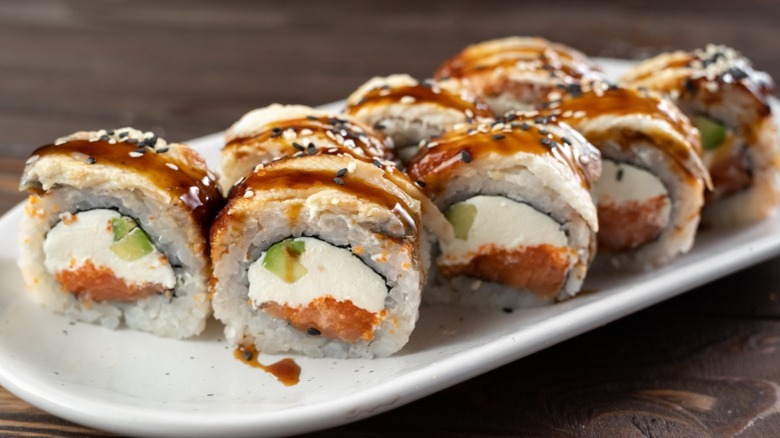
Uramaki (inside-out or California rolls) are different from maki rolls; they were invented in the 1960s as a way to "hide" the seaweed sheets that were still unknown to most Americans. More difficult to make, they can be done at home with a little practice. Constructed by laying a piece of plastic wrap on the rolling mat, covering it with rice, placing the nori on top, and following with fillings, this wrap takes a little more finesse. A common touch is to spread sesame seeds over the plastic before adding the rice so that the uramaki is well coated.
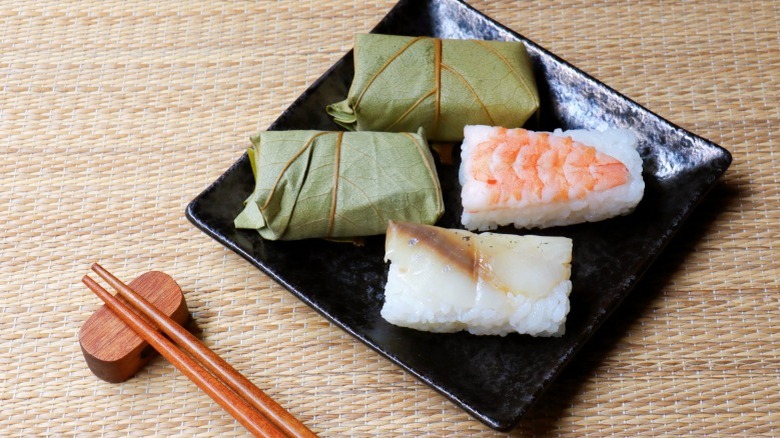
Temaki (hand rolls) are shaped by hand rather than using a bamboo mat. Rice and fillings are added to a quartered nori sheet before rolling into a cone that fits perfectly in your hand. Temaki is a perfect option for a party because they're quick and easy to make for guests to make. Finally, oshi (pressed sushi) is made with a rectangular box (an oshibako), molding the ingredients into rectangles, often without seaweed. Oshi is easy to make and even easier to eat; they're popular for picnics as the pieces can be wrapped in persimmon leaves, making them simple to transport and adding subtle flavor.
Not knowing what ingredients to combine in your rolls

There are obviously a few things that you'll need, but what else are you going to put in those rolls? It's time to start experimenting, and here's where you might find yourself overwhelmed with choices. In Japan, there are a number of classic combinations, as well as combos that are more popular in North America. Japanese sushi often has fewer fillings, mostly relying on the freshest fish and some seasoned rice with the occasional veggie. While over here, we like to load up with all the tastiest things at once.
If you want to expand your horizons, there are plenty of things that go brilliantly with nori and rice: grated carrots in a sweet soy sauce, tempura veggies, tamagoyaki (egg omelet), chicken teriyaki, pickled squash or radish. A little spicy mayo works well with chicken, while smoked salmon and cream cheese are also delightful. Just keep in mind the notion of balance when you're building a roll, combining different flavors and textures in order to maintain an interesting and varied dish. Everything should work in harmony, allowing each ingredient to shine.
Using the wrong seasonings
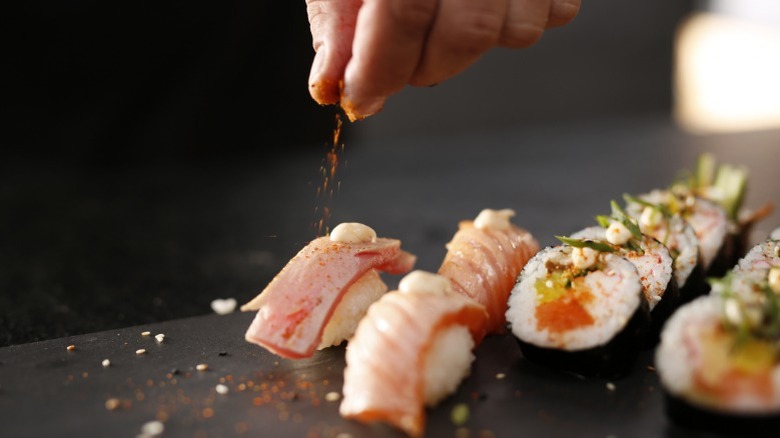
There are a number of ways to season your sushi that you might haven't considered. Aside from wasabi or soy sauce (more on those condiments later) or a sprinkle of roasted sesame seeds, there are ways to magnify flavor. The tangy, sweet vinegar rice works just fine as a base, but sometimes you'd like to add a little bit of extra oomph to your sushi.
Furikake is a savory mix of seaweed, sesame seeds, bonito, soy sauce, salt, and sugar, along with other ingredients depending on the maker. There are blends made for use on nearly every kind of seafood you can imagine, so there's an option for everything you might make. Sprinkle it on the sushi rice to add visual interest with a little extra flavor. If you're looking for something spicier, give shichimi togarashi (Japanese seven spice) a try. A dried red chili-based mixture, it contains black and white sesame seeds, dried orange peel, seaweed, and a hint of ginger. It's pretty hot, so start with just a pinch and go from there. It also makes a terrific spicy mayo when mixed with Kewpie (Japan's mayonnaise of choice) and a squeeze of lime, perfect for squeezing into tempura-stuffed sushi.
Not understanding how (and when) to add wasabi
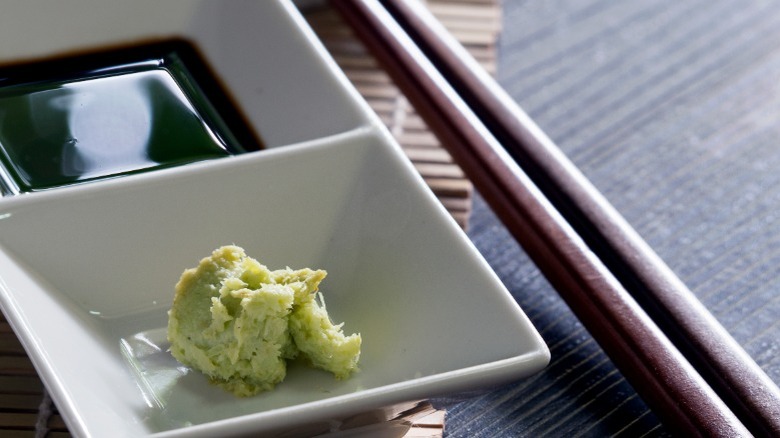
Japanese diners don't often feel the need to season their bites; they trust that the chef has prepared everything in perfect balance with no need for anything added. Japanese nigiri (raw seafood on sushi rice with little else) is often served with a dab of wasabi between rice and fish because it's perfect for enhancing the flavor of seafood rather than just providing a jolt of heat. As a bonus, it's also believed to have medicinal properties, increasing its appeal. In North America, however, we use a lot of wasabi on our sushi and slather it on almost any type we order.
You've probably heard that the majority of the wasabi that we eat in North America is actually just green-dyed horseradish. Real wasabi is awfully hard to grow, making it expensive and difficult to get a hold of here. On top of that, the best way to serve true wasabi is to grate it right before serving as it begins to lose its heat after about 15 minutes, making it hard to package and distribute while maintaining the integrity of the product.
Adding too much soy sauce or dipping inappropriately
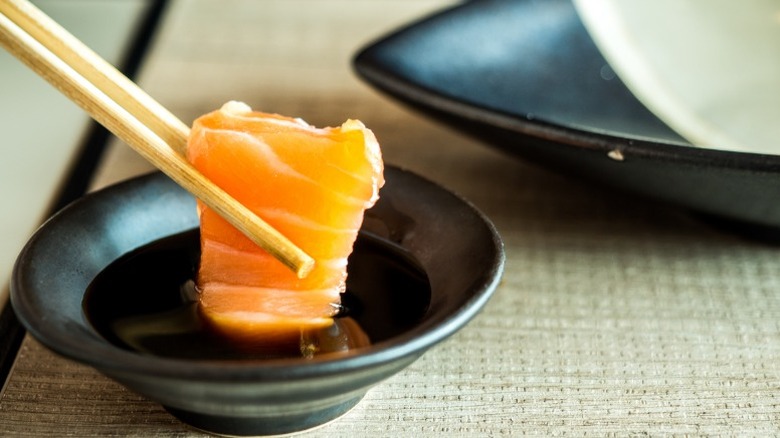
Finally, the use of soy sauce is another difference between America and Japan. Shoyu (soy sauce) should already be added to the vegetables that you've prepared to incorporate into your sushi, so there isn't much need to dip your rolls into it. However, there is an exception, and it's sashimi or nigiri. Both varieties are okay to eat with your fingers, making it easier to properly dip the bite into shoyu. The proper way is dipping the fish side into the soy sauce for subtle flavor rather than absorbing too much into the rice and overpowering everything.
Mixing wasabi and soy is a pretty contentious action, so proceed with caution. Again, your sushi should be made with the balance of flavors in mind, so there shouldn't be much need for anything else. The act of mixing the two is called "wasabi joyu" and is rarely looked upon favorably. Both ingredients are meant to be enjoyed separately, as they bring different elements to the meal, and mixing them just mutes the best qualities of each.