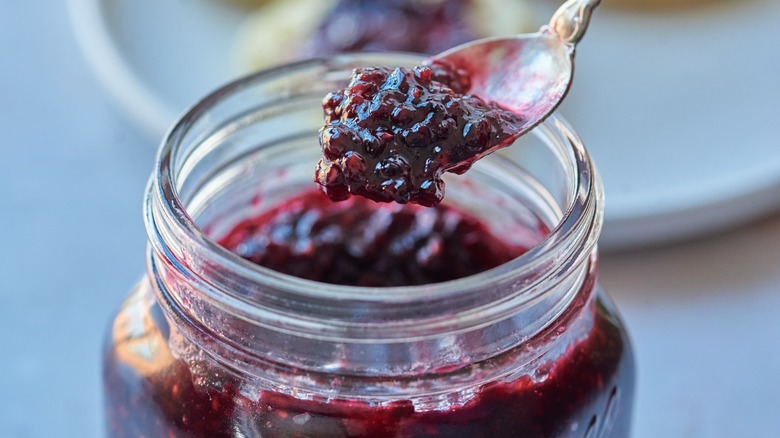
Vanilla Blackberry Jam Recipe
Fruits are one of the most versatile foods to have in your kitchen because something as simple as a blackberries, can transform into frostings, smoothies, syrups, and pies. While the taste of ripe, juicy, fresh fruit can't be beat, squishy, week-old berries can still be repurposed into delicious fruity jams and jellies in as little as 30 minutes. Making jam doesn't have to be difficult or time-consuming, and is the perfect way to use a bunch of berries all at once.
In this recipe written by Michelle McGlinn, we guide you through a simple, no-pectin blackberry jam with a hint of lemon, and the warm taste of vanilla. Because blackberries are naturally high in pectin, this jam is made up of ingredients you probably already have at home. And since there's no need for pectin, the berries will gel on their own with the help of lemon juice and sugar. Still not sure you're ready to tackle jam? We included some troubleshooting tips for making the best of any mistakes, so jump in and get cooking — your next peanut butter and jelly sandwich will thank you.
Gather the ingredients for blackberry vanilla jam
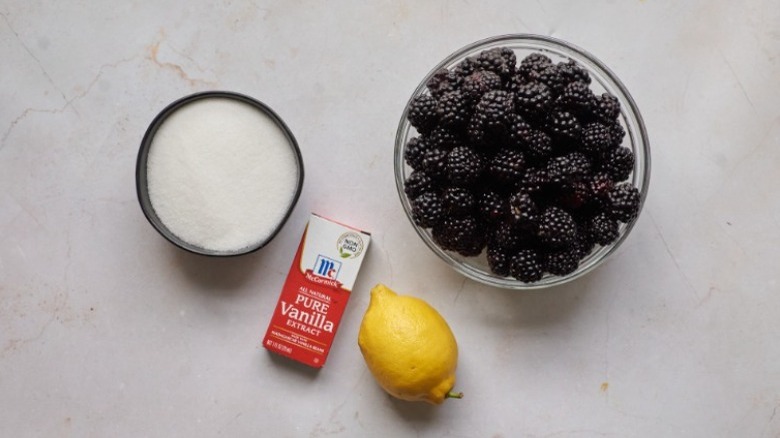
Jams come together easily with very few ingredients, thanks to heat and a good saucepan. The most important ingredient here is the blackberries, and you'll want a few cupfuls to yield a good batch of jam. Look for the large packages in the grocery store, and make sure the berries are fresh.
Otherwise, you'll just need sugar, lemon juice, lemon zest, and vanilla. The sugar in this recipe is enough to make the jam sweet, but it isn't overly sugary nor bland. You can customize the amount of sugar based on your own tastes, or use our recipe as a guide for a subtly sweet jam.
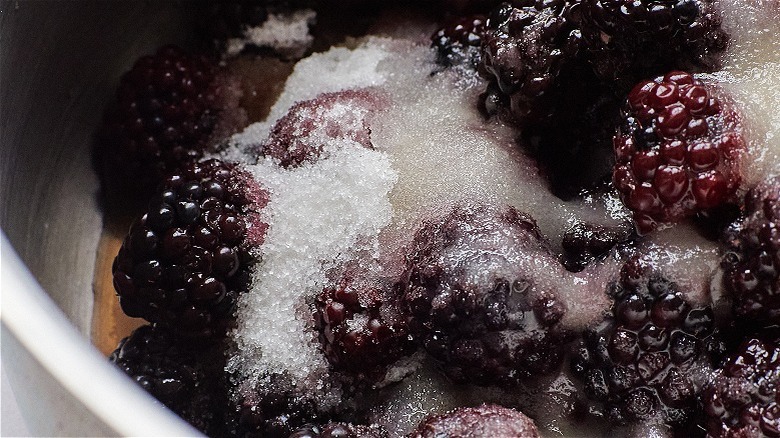
Cook the berries down

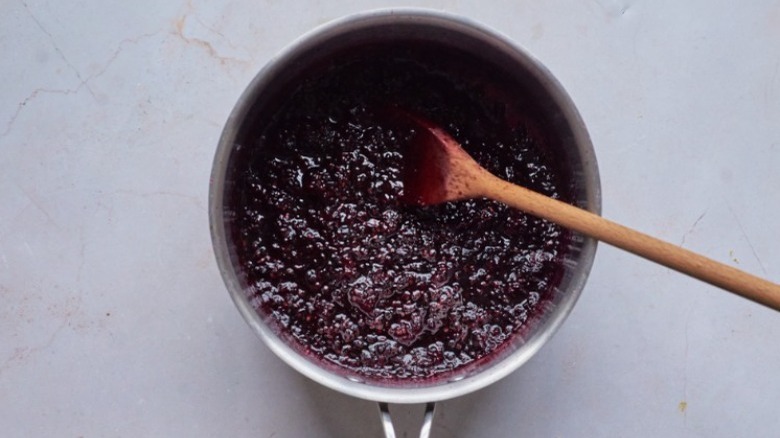
It's important to use a heavy, dense pot for jam, so the berries cook evenly and avoid scorching. Add the berries, lemon juice, sugar, and vanilla to your heavy-bottomed saucepan over medium to medium-low heat. Then, bring it all to a simmer, and stir frequently as the berries break down. At first, the sugar will dissolve, and you'll see little movement otherwise. Next, as the berries start to break down, you'll notice dark, juicy liquid starting to simmer around the berries. As time goes on — you'll need about 30 minutes — the blackberries will lose their shape, and simmer into liquid. You can mash the berries to speed it up, but there's no need to do anything other than stir.
Adjusting the sugar
You can adjust the sugar in the blackberry jam, but note that adding different amounts of sugar affects the gel. Sugar helps the berries firm into gel, so more sugar means firmer jelly that's cooks faster. Less sugar, or no sugar at all, means the jam is missing part of what makes it firm. Blackberries have high natural pectin, so you can get away with very little sugar, but if you want to go sugar-free, you'll need to add pectin to your jam.
If you add more sugar than our recipe calls for, start testing for the gel stage around 15 minutes. If you cut all the sugar, plan to cook and stir a little while longer.
Getting to gel stage
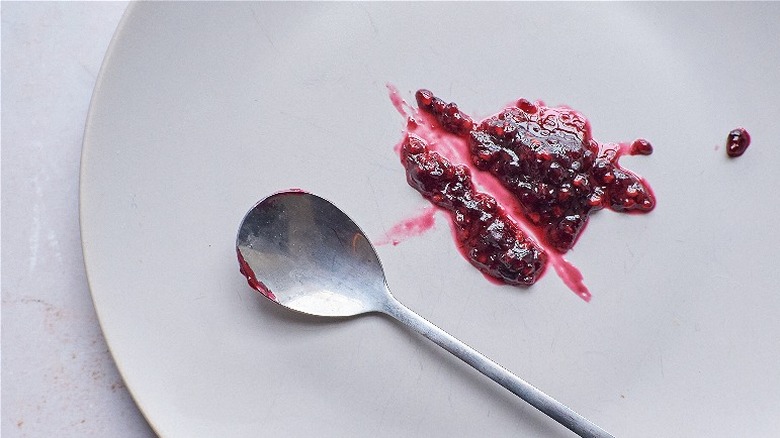
The reason jam can be tricky is because of the gel stage. Of course, you don't want a runny jam, nor do you want a crystalized brick of burnt berries. However, it's hard to tell when the jam is ready because it firms as it cools, so you have to remove it from the heat before it looks finished.
To test the jam before taking it off the heat, place a small plate in the freezer before you start. Around 20 to 30 minutes into simmering the blackberries, when the berries are starting to liquify, take the plate out of the freezer, and drop a dollop of jam onto the cold surface. Because this rapidly cools the jam, you'll be able to see the cooled state much faster than letting the whole batch come to room temperature. Give it a few seconds, then wiggle the jam on the plate. Does liquid seep out, or does it just jiggle a bit? If it's the latter, you're at gel stage. You can also run a spoon through the jam, and if the line stays moderately intact, your jam is gelled. Test this early in the simmering process to avoid overcooking the jam.
How to fix overcooked jam
There's 2 types of overcooked jam: you simply cook it too long and it hardens past the gel stage, or you scorch the fruit by letting the berries burn on the heat. Of course, even if you think you hit the gel stage spot on, there's a chance you cooked the berries a touch too long, and the jam turns out a little firm and bumpy. The jam should be shiny, moist, and be able to slip off of a spoon. If the jam just looks a little dry and plops off of the spoon, add a splash or 2 of water, and stir until the jam is moistened again. You can also reheat the jam with water, until the jam is loosened, then let cool. If the jam tastes off, it may have scorched while cooking and can't be saved — toss scorched jam and try again with fresh berries, making sure to stir constantly.
Storing and serving vanilla blackberry jam
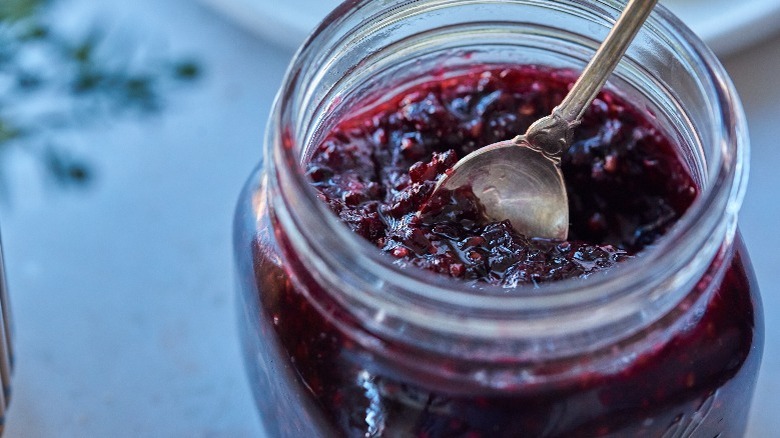
When the jam is done, stir in the lemon zest, and serve. To store this jam without canning, transfer to a jar or sealed container, and store it in the fridge for 2 to 3 weeks. The jam will grow mold when it goes bad.
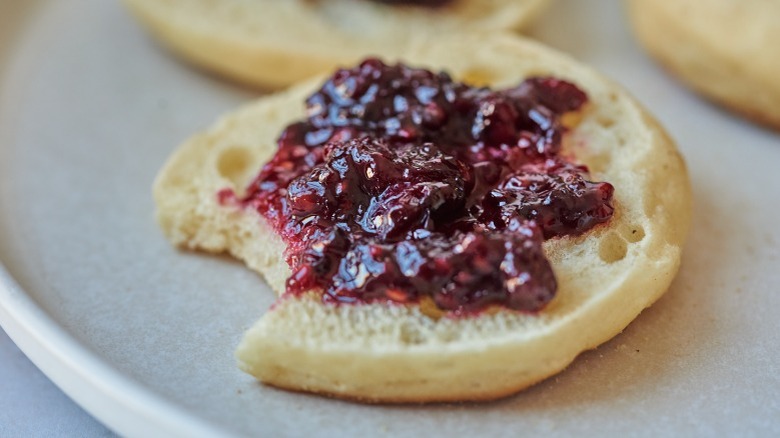
If you want to store the jam for a long period of time at room temperature, can the jam in mason jars by using a hot water bath. To use the jam, spread it on English muffins, peanut butter and jelly sandwiches, or use in macarons or cake fillings. You can also whisk jam into buttercream to make delicious cupcake toppings!
Vanilla Blackberry Jam Recipe
Making your favorite fruity topping couldn't be easier, especially with this vanilla blackberry jam recipe.
Ingredients
- 1 ½ pounds blackberries
- 1 cup sugar
- 1 lemon, zested and juiced
- 1 tablespoon vanilla extract
Directions
- Add blackberries, sugar, lemon juice, and vanilla extract to a heavy-bottomed saucepan. Place over medium heat. Place a small plate in the freezer.
- Heat the blackberries until they begin to break down, and simmer into liquid. Bring the heat to medium-low.
- Continue to cook, stirring almost constantly, until the blackberries are completely broken down, and the mixture is gelled, 20 to 30 minutes.
- To test readiness, take the plate from the freezer, and spoon a small amount of the jam onto the plate. Jam should set up and be loose, but not runny. Run a spoon through the jam; if the line stays intact, the jam is gelled.
- Remove the jam from the heat, and let cool completely. Stir in the lemon zest, and add the jam to jars to store.
Nutrition
| Calories per Serving | 70 |
| Total Fat | 0.2 g |
| Saturated Fat | 0.0 g |
| Trans Fat | 0.0 |
| Cholesterol | 0.0 mg |
| Total Carbohydrates | 17.0 g |
| Dietary Fiber | 2.4 g |
| Total Sugars | 14.7 g |
| Sodium | 0.7 mg |
| Protein | 0.6 g |