The Biggest Mistakes Everyone Makes With Canned Beans
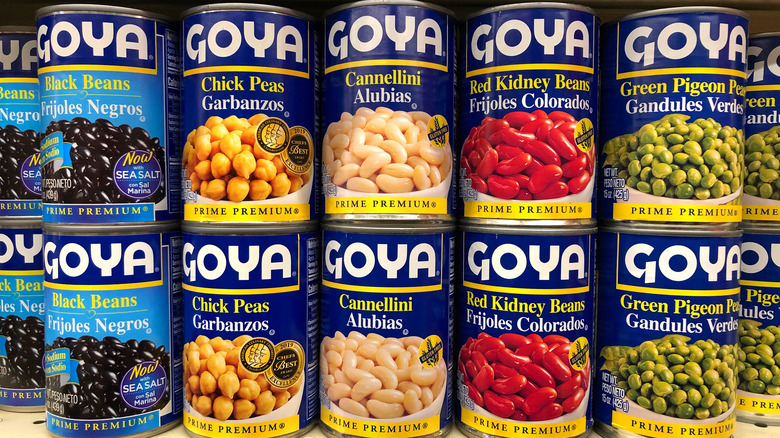
Canned food can be such a lifesaver, whether you're simply popping it open and digging in or adding it to a recipe. Canned beans, in particular, are a common food staple picked up at the grocery store, with a variety of uses. Perhaps you're blending a can of chickpeas for homemade hummus or simmering a serving of mixed beans to make chili.
There are many factors to examine when observing the relative benefits of canned versus dried beans. Nutritionwise, SF Gate confirms that the difference between the two is minimal. Meanwhile, the sustainability argument favors the dehydrated variety (via sustained kitchen). Then, of course, there are culinary aspects to contend with too.
While it's certainly possible to meal prep an assortment of dried legumes every week, let's face it — it's not always possible if you want to maintain some balance in your schedule. That said, as long as you avoid several common mistakes when using canned beans, they'll quickly become your favorite pantry staple.
Not rinsing and draining the beans
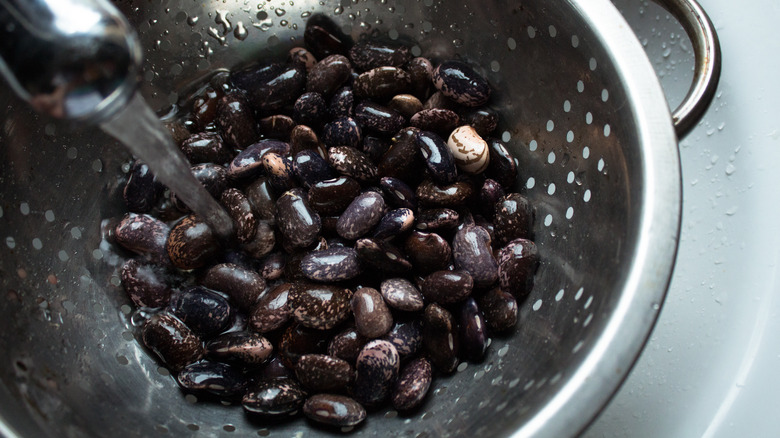
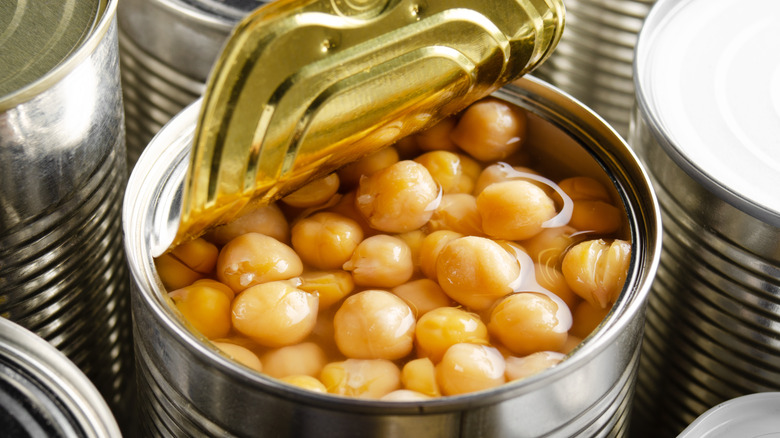
Certain canned items — like fruit in syrup — are ready to eat, but beans minimally require two steps: rising and draining. The liquid itself is meant to prolong shelf-life and keep them fresh. According to Bush's Best spokesperson Teesee Moore, via HuffPost, it basically consists of water and salt, which cause the legumes to release starches over time. While you shouldn't toss it all away (more on that later), it's advisable to separate it.
They become coated in the salted, starchy liquid when they're canned. So, to avoid undesirable flavors or textures from the residue, you should always rinse canned beans. The test kitchen folks at Better Homes & Gardens point out that rinsing also helps eliminate any metallic flavors they might have acquired from the can.
It's also worth noting that the primary nutritional downfall of canned beans is their sodium content (via SF Gate). However, according to the results of a 2011 study published by the Journal of Culinary Science & Technology, there is a notable decrease in sodium content before and after rinsing them. As an added bonus, nutritionist Monica Reinagel notes that passing canned beans through water can lower the compounds that create digestive discomfort and gas (per Nutrition Over Easy).
Nevertheless, depending on the dish you're making, you might not want excess water, either. Be sure to shake the beans off in a colander and leave them to drain for a few minutes following a rinse.
Using a damaged can
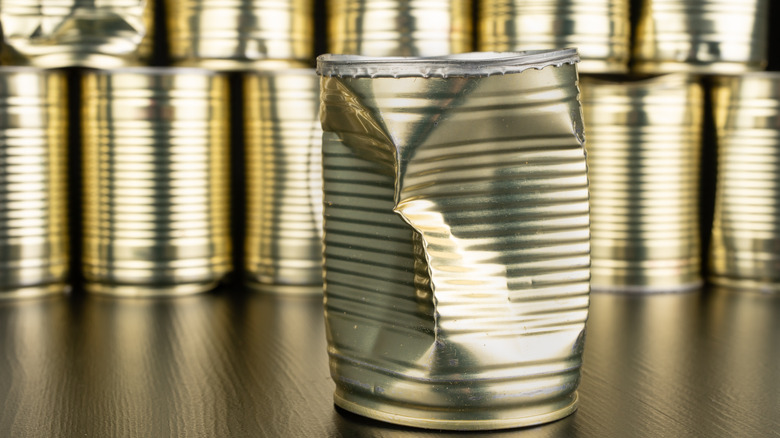
Canned food is especially convenient thanks to its durability. However, every now and then, the rigid aluminum exterior of the can is damaged, be it through the distribution and shipping process or when you accidentally drop it. While the source of the dent in the latter case is evident, buying a compromised can is a bit of a riskier scenario.
If we're only talking about a minor indentation, your beans should be fine. However, the U.S. Department of Agriculture reports that more pronounced dents with notably sharp edges are potentially unsafe. In particular, when the seam of the can is damaged, bacteria have a direct route of entry. To determine whether the airtight seal has been affected, press down on the lid to see if there is a popping sound (via Modern Survival Blog).
To alleviate any hesitations about the state of the insides, just open the can and examine the contents. Any hissing, spraying, or foul odor clearly signifies that you should toss it out. Meanwhile, some cans show signs of bloating, with or without dents. The U.S. Food & Drug Administration notes that this characteristic can be due to microorganism activity (including botulism) or spoilage. If you're ever in doubt, don't take a chance.
Not making necessary adjustments if substituting for dried beans
Substituting dried beans with canned in a recipe is a good trick to reduce prep time and get dinner on the table more quickly. However, you risk ending up with less than stellar results if you don't modify recipes that call for the dehydrated stuff. For starters, even if you rinse your can of legumes, it will still contain notably more sodium.
Canned beans absorb some of the salted water they are stored in, whereas dried ones first soak in whatever you cook them in (via Cook's Illustrated). If you're making an aromatic broth, it won't enhance your canned beans quite as much as the alternative. While your broth or stew will still be packed with flavor, the legumes will retain a fairly one-dimensional taste unless they simmer for at least half an hour.
Don't push it on the duration, though, or the structural integrity of the beans will begin to deteriorate. Conversely, given their dry and hard characteristics, dried legumes maintain far more bite as they cook. Be sure to adjust the cooking time if you're following a recipe meant for the latter.
Miscalculating proportions when substituting for dried beans
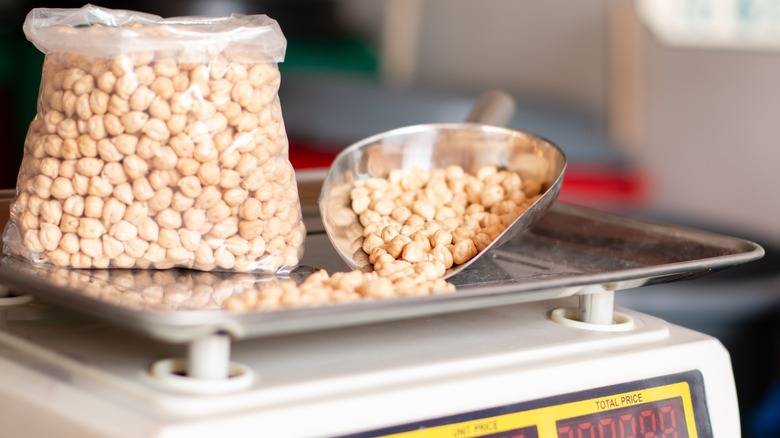
Naturally, 1 cup of plump, canned beans isn't equivalent to the same volume dried. According to VegFAQs, the correct ratio varies depending on the type of legume, but typically 1 cup of dehydrated beans can equal 2.25 to 3 cups canned. Meanwhile, Cook's Illustrated makes the conversion from 1 pound of dried beans to 58 ounces of canned ones, which can be three to four cans.
Some recipes are more forgiving and might just result in a dish with less bulk, since dehydrated beans just about double in size and weight as they cook. You can be pretty lenient with a hearty stew, but this shouldn't be the case if you're aiming for a specific consistency. You can bet that you'll need to add more liquid to your food processor if you accidentally double the quantity of chickpeas in your hummus recipe. No matter what you're preparing, be sure to double-check the units of measurement to avoid having to perform significant adjustments.
Over or under seasoning the beans
You might think that a recipe written for dried beans only requires a few modifications in quantity and cooking time, but it goes beyond that. As mentioned, canned beans usually sit in a brine solution of salt, water, and their own starch. Granted, this may vary depending on whether you are working with a reduced-sodium canned product. Still, that's a far cry from dehydrated beans, which require plenty of water and salt before you even start seasoning them according to your desired flavor profile.
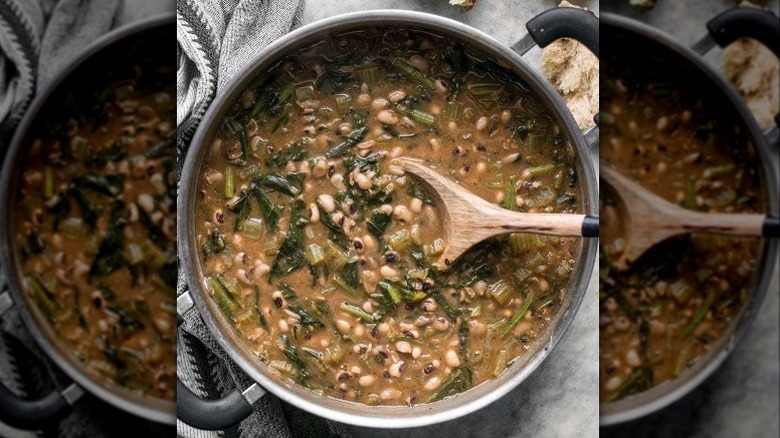
To distinguish your meal from basic legumes in a can, simmering them with herbs and spices infuses rich flavors and does wonders to enhance their quality. Just because you don't have time to begin with dried beans from scratch, it doesn't mean you have to settle for less flavor. Olive oil is guaranteed to make plain legumes taste better, and spices like garlic powder, chili flakes, thyme, rosemary, oregano, cumin, coriander, and paprika are all great starting points for your culinary experimentation.
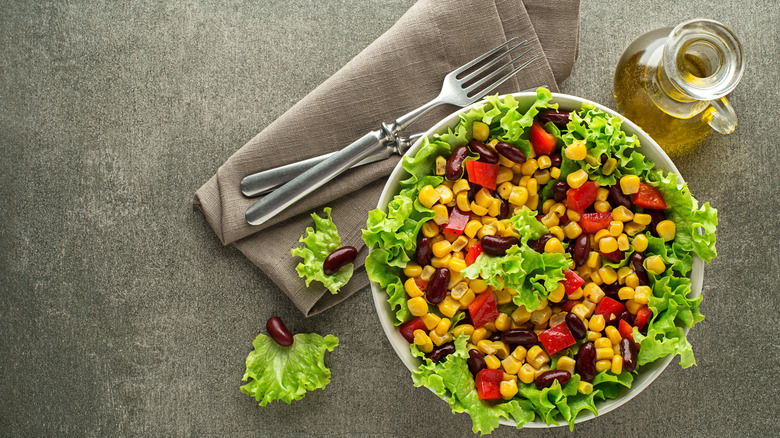
Failing to experiment beyond the basics
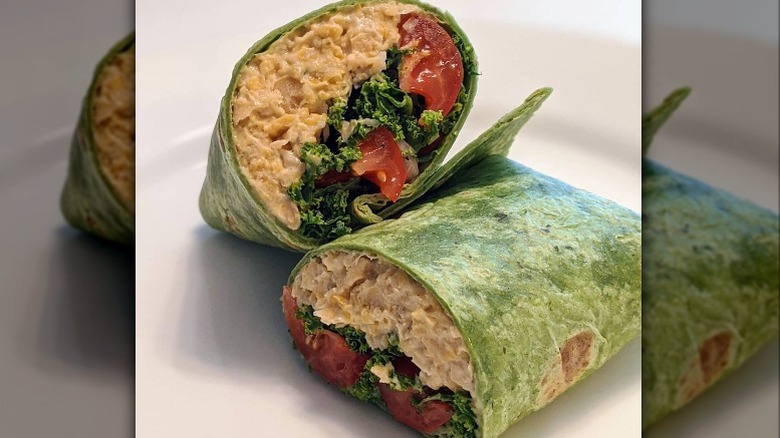
Sometimes you only have time to toss a can of rinsed chickpeas with lettuce and other veggies and call it a day. And while that's partly why we love the efficiency of canned beans, they also have far more potential. Whipping up a three-bean chili recipe or blitzing up a can of chickpeas for homemade hummus are obvious options, but there's so much more to be done.
Vegetarian bean burgers are a delicious version of a meat-based dish. If avocados aren't in season or you're over the green toast phenomenon, cannellini beans on toast is the creamy alternative you didn't realize you needed in your life. For a textural opposite, roasted chickpeas will surely be your new favorite crunchy snack, and you can easily modify the recipe based on your desired flavor profile.
Your creations don't have to remain on the savory spectrum of flavors either. Canned chickpeas, white beans, or black beans make excellent ingredients in a number of baked treats like brownies or blondies. Or, blend up this cocoa-bean smoothie recipe for a protein- and fiber-rich start to the day.
Overcooking them
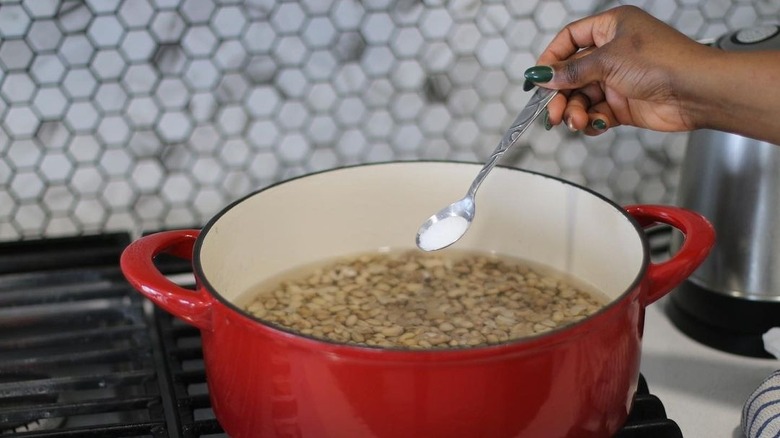
Much like you have to be vigilant about whether your recipe calls for 2 cups of dried versus canned beans, you'll also have to take note of overall cooking times. While dried beans can easily simmer for a couple of hours (via UnlockFood.ca), you'll end up with a mushy mess if you try the same with the canned version. Because they're meant to be ready to use, canned beans are already cooked.
Nonetheless, chances are you might want to season the legumes or incorporate them into a preparation that requires cooking. Southern Living also notes that some types of beans (such as black, kidney, and cannellini) require a bit more liquid as you cook them, or else they may become too dry. Use this as an excuse to pack in more flavor by simmering them in a broth or water seasoned with aromatics. After half an hour at low heat, they should be perfectly creamy and ready to eat. Much longer, and you're veering into unidentified pulp territory.
Storing leftovers in the can
Although canned foods "last for years," according to the USDA – and maybe even "indefinitely" (per Canned Nation) – once the packaging is compromised (either damaged or opened), the shelf life quickly drops. You're looking at three to four days once a can of beans is opened, much like any other perishable food item. As it happens, the handy vessel they've been stored in up until you eat them is not ideal for leftovers.
While the USDA assures consumers that these cans are not unsafe, they can impart metallic flavors to the food. In particular, those with a high acid content (tomatoes, pineapple, etc.) are more likely to run this risk due to possible corrosive activity. For best results, rinse and drain the entire can of beans, and store whatever you don't use in an airtight glass or plastic container in your refrigerator. Since the purpose of these boxes is food storage, you can rest assured that they're most suited to the task.
Not freezing extra beans
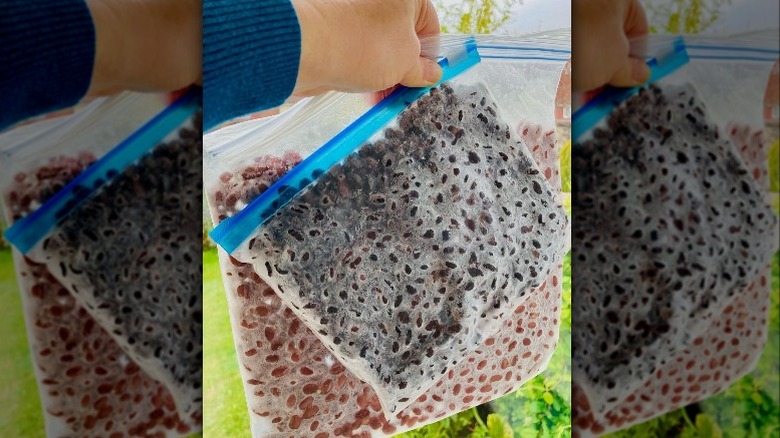
Depending on your bean consumption, it's fair that you might not want to eat an entire can in each sitting. And while you can incorporate them into recipes for your weekly meal prep, as they say, variety is the spice of life. Even though there are times when we are happy to dig into a bowl of chili on repeat, in other instances, we want new and exciting meals on a daily basis.
In these cases, your best bet is to freeze leftover beans since you won't be getting much out of them past three days. However, much like when you're storing them in the refrigerator, how you store them is important. According to Ontario Bean Growers, start by rinsing and draining the legumes in a colander, then pat them dry and transfer them to an airtight container or a sealed plastic bag. Bush's Best suggests covering the beans with water if you store them in a container, but it isn't necessary.
UnlockFood.ca recommends freezing them no longer than one to two months to maintain optimal quality. Once you're ready for more, let them thaw, drain off the excess water, and use the legumes as you would straight out of the can.
Assuming that canned beans aren't as good for you
Instinctively, you might jump to the conclusion that canned beans don't have the same nutritional benefits as dehydrated ones, given their convenient, ready-to-eat nature. After all, there's something about the process of opening a metal can that feels unnatural compared to legumes in a raw and dried state. Nonetheless, the difference isn't as large as you might imagine. Plus, anything that gets you eating healthy food with more facility is worth consuming.
Take it from registered dietitians who praise canned beans and eat them multiple times a week (via Canned Beans). Canned or dried, they contain notable amounts of protein, fiber, vitamins, and minerals. The canning process also helps transform the fiber into a more digestible form, eliminating physical discomfort (via Canned Beans). If you're trying to cut down on sodium, you're in luck: as mentioned before, you can rinse beans to decrease the salt content of canned beans. Alternatively, you can buy reduced-sodium versions.
Sticking with the same bean
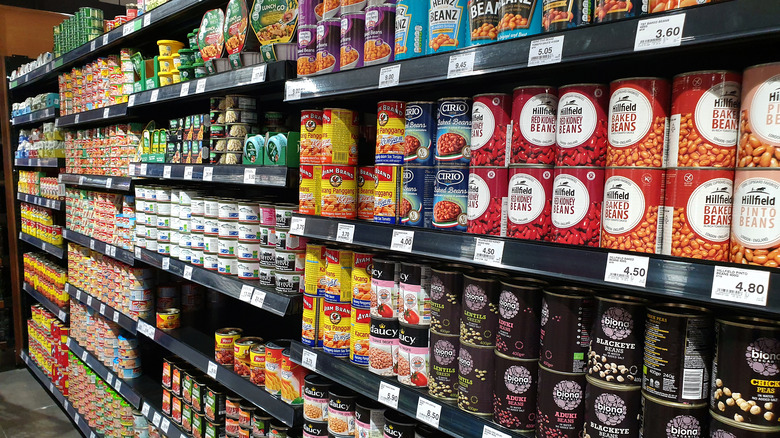
It's normal for your grocery routine to fall into a familiar rut — we all have our favorites. While some items, such as chickpeas, seem like they can take care of all of your nutritional and culinary concerns, it's worth venturing away from your repeat selection. With plenty of types of beans available in the average supermarket, by failing to experiment, you're really just losing out.
Apart from the unique flavor and textural qualities (not to mention the color it can add to a dish), by sticking to the same old type of bean every time you cook, you're not only missing out on novel dishes to enjoy, but you're probably steering clear of certain vitamins, minerals, and macronutrients. For example, navy beans provide the greatest proportion of fiber of any bean (per SF Gate). Soybeans and lentils top the protein charts (via Livestrong).
In the kitchen, you need red kidney or pinto beans if you're making chili, and hummus minus the chickpeas is really just a puree. Meanwhile, black beans are an excellent taco filler, and there's nothing quite like a warm, nourishing white bean soup. As versatile as every type of bean can be, each one has its place to shine.
Only opting for store-bought
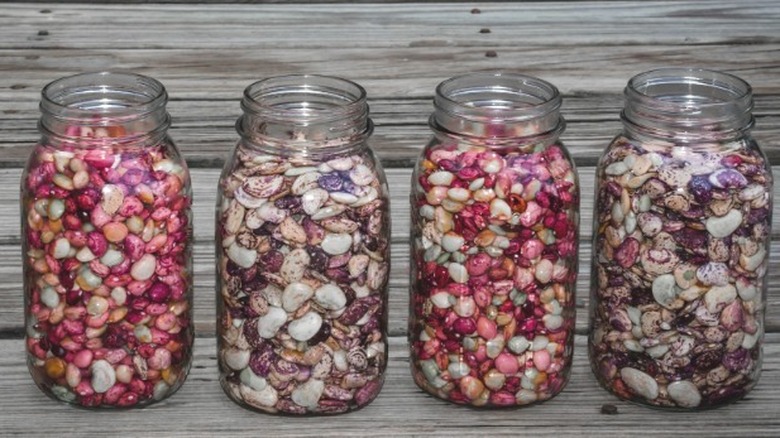
Perhaps up until now, you've only considered canned beans sold at the grocery store. However, much like canning pickles and preserves, the same resourcefulness can be employed to make your own canned beans. Since you're using dried beans to begin with, you'll even eliminate any issues related to salt content or worries about the material used in standard cans.
Before the idea intimidates you, know that canning requires following basic yet important directions. You'll need a pressure canner and clean glass jars, but beyond that, it's really just a matter of performing each step with intention. Depending on the type and quantity of beans, as well as the size of your pressure canner, the National Center for Home Food Preservation notes that the duration of cooking will vary.
Starting with dried beans, you'll soak them for a number of hours before boiling them to cook. Transfer the boiled beans and hot water into sterilized jars, ensuring that everything remains submerged. If you want to add a pinch of salt or any other seasoning, now's the time. Place the lids over the jars and pop them into the pressure canner to seal. Follow the instructions for your specific appliance for the best and safest results.
Discarding all of the liquid
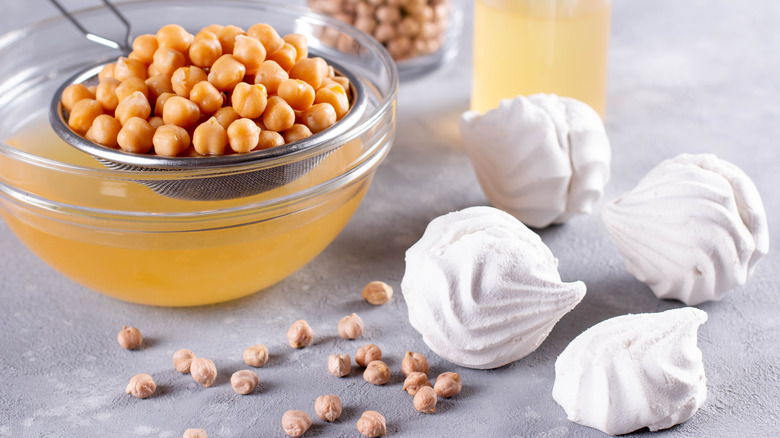
While a good rinse is beneficial for several reasons, you don't have to dump the liquid from canned beans into your sink. As it turns out, it offers many interesting culinary benefits. Since it consists of salt, water, and bean starch, it can work as both a flavoring and thickening agent in soups and stews (via HuffPost). However, Matthew Fairman, a resident culinary expert at Cook's Country, warns home chefs to modify the amount of salt and seasoning they add alongside it.
Meanwhile, canned chickpea liquid, aka aquafaba, has become a superstar ingredient in vegan baking (via America's Test Kitchen). Not only does it act as a suitable binder thanks to its high starch content, but it also makes an admirable egg or egg white substitute, as Bob's Red Mill explains. The site lists the appropriate conversions: Use 1 tablespoon to mimic an egg yolk, 2 tablespoons for an egg white, and 3 for a whole egg.
Unlike swaps using flax or chia seeds, aquafaba can hold air as it's whipped, turning into foam and ultimately rising — much like a meringue. Don't think this trick should be limited to vegan baking, either; aquafaba can save your spontaneous baked creation when you realize you've run out of eggs. And rest assured, your chickpea liquid treats won't divulge their secret.