12 Tips And Tricks You Need When Using A Milk Frother, According To A Former Barista
Any home barista who wants to make more than just drip coffees should know how to use a milk frother. A milk frother is a common barista tool that aerates milk, creating the foam you'd find on your morning latte or cappuccino. Whether you're working with a small handheld frother or opting for a steam wand, there are a few things you should know to get the most out of your foam. If you're struggling to get any foam out of your frother at all or just aren't achieving the foam consistency you're looking for, fear not — as there are certain adjustments you can make before deciding to give up on your frother for good.
As a former professional barista, I'll provide tips and beginner information about what kind of milk frother is best to use at home and how to capitalize on the one you purchase. With these tricks in mind, you'll be able to master the difference between dry foam and wet foam in no time.
1. Know whether you need to create a wet or dry foam

Before you start working on the perfect froth, it's important to know the basics of what kind of foam you're trying to create. If you're a fan of lattes, for example, you won't need to worry about making much foam at all — latte milk is steamed, so you'll create very small bubbles (or microfoam) using the frother of your choice. But if you're the kind of person who enjoys cappuccinos that are entirely made of foam, you might be used to ordering your coffee dry.
When you're going for a dry foam, you want almost no milk left in the cup you're steaming. This can be achieved by frothing an entire cup of milk until the milk is virtually gone, or by foaming a large pitcher of milk and skimming the foam off the top with a spoon before adding it to your drink. Meanwhile, wet foam is slightly more common. It's what you'd typically receive by default when ordering a cappuccino — it's primarily foam with enough milk to add a more liquid consistency as you drink. Achieving wet foam is easier and less time-consuming than achieving dry foam, especially depending on the kind of frother you're using.
Whether you're opting for wet or dry foam, knowing the consistency you're going for will help you reach it more easily. Creating different foam types can vary based on frothing lengths and types of milk.
2. Milk with higher fat contents are best for frothing
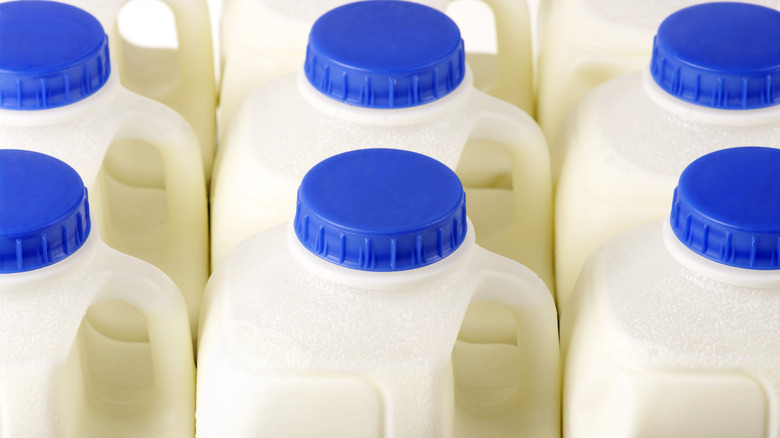
The fat content of the milk you're frothing really does make a difference. For the best results, you'll want to use 2% milk for the richest, sturdiest froth. This is the milk that baristas typically opt for in order to create a smooth, creamy, and consistent foam — you'll find that, in a cafe, most common coffee drinks are made with 2% milk. This milk froths better because of how the fat and proteins in the milk interact when being aerated. 2% milk has enough fat to create rich, sweet foam with large bubbles — and it's best across the board because it tends to foam up much more quickly than other kinds of milk.
Fans of whole milk will be happy to know that this kind of milk is often appreciated for having the richest, thickest foam. Whole milk is a great choice when you want a more luxurious-tasting beverage, but it comes at a price. The fat content in whole milk can sometimes make it harder to foam than other kinds of milk.
If you have a less powerful frother or don't want to deal with long waits when frothing by hand, you might want to start with 2% milk first to see how well your frother can keep up. If you've been using whole milk and aren't achieving any foam at all or are only getting small bubbles, switch to a milk with lower fat content instead.
3. Oat and soy milks are the best nondairy milks to froth
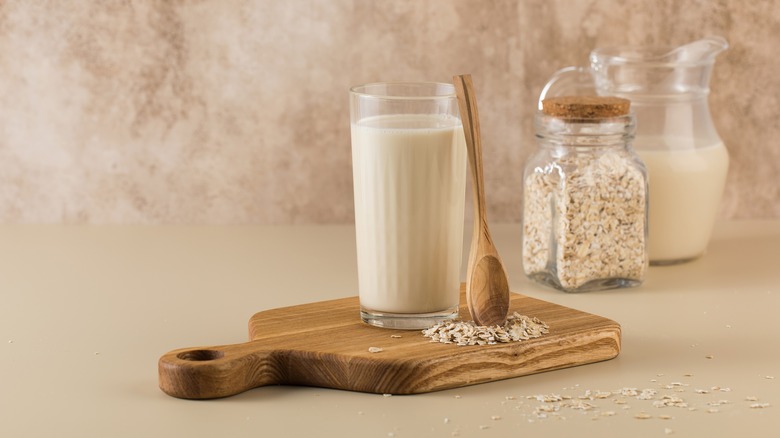
Nondairy milks don't have the same makeup as regular milks, but that doesn't mean they can't be frothed, too. One of the best nondairy milks for frothing is oat milk, as it has the most similar makeup of fats and proteins to dairy milk — making it the easiest nondairy substitute for anyone looking to achieve consistent foam. It also tastes the most similar to dairy milk, so you'll be able to achieve the same flavor as you would with a regular drink. You can even make barista-worthy oat milk at home if you're hoping to avoid an extra trip to the store.
Soy milk is another great option for frothing. Before oat milk gained popularity, soy milk was reigning champion of nondairy milks for frothing, with the consistency of the foam being around the same as dairy milks. You can also easily find barista milk mixes made with both soy and oat milk, so you can opt for a flavored nondairy milk that produces consistent foam.
As for other milks, almond milk and coconut milk are still options for foaming, but you may find that they don't create as smooth of a froth as soy and oat milk do. Depending on the type of frother you're using, almond and coconut milk will also take longer to create a solid foam. Lastly, if you're a rice milk fan, you're out of luck — rice milk is notorious for being un-frothable.
4. Manual frothers foam milk without steam
A manual frother is just what it sounds like: a frother that's going to make you do all the work. These types of frothers are popular because they don't require any batteries or plugs, as they froth your coffee without steaming it. A manual frother will come with a large container to pour the milk of your choice into. Then, you'll use the machine's plunger to aerate the milk (think of the machine as like a French press but with way more pressing). To foam the milk, you'll continue moving the plunger up and down inside the carafe.
The best part about a manual frother is that the milk carafe will usually have markings that tell you exactly how much milk to use, which means you won't need to worry about whether or not you're frothing too much milk at once. Another major benefit of a manual frother is that it actually doesn't take a ton of time to create a smooth cup of foam. You'll likely find that you can pump for as little as 20 seconds to achieve wet foam, and up to 40 seconds (or a little more) for dry foam. As with any type of frother, if you don't like the consistency you've achieved, just keep frothing until you create the foam of your dreams.
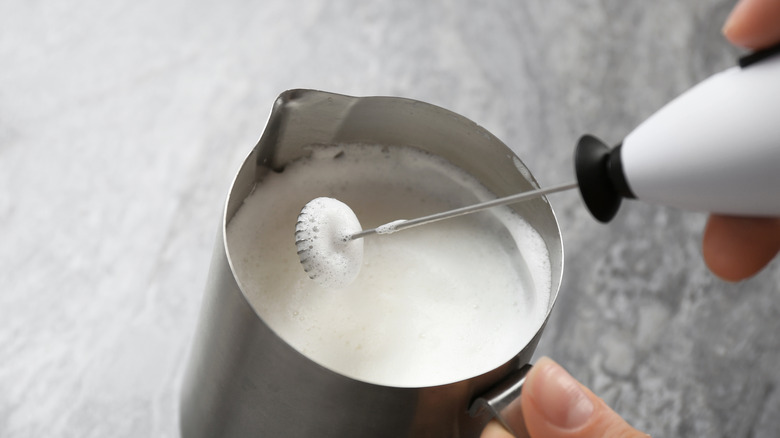
5. Find the right angle to hold and rotate a handheld frother
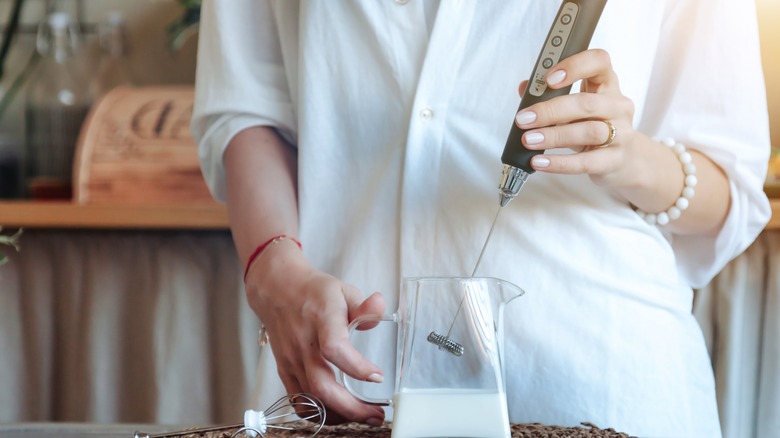
You might be most familiar with a handheld frother — a small aeration wand that you hold in your hand while you foam the milk. Handheld frothers will typically use batteries, although you'll also find handheld versions that plug into the wall or can be charged for wireless use. A handheld frother will require a little less work than a manual frother, as it only needs you to hold and rotate the frother as you aerate.
The biggest learning curve with handheld frothers is that you'll need to know the right angle to hold the frother at as you foam. You may also find that, depending on how powerful your handheld frother is, you can only work with milks that are already warm. A small handheld frother will sometimes offer a lot less power than other types of frothers, which means that you'll need to carefully select the type of milk you're frothing in order to get the most out of your handheld frother.
The good news is, once you're familiar with your handheld frother, you'll be able to achieve the perfect cup of foam in under a minute. Plus, you'll have a milk foamer that's cheap and takes up hardly any space.
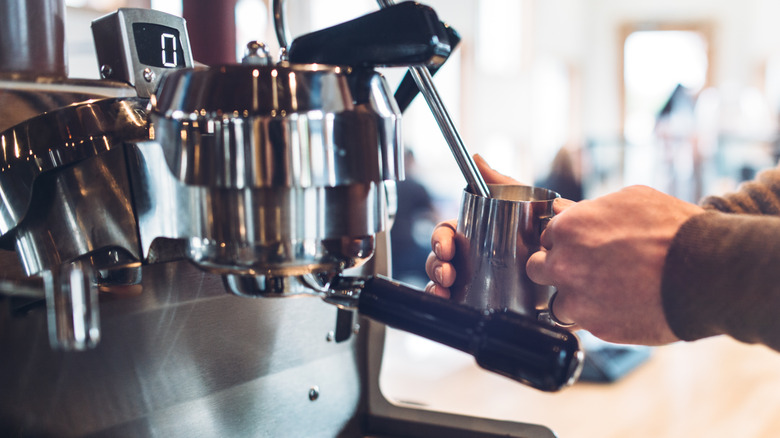
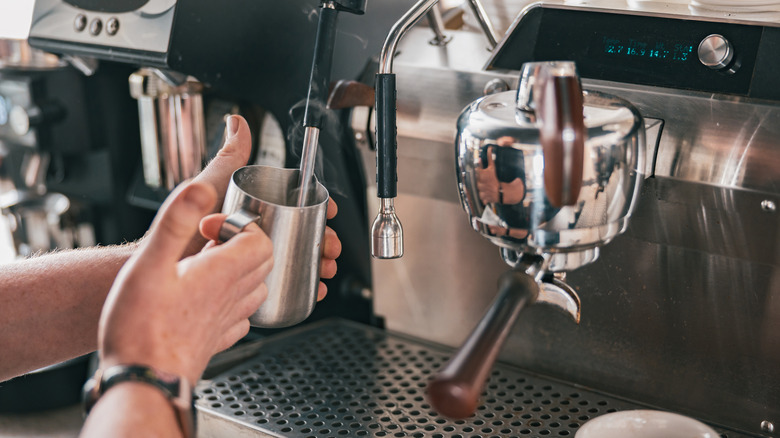
6. Steam wands froth milk the fastest
Steam wands are the kind of frother that most professional baristas are familiar with, as they come as an attachment to any classic espresso machine. Steam wands are by far the fastest at frothing milk, and they also provide a perfectly consistent froth for any cup of milk. With a steam wand, you may find that you're able to froth more kinds of milk rather than being limited by how well your frother can handle milks with different fat content. This opens up more milk options in both the dairy and nondairy aisles.
The main downside of a steam wand is that they come with a full espresso machine, which are typically much more expensive than manual or handheld milk frothers. This also means you'll need to free up more counter space. However, if you enjoy making the most perfect cup of coffee possible each morning, you might find that an espresso machine gives you the easiest route to your favorite drink.
Note that many espresso machines will also come with automatic or built-in frothers. These require no work, because the machine will automatically froth the milk for you. Other than determining the kind of milk you prefer in your coffee, these machines won't need any adjustment in terms of learning to froth — they'll likely also come with a recommended milk temperature.
7. The best starting temperature depends on your frother
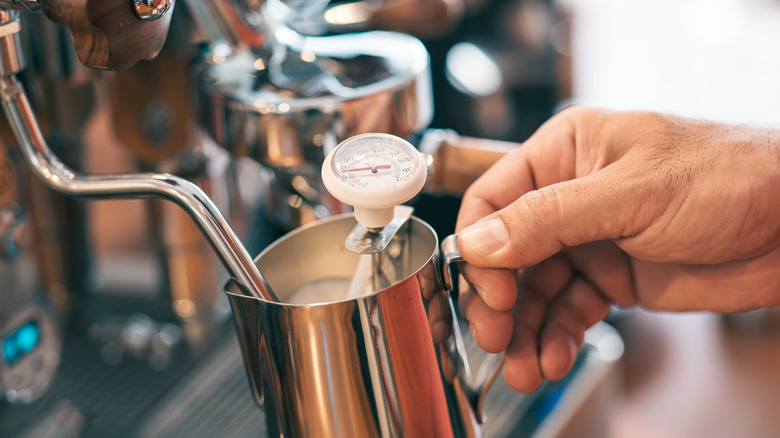
When frothing with a steam wand, you should always start with cold milk. This is because cold milk gets more air when foamed, causing it to create foam with a better consistency than warm or hot milk. Baristas will always start steaming with a pitcher of cold milk; steam wands will heat the milk as it's steamed, so you're left with a delicious cup of foam that's the perfect temperature. If you are working with a steam wand, you may also find that warming the milk beforehand will cause the end result to be too hot for a good cup of foam.
With that being said, if you're using a handheld frother rather than a wand steamer, you'll need to warm your milk up before attempting to froth it. Handheld frothers just aren't powerful enough to warm and aerate cold milk. The same thing goes for manual frothers, as they're designed to aerate milk, not heat it up.
Before you start using either of these kinds of frothers, heat the milk until it's steaming — you'll want to aim for around 150 degrees Fahrenheit for the perfect froth, give or take 5 degrees — before frothing it. You should see bubbles start to form quickly, and the end result should be a stable foam that still tastes pleasantly sweet, indicating you've hit the right temperature.
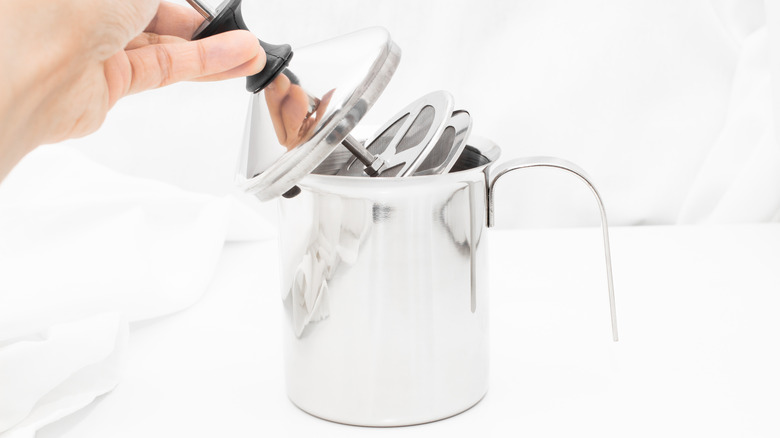
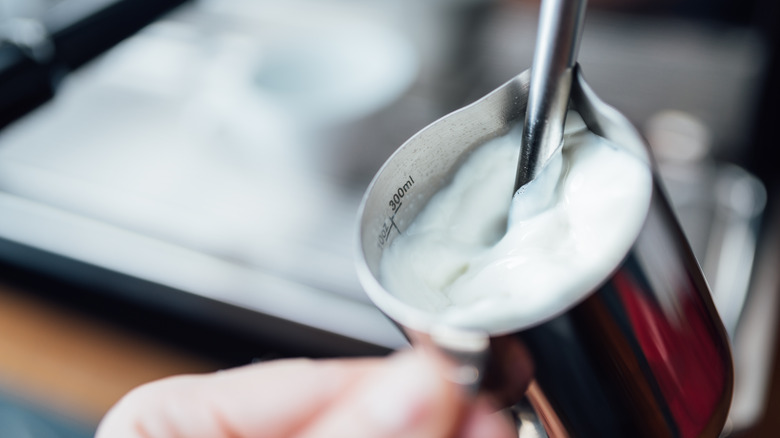
8. A milk pitcher is the best container for frothing
The best container by far for frothing milk is, of course, a milk pitcher (made of heat-safe material, not glass!). Not only are they guaranteed to be durable so you can warm your milk as you froth it, but they're also built to give milk the ideal froth. The shape and size of a milk pitcher helps to create better aeration for the milk. Too shallow of a container, for example, and you'll find it difficult to keep your frother away from the bottom of it. Too large, and your milk won't aerate properly.
Another benefit of using a milk pitcher is that they will also typically come with lines that indicate how much milk you should pour for a full cup of froth. This makes it much easier to identify the amount of milk you should be frothing at once to create the perfect cup of foam.
If you're not planning on using a milk pitcher, opting for a heat-safe container that is similarly shaped will give you the best results — especially if it has measurement markers you can use. Choose a vessel that has a mouth you can pour the foam out of once you're done. As long as your container can hold the amount of milk you want to froth, along with room for your frother to move, you should be all set.
9. Begin with the frother placed just below the milk's surface
For the frother position, you don't have much of a choice when it comes to manual frothing. But for handheld frothers and steam wands, there is a go-to method to positioning the frother — and it's one of the first things baristas learn in training. For the best results, you should start by inserting the wand or frother into your pitcher of milk so that it's just below the surface of the milk. Make sure the tip of the frother is completely covered by the milk so that you don't accidentally end up splashing it everywhere.
Once you've positioned the frother, you can turn it on and start aerating. You can then gently move the frother deeper into the cup of milk before pulling it back up to the surface again, creating an up-and-down bobbing motion. Make sure not to hit the bottom of the cup or bring the frother up above the surface of the milk. As soon as you've achieved your desired consistency, turn off the frother before removing it from the milk pitcher.
10. Tilt the milk pitcher at an angle for a good basic froth
When learning how to froth milk, you'll also want to consider the angle at which you're frothing it. For manual frothers, you don't need to worry about this. But when you're steaming a cup of milk with a steam wand or using a handheld frother, you'll want to tilt the milk pitcher away from the frother slightly, so that either tool you use can create a miniature whirlpool of milk. This will help your frother aerate the milk faster and will also give it a smoother consistency. Make sure you keep the steam wand or frother to one side of the cup, then tilt the milk slightly towards the other side.
Sticking the frother directly in the center of the cup will give you no way to adjust the angle of your pitcher. It will also prevent your frother from creating a milk whirlpool — the way air gets into the milk in the first place.
11. Keep track of how long you froth the milk for

A steam wand can create a nice cup of wet foam in around 10 seconds or less, ideal for quickly making wet or dry foam. This will vary depending on the kind of wand you're working with. Manual frothers will take around 30 seconds for wet foam. Handheld frothers can take longer, often around a full minute of frothing — although, depending on the power of your frother, it may take less time.
Knowing these average times will help you create the perfect cup of foam. Carefully watch how the bubbles are forming in your cup of milk as you foam; if you want it to be wet, you'll have slightly smaller, less airy bubbles (you can stop every once in a while to check that there's still milk in the bottom of your pitcher, too). For dry foam, you'll likely have to continue using your frother past the average times — once the foam is super stable and the bottom of your pitcher no longer has much (or any) milk in it at all, you can stop frothing.
If you froth past the point of dry foam, you'll remove its sweetness (and you might even curdle it if you're unlucky). Once you've hit the dry foam stage, proceed with caution! If you're experiencing the opposite problem and your milk isn't foaming no matter how long you froth it for, the issue isn't with the length of time, so consider other factors.
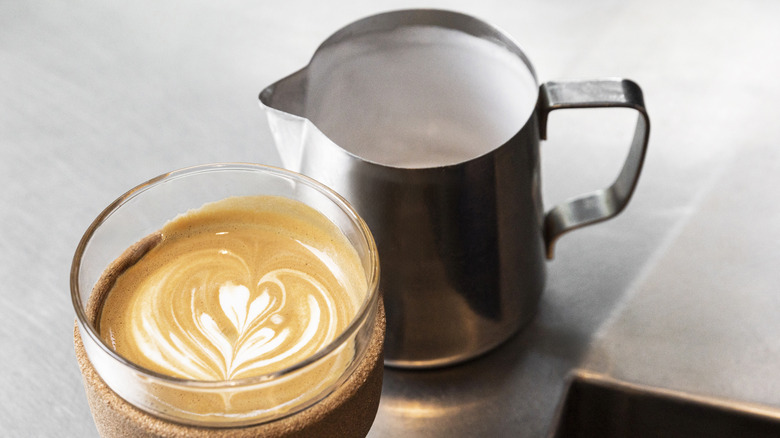
12. The amount of foam needed depends on the coffee drink

If you're looking to make a basic latte, you'll want to steam your milk with your frother of choice. Don't go beyond small bubbles that add a bit of microfoam to the top of your latte. This will typically take the shortest amount of time with any device, making it relatively easy to do even with a less powerful handheld frother. Flat whites, steamers (steamed milk with no coffee), cafe au lait, and flavored drinks (such as mochas) will follow the same routine as a basic latte in regard to steaming milk.
Cappuccinos require the most foam, so you'll want to be prepared to make nearly a full pitcher of foam. Unless you're looking for a wet cappuccino specifically, you'll want to create foam that is a little more stable and has some substance to it. For a regular cappuccino, make sure there's still a bit of steamed milk at the bottom. Bone dry cappuccinos will have no leftover steamed milk at all — just make sure to stop as soon as all the milk has been foamed, or scoop the foam out of the pitcher instead if you're worried about going overboard.
Macchiatos will also have a spoonful of pure foam on top. So follow the same route you would when frothing for a cappuccino.