14 Tips You Need For Making Homemade Coffee Creamer

If you have ever purchased creamer from the grocery store, there's a good chance you've turned over the bottle and looked at the ingredients and nutrition information. There's also a good chance you have been rather stunned by what you see in the ingredients. You'll see items on the bottle you recognize as well as ingredients that sound like they came from your sophomore chemistry textbook. This might be an uncomfortable realization, but you may feel torn because you don't want to give up that delicious creamer. Well, thankfully, making creamer from the comfort of your own kitchen is not only quite simple, but also allows you to know exactly what goes into it.
To make a basic creamer, you'll only need a few ingredients and a little bit of time. More complex creamers require a few additional ingredients and a little creativity. However, be aware that no matter what you set out to create, there's a good chance you will experience a little bit of a learning curve. It's hard not to need several attempts when you're creating something new for the first time. If that is the case, try not to be hard on yourself and simply try again.
Begin with a delicious base
When it comes to making your own coffee creamer at home, getting started may feel like the biggest struggle. However, the base for your homemade creamer is as simple as choosing a milk option to start the process. Some common options might include whole milk, half and half, or heavy cream, like whipping cream. However, if you are trying to avoid dairy, an option like almond milk, coconut milk, or even oat milk would be a delicious alternative.
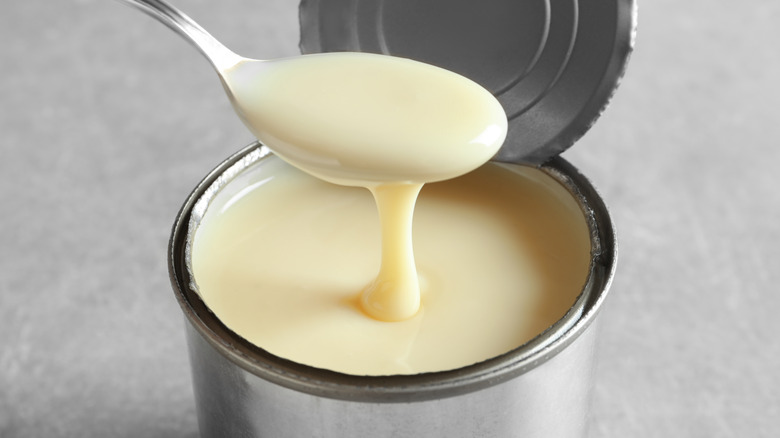
That said, our absolute favorite homemade coffee creamer base is something you may not immediately consider: sweetened condensed milk. We love this option because it is quite thick and already has a fair amount of sweetness. It gives you a great place to start and may even save you a little work down the road. Plus, if the thickness ends up being too substantial as you are heating everything up, you can always add in a milk of your choice to thin it out a little bit. You'll find canned sweetened condensed milk in the bakery aisle of your local grocery store. Plus, if you have a little left over, you can make yourself a delicious Vietnamese iced coffee.
Sweeten the deal
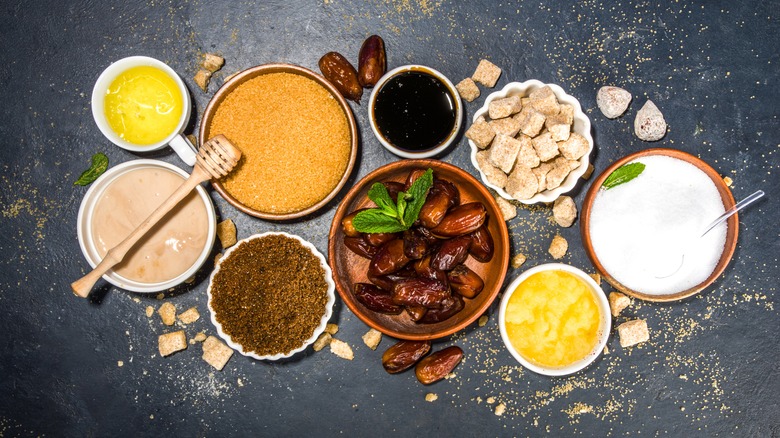
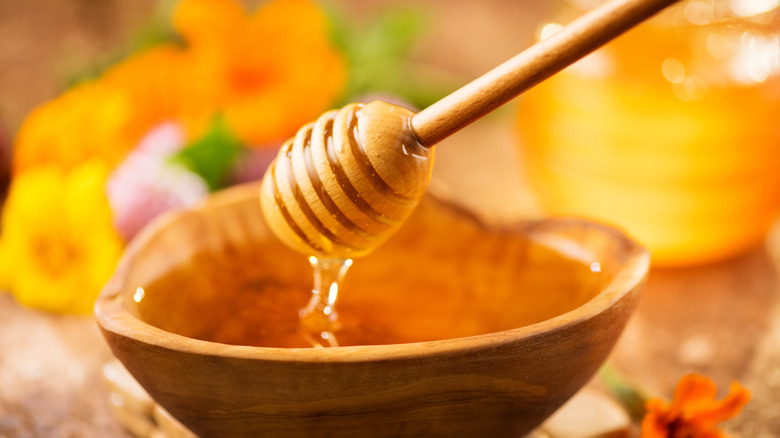
When using a base other than sweetened condensed milk for your homemade creamer, you may want to add a sweetener to achieve the desired taste. Fortunately, there's a wide variety of sweeteners available that can contribute unique flavors and enhance your creamer. Aside from common options like granulated sugar or brown sugar, you could explore alternative sweeteners such as honey, maple syrup, or agave nectar. Each of these adds a distinct flavor profile that can complement the other ingredients in your creamer. If you're trying to reduce sugar consumption, a sugar substitute like stevia is an excellent alternative.
When selecting a sweetener, take into account the other flavors you plan to incorporate into your creamer, as they can influence your choice. For instance, if you're making a vanilla creamer, honey can add a rich, warm sweetness that enhances the overall taste. By thoughtfully combining flavors and sweeteners, you can create a homemade coffee creamer that not only tastes great but is also tailored to your personal preferences.
Adjust sweetness to your taste
When adding that sweetner, be sure to add it in small amounts. One of the enormous benefits of making your own coffee creamer is that you can attune it to precisely what you want it to be. This means that it can be as mildly sweet or heavily sweet as you would like.
Be mindful of your sweetener additions, especially if you want it to be extra sweet. When preparing something super sweet, too often, we add too much sweetener right away. This may create creamer that is too sweet, and, as a result, less appetizing. It is always easy to add more sweetener, but it is impossible to remove it. It's like a "measure twice and cut once" sort of rule in homemade coffee creamer creation. If you start small, be sure to keep creamer nearby so that you can add more as you need it. Plus, all sweeteners enhance flavor at different levels. So the same amount of honey may sweeten differently than the same amount of granulated sugar or stevia.
Make it nice and thick
Chances are good that if you are trying to make your own creamer at home, you initially fell in love with creamer from the grocery store. It's hard not to. This stuff is sweet and has a nice thickness to it that adds a delicious and lovely feel to your coffee. When making your own creamer, you may be concerned that you can't achieve the same thickness, but this isn't true.
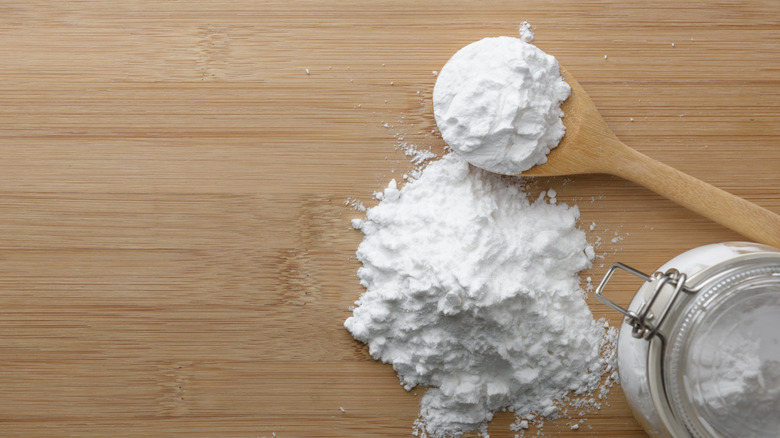
To ensure that your creamer is just as thick, if not thicker than the stuff you'll find on grocery store shelves, we recommend beginning with that sweetened condensed milk. However, if starting with sweetened condensed milk is not possible because you prefer another dairy milk or you're starting with a plant-based milk, there is still a way to achieve a nice thickness. All you'll need for this simple step is some cornstarch. For a quick thickening, you'll simply add two tablespoons of cornstarch for every cup of liquid that you have in your creamer. You may feel tempted to use flour in place of cornstarch, but that can lead to your creamer having an odd flour taste.
Make it flavorful
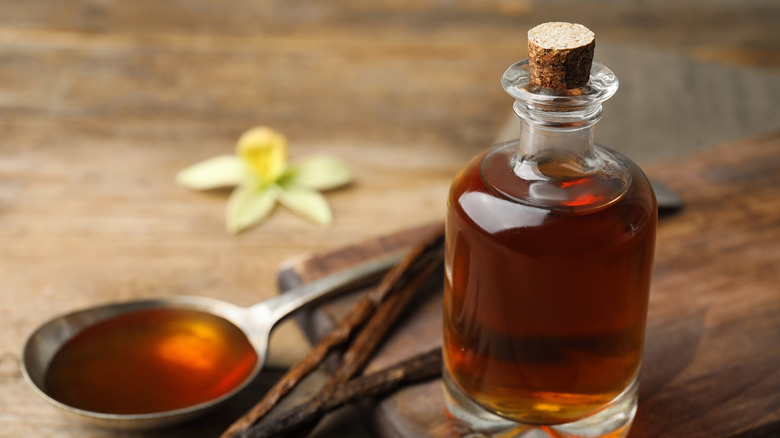
In addition to sweeteners, incorporating extra flavors into your homemade creamer can elevate the taste and make it uniquely yours. A classic choice is a vanilla creamer, which combines your chosen milk base, sweetener, and a vanilla pod. To extract the most flavor, slice the vanilla pod in half and scrape out the seeds before adding them to your mixture. For an even more pronounced vanilla flavor, consider adding a splash of high-quality vanilla extract.
Flavoring plays a crucial role in setting homemade creamers apart from their store-bought counterparts. With a wide variety of enticing options available on grocery store shelves, it might seem challenging to create a creamer that stands out. However, by experimenting with different flavors and ingredients, you can recreate and even surpass the taste of commercial creamers. With a little creativity, you can achieve nearly any flavor you might find at your favorite store.
Try out unique combinations
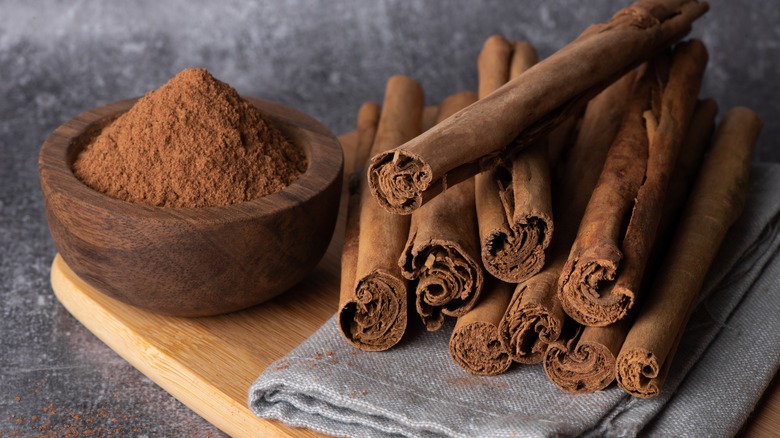
Try not to put limits on what you can create in the kitchen. For example, for some delicious chocolate creamer, add chocolate syrup and vanilla to your milk, or for a streusel coffee creamer, add extra cinnamon seasoning, vanilla extract, and even almond extract to whip up a seasonal favorite.
One of the best parts about creating your coffee creamer is that you don't have to let what is already out there limit your available options. Your favorite desserts are a great place to begin. Consider what your favorite desserts might be and attempt to recreate them. Do this by combining some of the spices and elements used to achieve your favorite flavors. Alternatively, look around your kitchen and see what fun combinations you can use to create a whole new flavor. For example, we absolutely love a vanilla, honey, and cinnamon combination. All three items are basic pantry staples, so you probably already have them lying around.
Choose those ingredients carefully

In some recipes, the quality of the ingredients you choose may have little impact on the outcome, allowing you to opt for generic or slightly lower-quality options. However, when it comes to making your coffee creamer, ingredient quality is of utmost importance. As you aim to replicate or surpass the flavors found in store-bought creamers, selecting the best ingredients is essential.
Although higher-quality ingredients might be more expensive, the investment is worth it. Opt for premium seasonings, organic options, and high-quality sources for your base and sweeteners. Don't compromise on any component, as the taste of your coffee creamer relies on the quality of each ingredient. You should research various brands and options available in your area to make informed choices. Reading reviews, seeking recommendations, and even tasting different products can help you determine the best choices for your homemade creamer. Investing in high-quality ingredients will ensure a delicious, satisfying coffee creamer that elevates your coffee experience.
Heat things up a little

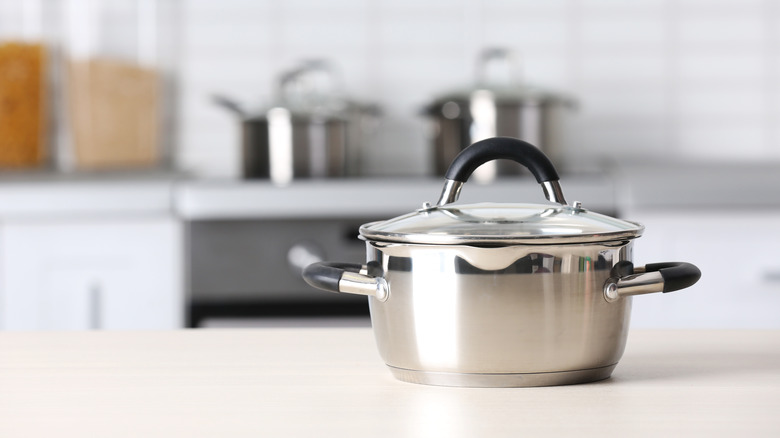
To guarantee a thorough mixing of all ingredients in your homemade creamer, it's essential to heat the mixture gently. This step becomes even more crucial when you have added a thickening agent like cornstarch. Start by combining all your ingredients in a saucepan over low heat. Then, continuously stir the mixture to prevent it from sticking to the bottom and to ensure even heating.
As the liquid gradually reaches a simmer, you'll notice the flavors melding together, and any solid ingredients, such as sugar or thickener, will dissolve. This heating process blends all the flavors harmoniously and ensures seamless integration of the individual components, resulting in a smooth, cohesive, and delicious coffee creamer. Since you generally keep your creamer in the fridge, it may not be immediately obvious that it all needs to be heated up, but this is an absolutely essential step, so be sure not to skip this one.
Allow it time to cool
After warming your delicious and flavorful homemade coffee creamer on the stove, the best thing to do is to give your creamer time to sit out. Allow it to hang out on your countertop, removed from heat, in its pan until it comes to room temperature.
This cooling process is essential because it gives everything time to come back to room temperature and stop cooking and mixing. If you put it right in the refrigerator, you might inadvertently hamper any steepings that might be happening within the still-warm liquid, potentially sacrificing some of the flavor depth you're aiming for. Since you haven't strained it yet, all of those delicious ingredients are still hanging out together. By allowing the creamer to cool at room temperature first, you give it a chance to develop a richer, more complex flavor before storing it in the refrigerator for long-term use.
Be sure to strain it
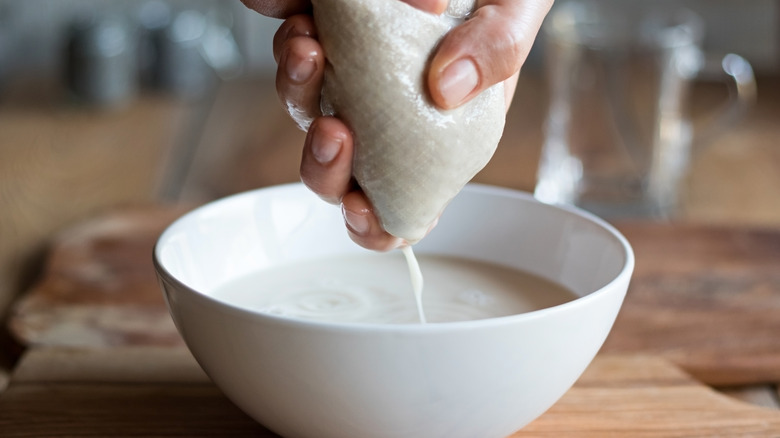
When preparing your creamer, you may include some fairly large ingredients. While these items do add significant flavor to your creamer, they shouldn't be in the final product. This is why we recommend straining your mixture after you give it plenty of time to cool down.
Of course, be careful when handling this liquid while you strain it, but know that this process can be a little messy. If you have a mesh bag that you like to use for making different kinds of nut milks, that would work well as a strainer — but something like a mesh colander or something similar would work as well. Whatever you use, make sure the little holes are small enough to catch whatever bigger byproduct you may have included in your recipe. Of course, small particles like cinnamon don't necessarily need to be removed, but bigger ones should be. The goal here is to capture anything that might mess with the consistency of the creamer in your coffee.
Store in a proper container
Naturally, once you've made your homemade coffee creamer, you'll need a suitable container to store it in. If you have an empty creamer bottle from a previous store-bought creamer, that would be an ideal solution, plus it allows you to repurpose an item you already have on hand. However, if you don't have one, there are still plenty of other options.
Look for a container that is easy to pour from and provides a reasonably airtight seal to maintain freshness. A juice carafe or a covered pitcher would work well for this purpose. You can often find such items at local big box stores, or you can explore various online retailers that carry a wide range of kitchenware. When choosing your container, make sure to pick one that will fit comfortably in your refrigerator and can be taken out and used conveniently whenever you need to add a splash of creamer to your coffee.
Give it a good shake

More than looking nice in your fridge, there's another good reason you'll want to pick a quality container in which to hold your homemade creamer. Just like store-bought creamers, it's a good habit to shake your homemade creamer before using it. In fact, this step is even more important when dealing with homemade creamers, as they do not have the same mystery ingredients store-bought creamer do.
Over time, as your creamer sits in the refrigerator, it's natural for the different components to separate. This separation occurs with many beverages, especially natural ones, and is nothing to worry about. The solution to ensuring a well-mixed creamer is straightforward: Give the container a few good shakes before pouring it into your coffee. Shaking the creamer helps to recombine the separated ingredients, creating a uniform, cohesive liquid that will enrich your coffee with its full flavor and creamy texture. By taking this simple extra step, you can enjoy a consistently delicious coffee experience with your homemade creamer every time.
Experiment with portion sizes in your coffee

If you've used store-bought creamer for some time, you likely know exactly how much creamer to add to your coffee. After all, every time you buy a specific creamer at the store, its flavor is probably pretty identical to every time before. This is one of the benefits, after all, of buying pre-made creamer. While you can try to get close to the same experience by making your own creamer at home and paying close attention to all of the items you add and their quantities, due to measuring and ingredient differences, you probably won't get it exactly the same each time. For that reason, we recommend freeing yourself of the assumption that you know exactly how much creamer you need.
Instead, begin by adding just a little bit of creamer to your coffee and then slowly increasing it to how much tastes right. This way, you can achieve your desired taste without worrying about wasting any creamer or coffee in the process. Just like the sweetener, it's always easy to add more creamer, but it is impossible to take it away.
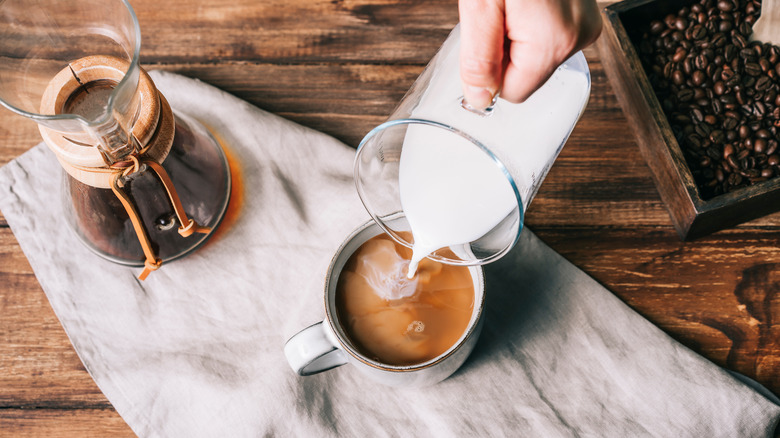
Create cold foam
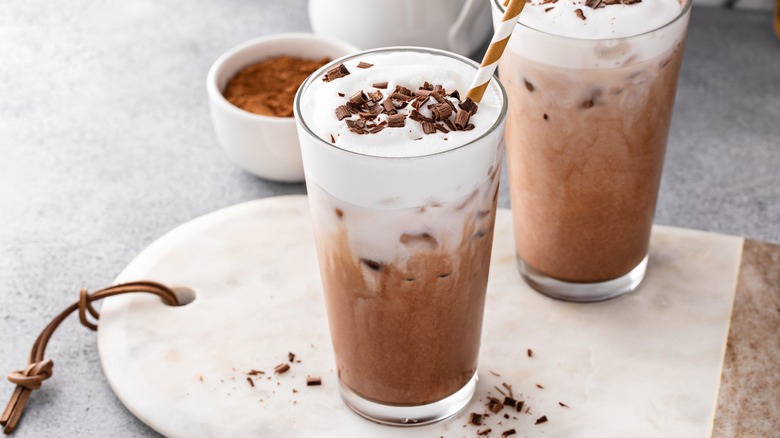
After making your own creamer, you may wonder what to use it for. We are happy to say that you can use homemade creamers in exactly the same ways that you might use your favorite branded creamer from the grocery store.
Our favorite way to use creamer is to froth it up and use it for cold foam on our iced coffees. We find that it has all the sweetness and creaminess that our iced coffee needs to be absolutely perfect. Plus, with a well-made creamer, the process is quite simple. Simply get yourself a handheld electric whisk or something like a frother and then whisk until that creamer becomes the consistency that you wanted to be. Then pour it right over your iced coffee. If you did it right, and you're hoping for cold foam, it should slowly seep into the iced coffee below it. Of course, you can also use creamer in your hot coffee. We like using it in place of milk while making lattes or even flavored cappuccinos.