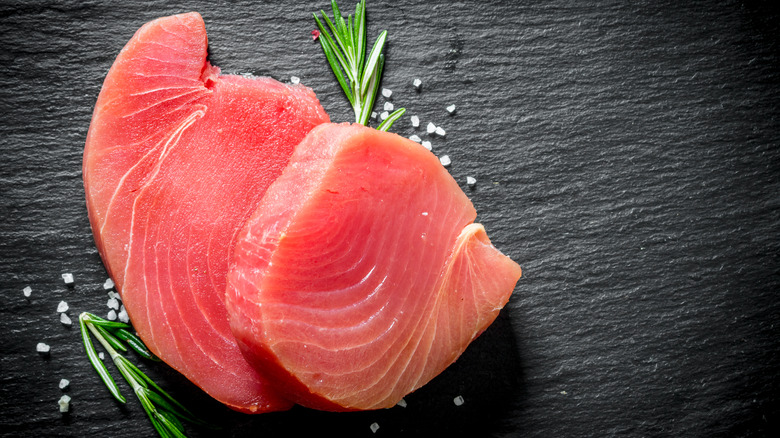
A Quick And Easy Guide To Cutting Fresh Tuna
Cutting up a whole fresh tuna is usually associated with finely skilled, deft movements and razor-sharp flashing knives. Here's the good news: With guidance, anyone can dress the fish, and with practice, the process can become quick and easy.
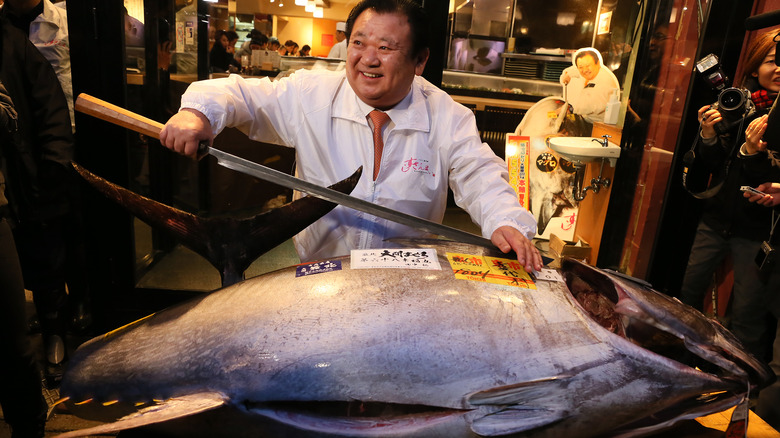
Traditional Japanese fish-cutting is likely more than 836 years old, per Repast (via the Culinary Historians of Ann Arbor). By comparison, there's evidence that sushi-making was first recorded in fourth-century China, which makes fish-cutting a surprisingly young art form, per PBS. When practiced with expertise, this skill quickly reduces large seafaring monsters to delectable morsels of sashimi, delicious broths, and various other meals you can cook with this fish.
The Japanese fish-cutting methodology focuses on reducing waste by sliding the knife close to the bone so as to remove as much meat as possible, according to Yuji Haraguchi, owner of Okasana Fish Market in New York City (via Bon Appétit/YouTube). Reducing waste in this manner has ties to a 400-year-old sustainability practice called Mottainai, which is still prevalent today, per Spoon and Tomago.
Use a Sharp knife
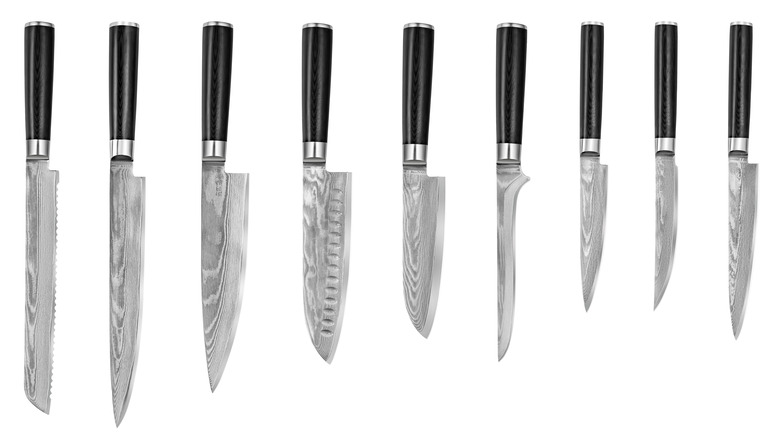
An essential tool for cutting fresh tuna is, obviously, a knife — but not just any knife; this skill requires one that cuts keenly. If it is not sharp enough, frustration will ensue along with less than desirable results and, per Culinary Lore, the likelihood of injury.
Japanese fish butchers favor a Maguro knife to break down fresh sushi, per Knifewear. This particular knife is sometimes referred to as a Maguro "tuna sword" and is longer than the average butcher knife, per Meglio Knives, and very sharp. As a specialized implement, it can cost the buyer upwards of $1000, per Korin. However, few people are willing or able to slice off that much money from their bank account just to fillet a tuna steak.
However, a standard filleting knife is a suitable compromise, as it is flexible, sharp, and easily manipulated. More importantly, this knife costs a fraction of the Maguro knife, per Food & Wine, and is perfect for the weekend enthusiast, per TB Haute Coutellerie.
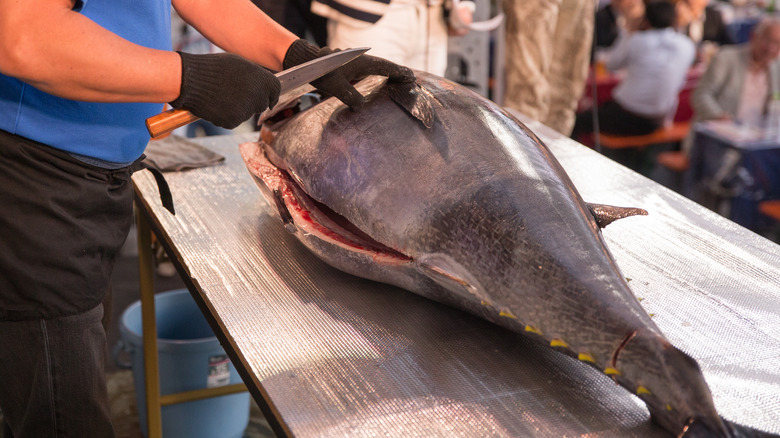
Get rid of the external osseous structures before cutting
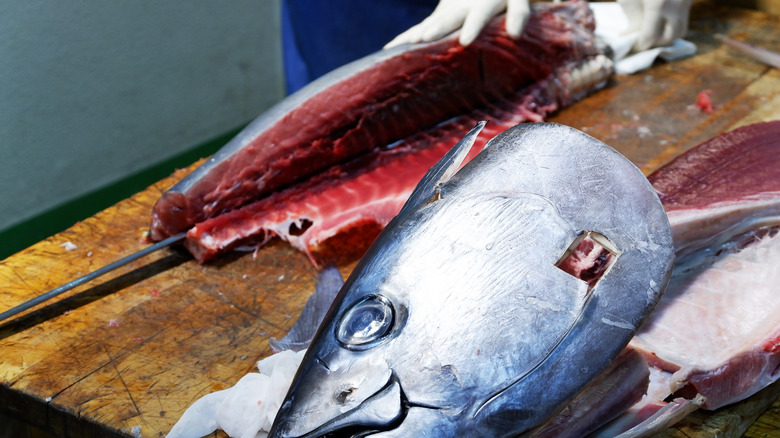
In many cases, fishermen and fishmongers sell the fish without its head. This is done to show the quality of the flesh to the buyer. Additionally, the fisherman will often practice Ike Jime when they slaughter the fish to deliver the best possible product, per Samuels Seafood.
Even with its head off, a fish carcass has external osseous structures like the collar, the pectoral fins, the dorsal and ventral fins, and the barbed spikes behind them. All of these bony bits need to come off before the cutting starts. If not, these sections could get in the way of the knife blade when it's time for portioning the fish, according to Yuji Haraguchi (via Bon Appétit/YouTube).
To remove the collar the knife is driven down diagonally along the top of the belly, making sure to glide it along the bone. The trick, according to Haraguchi, is cutting along the bone, which reduces the amount of wasted meat. This method applies to the other hard scales, fins, and spines on the fish. In fact, extraneous cuts are used to make a dish called Tunakotsu Ramen.
Cut through the tuna one layer at a time
It should be noted that cutting a tuna is hard work as the skin of the tuna fish is tough, it's even been known to wear down knife blades. For this reason, some fish cutters have recommended a knife with a serrated edge to penetrate the skin, per 360 Tuna.
The muscle is somewhat easier to cut, but the spine bone has a texture of its own. The latter is why many professional fish cutters use more than one knife — some sturdy and short, others flexible and long, but all razor sharp. Each knife serves a purpose: One is used to split the skin, the other to cut through the flesh, and then some knives are used to cut through the bone, (via Chef's Resources/YouTube).
Even if the fish cutter relies on a single blade, the principle remains the same: Cut through one layer at a time. This way, extracting the good stuff will mean using more than one stroke of a knife in the same place. However, this method will allow for more accuracy in removing the best fillets.
The Gomai Oroshi
To remove the first back loin, the blade should glide along the ribs and spine without cutting through them. The second incision is a deep one along the top of the fish. The two cuts should intersect along the length of the vertebrae, freeing up the first tenderloin, (via Bon Appétit/YouTube)
In order to remove the belly tenderloin, a sturdier knife is used as it has the ribs attached to it, but it's important to "cut where you see." The knife's angle should be horizontal as it breaks through the rib bones, gliding along the spine to the collar.
After removing the hemal and neural spines, run the blade from the tail to the collar along the lower side of the fish to produce two more sections. The result will be four large tuna cuts and a collection of bones that constitute the five parts of Gomai Oroshi, per "Sushi: Food for the Eye, the Body, and the Soul."
Heed the bloodline
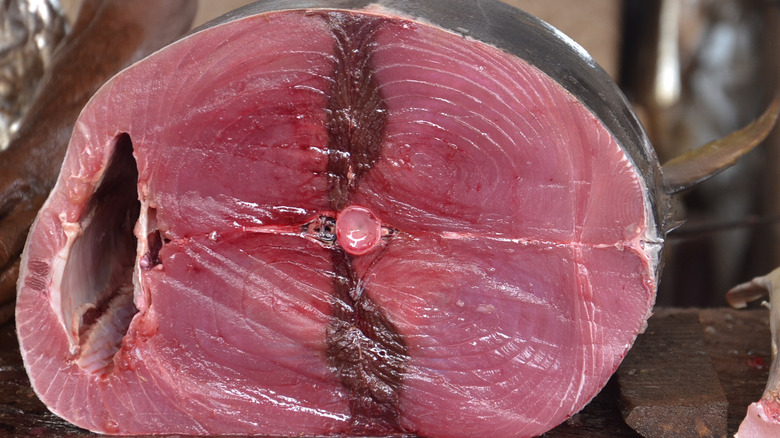
The bloodline (or the red muscle) is a dark red horizontal layer of flesh that extends from the tuna's vertebrae, per Research Gate. The more time elapses after catching the tuna, the more the color of this layer of flesh changes until it becomes brown. As such, the bloodline is an indicator of the tuna meat's quality, per Flash Pepper.
The reason for this darker-colored flesh is the high myoglobin concentration in that part of the fish's anatomy, per My Recipes, which creates a more robust and perhaps overwhelming taste. For this reason, it is common practice to remove this part before cooking the fish, per the Chicago Tribune.
To remove the bloodline, face the tenderloins' skin down and cut along both sides of the darker streak, sinking the knife deeper as it draws closer to the tail. It's better to make the cut too shallow and cut a second time than cut too deep and waste good tuna flesh, according to Mossy Oak/YouTube. Once the bloodline is gone, the tenderloins are ready for steaking. To do this, cut each piece at least two centimeters thick, as demonstrated by Sea Fish/YouTube. When you're at the thinner end of the loin make sure to cut at an angle in order to produce a steak with the correct thickness.