10 Tips You Need For Homemade Apple Cider

Making homemade pressed apple cider is a delightful way to enjoy the surfeit of apples in the fall — there's nothing quite like a glass of hard cider or a mug of mulled cider to get you in the spirit of the upcoming cold weather. It's a versatile beverage, too: dress it up in cocktails, swig it straight from the gallon jug, or boil it down and turn it into syrup for apple cider doughnuts.
But what about pressing your own cider? Many people shy away, thinking it's a complicated process that requires specialized equipment. While there are a few necessary tools, the process itself is pretty simple (and the tools can be DIY or snatched from your own kitchen). Plus, there's nothing like drinking a glass of freshly pressed cider.
I have a decade of experience making hard and soft cider from apples harvested from the orchard in my backyard and many seasons more of turning discounted ugly produce at farmer's markets into a winter's worth of cider. It's easy to press your own cider (and maybe ferment it into a festive beverage for the holiday season). Following are some tips and tricks for getting the most out of your apples. Use them as you design your perfect fall beverage — pressing cider is an art form as much as it is a process. Feel free to experiment with different apple varieties and techniques to find the flavor profile you like the best.
Don't pass by ugly apples
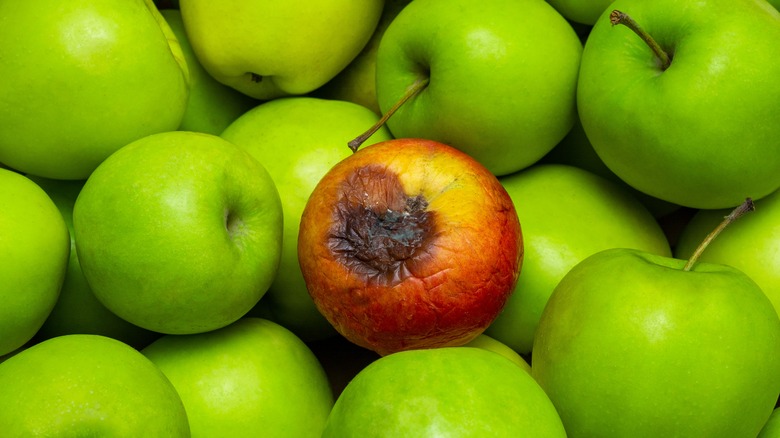
The choice of apple is critical when making cider. It's the only ingredient and carries a lot of weight when it comes to the final drinking experience. Choose a mix of apple varieties for the best flavor and high juice content. For example, Macintosh apples are very juicy and have a delicious sweet-tart flavor, but Red Delicious varieties can be dry and mealy. Sweet apples give the cider natural sweetness, while tart apples add complexity. Smaller varieties, like crab apples, have lots of astringent tannins, which add a nice touch to hard cider.
There is a lot of debate on using windfall apples from the ground. These are also referred to as drops or grounders. For many cider traditionalists, windfall apples are the fruit of choice in cider making. However, many state and federal agencies have come out against it, especially if you'll be skipping pasteurization. Windfall apples have more contact with the ground and can pick up dangerous E. coli bacteria from animal feces. This isn't a problem if you plan to pasteurize your cider.
If you don't want to use windfall apples, head to farm stands that offer misshapen produce at a discount. These can often have bruised spots or small worm infestations that can be removed easily. Finally, the time of year matters, too. Regardless of variety, apples harvested in late fall are sweeter than those picked as summer just begins to wane.
Working with clean fruit is a must
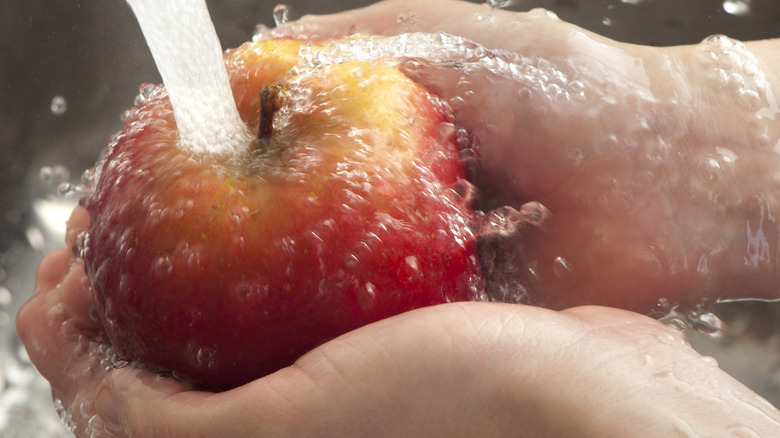
Think of apple cider as the distilled essence of the fruit. Every flavorful and aromatic compound in an apple gets diligently extracted through the pressing process. Because of this, clean fruit is critical.
Organic apples are preferred because they are grown without chemicals or artificial fertilizers. But even organic apples need a thorough scrubbing. Fill a large tub where the kitchen sink with clean water and add vinegar (one part vinegar for every three parts of water). Allow the apples to soak for 15 minutes, then scrub them with a vegetable brush. At this point, you can also remove bruised and wormy parts. If your apple has tunneling and a brown or black residue inside, you must cut that out, too. This is worm frass (feces), and that's not a delicious part of cider. If you find apples filled with large areas of frass, compost or throw them away. Finally, rinse the apples after scrubbing and cut them into quarters. You don't need to remove the peel, cores, seeds, or stems.
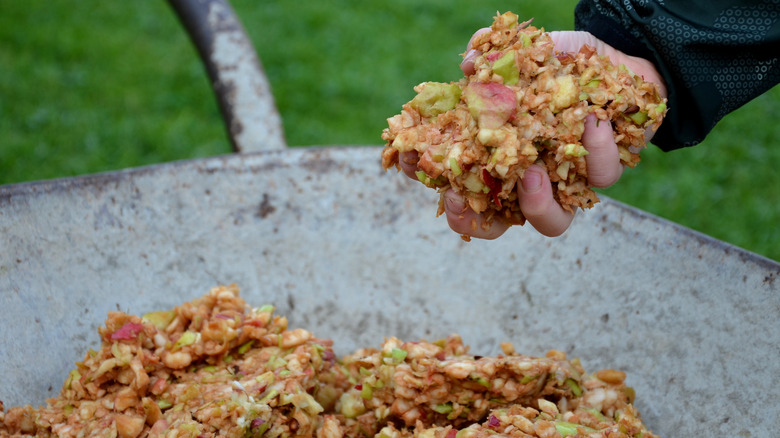
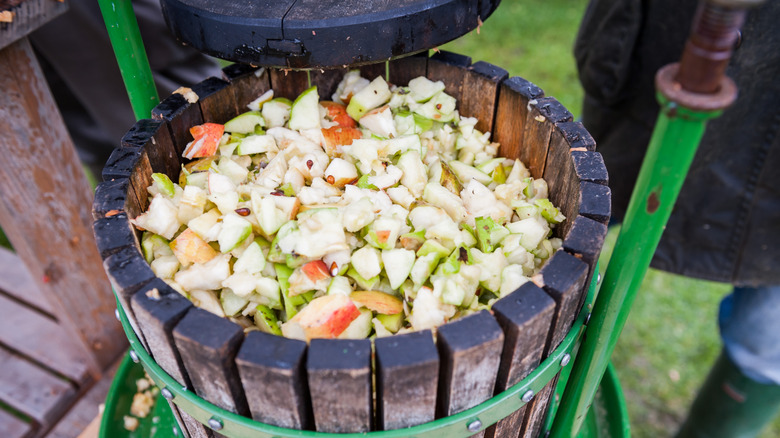
Pulp before juicing
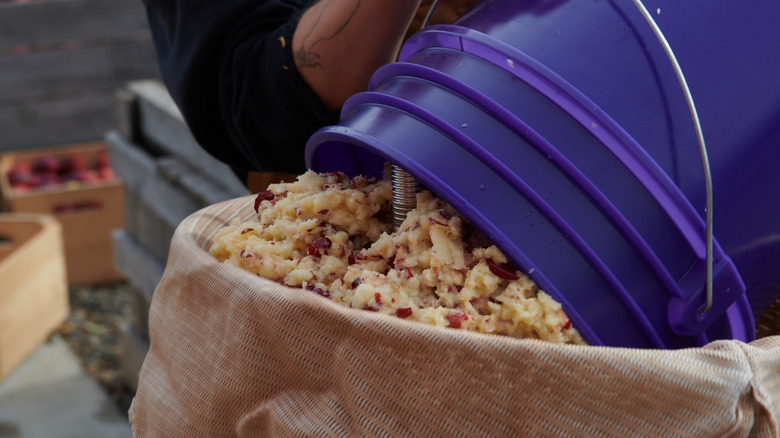
Rookie cidermakers often skip this step, to their detriment (and lower volume of juice). Pulping the apples before juicing, also known as scratting, breaks down the cell walls of the apples before they are pressed. This enables the apple to release more of its juice. If the only apples you have for juicing are dry and mealy, skipping this step will further reduce your final volume of juice.
You can use a fruit crusher or a homemade crushing mechanism to break down the apples into a pulp. Another easy way to start your apple pulp is in a food processor. Use the pulse setting and process the apples until they are the consistency of oatmeal. The resulting pulp is referred to as scrat.
If you don't have a food processor, or your volume of apples is high, there are other ways to pulp your apples. Some enterprising cider makers use a 5-gallon bucket and a paint mixer to reduce them, while others purchase specific apple pulping machines. The first solution costs less than $100, while the second can cost several thousands of dollars. Whichever you choose, it's possible to soften the apples slightly to make them easier to pulp. Toss them in the freezer and then allow them to defrost. The flesh will be softer and easier to scrat.
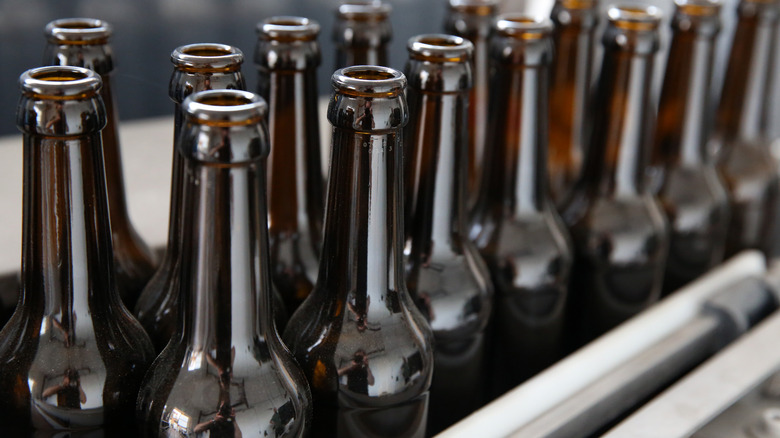
Use appropriate pressure
Now comes the fun and potentially expensive part of making apple cider: pressing the pulp into juice. While some fully automated presses will scrat and then press the apples at the flick of a switch, most presses for small-batch home cider-making aren't that simple.
Traditional basket cider presses exert pressure onto apples loaded into a hopper. These apples are then smashed to release the juice, which is caught in a bucket underneath (or to the side, depending on the model). Modern hydraulic presses work much the same way.
Another throwback type of press uses manual labor to exert pressure. A pressing plate is lowered gradually by using a manually turned wheel. The ideal amount of pressure for a manual press is approximately 70 psi. This produces a 70% yield of juice. Compare this to electrically powered cider presses that can exert pressure at about 90 psi. If you're dedicated to saving money, lower-tech presses cost less and can still get the job done. You can even build your own.
Store-bought or home-built, each type of press should be operated as slowly as possible. This helps extract the maximum amount of juice and prevents overflow (liquid gold on the ground). And don't throw out the pomace (the leftover pulp). You can use that, too.
Consider making your own press
Making your own cider press is simple and easy with just a few tools and some supplies from the hardware store. At a minimum, you'll need a structure to hold the apple press basket, a jack of some sort to exert downward pressure, a piece of wood to set the jack on, an apple press plate and apple press basket, a 5-gallon mesh bag, a high-sided aluminum baking sheet that can fit the base of the bucket, and a bucket to catch the juice.
Start by building your structure (essentially a sturdy wooden table with a rectangle of wood rising above the surface where the bucket sits). The 5-gallon bucket should be clean and unused. Drill holes in the bucket, starting at the base and drilling about every three inches or so).
Set the bucket on the baking sheet, and place both on your structure. Test the drainage by adding water to the bucket with the holes, place the cider-catching bucket below, and make additional holes if needed.
When you're ready to press, add your mesh bag to the bucket with the holes and place it on your structure. Add your apple pulp and apple press plate (this distributes the jack's pressure). Place your jack on the press plate, then turn it on. You might need to add a supporting piece of wood at the top (so the jack doesn't fall over) and more wood as the juice extracts.
Choose your clarity
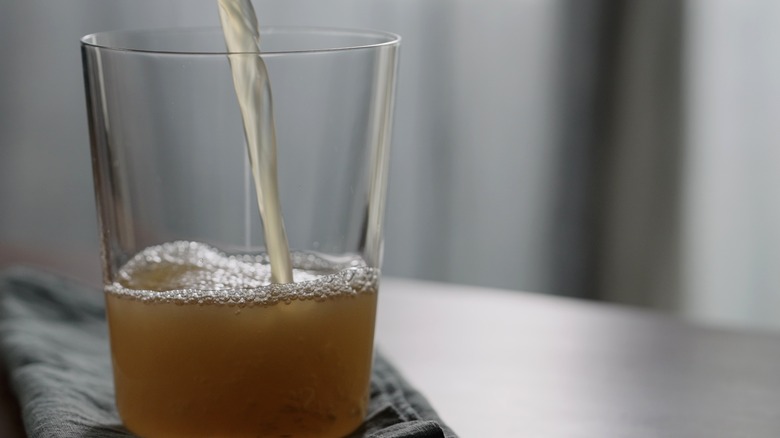
Apple cider and apple juice are not created equal. Apple cider is a deep, rich, opaque beverage, but apple juice has been filtered to within an inch of its life. There is no sediment, and it is crystal clear.
But this doesn't mean that your apple cider cannot also be filtered. Filtering your cider once pressed removes any bits of apple pulp that may have passed through your mesh basket or other system in your cider press. If you are the type of person who doesn't like pulp in their orange juice, this step is definitely for you. Filtering cider is also a good idea if you'll use it in spiked cider cocktails where the presentation and texture of the drink are essential.
Filtering your cider need not be precious. Cheesecloth or a fine mesh strainer can remove additional pulp or sediment. If you choose cheesecloth, fold it over to decrease the mesh size. This results in a clearer cider. Best case scenario? Add cheesecloth or a nut milk bag to a fine mesh sieve for ultimate clarity.
Pasteurize your soft cider for long-term storage
Pasteurization is a hot topic in the world of apple cider. Many home cidermakers choose not to. The origins of pasteurization were intended as a method to kill any bacteria, good or bad. But die-hard home cider makers swear by keeping the good bacteria.
However, some serious risks exist for children, older adults, and those with compromised immune systems when apple cider is not pasteurized. Unpasteurized cider, especially made from windfall apples, can have high concentrations of bacteria, including salmonella, E. coli, and cryptosporidium parasites. All of these can cause severe gastrointestinal upset (and possibly even death).
Pasteurizing your cider also allows for long-term storage, which isn't possible with unpasteurized cider. And the good news? This heating process kills bad bacteria but does not destroy one of the main compounds that make fresh apple cider so healthy: antioxidants. These are linked to reduced inflammation and may even lower your risk of cancer.
The process is easy. Heat the juice to 160 F (71 C) for at least 6 seconds, then cool rapidly. You can start the cooling process by transferring the juice to a container immersed in an ice bath. Stir the juice to cool it rapidly, then promptly refrigerate. Pasteurized cider is safe in the fridge for approximately four weeks but can also be canned or frozen for extended storage.
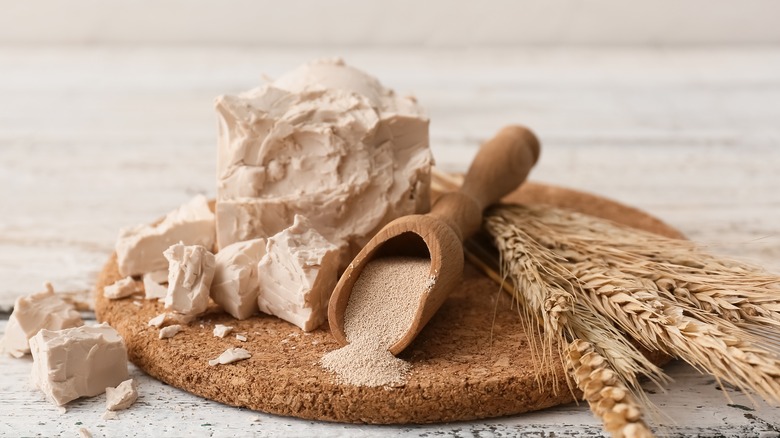
Yeast produces better-tasting hard cider
For some people, making cider doesn't mean a sweet drink that's best for kids. Cider refers to hard cider, a fermented beverage that is naturally gluten-free and a delicious and refreshing alternative to beer, wine, or cocktails. The best news? When you press your own apple cider, you can have both. Hard cider starts as plain old apple cider. So save a jug for the kids, and turn your attention to making your own adult beverage.
If you want to make hard cider, the easiest way is to put the cider in the back of the fridge and let the natural yeast from the apples do its work. This can result in a fizzy, delicious drink. But sometimes it does not. Wild yeast is not guaranteed in quantity or quality — you may end up waiting months for a drink that tastes like old socks.
If you don't want to risk it, save some time and add yeast. Champagne yeast is the standard type of yeast to add. Once you add it, pour the juice into sterilized fermentation containers and seal them with an airlock. The airlock allows some built-up gases to escape without letting more air in. Let the juice ferment in a cool, dark place for several weeks or months, depending on the desired strength and flavor. For hard cider, once fermentation is complete, it can be bottled. You may choose to add additional sugar or other flavorings at this stage.
Be patient
Once your cider is pressed and, if desired, fermented, it's ready to enjoy. Unpasteurized soft cider should be refrigerated and consumed within a week or so (pasteurized within a month), or it can be frozen for more extended storage.
But if you're experimenting with fermentation and brewing a batch of hard cider, be patient. Hard cider can be aged to develop its flavors and stored in a cool, dark place. The longer it waits in the dark, the more flavorful it will become. Most home hard cidermakers suggest fermenting for two weeks before carbonating, but in many cases, cider left longer begins to develop its carbonation naturally. This means you won't have to invest in carbonation equipment and can use the same gear as homebrewers.
It can be fermented and bottled using the same equipment that homebrewers use. You'll mainly need a carboy and an airlock, but bottling requires more tools. You'll need bottles and caps, plus a capping clamp. As always, ensure all your gear is clean and sterilized — run bottles through the dishwasher just before use.
Seal the bottles, and get ready for more waiting. Find a quiet, dark place for your cider to rest, and leave it alone for at least two weeks. At this point, you can crack a bottle and check for flavor and carbonation. Don't be discouraged if it's not quite ready. Wait another week and taste again.
Utilize the entire apple
The beauty of making your own apple cider is that it is a zero-waste proposition. Nothing should be thrown away, including the dried-out pressed apple pulp (referred to as pomace). Although much of the nutrition has been extracted, there are still vital parts that can add value to your livestock, your compost, or your salad.
The most straightforward use for spent mash is as an additive to your compost. Do not put it directly on plants; pomace is acidic and can kill. If you keep a flock of backyard chickens, make their day by adding pomace to their forage.
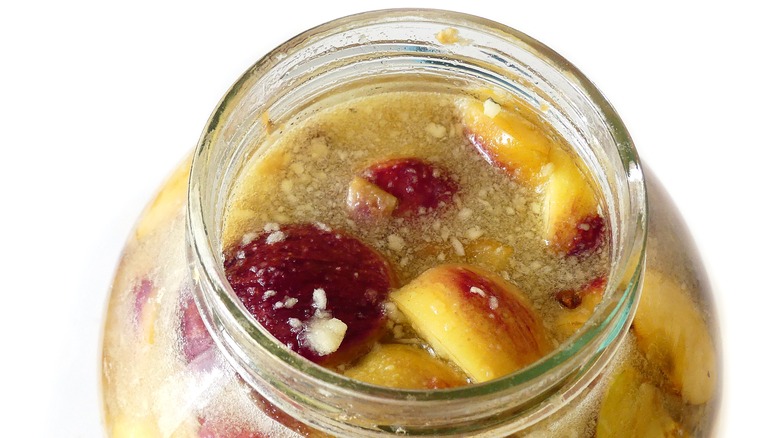
Also, consider making your own apple cider vinegar. Many people consume apple cider vinegar as a daily shot, but if you're just looking to add flavor to salads and dressings, this is a solid option. Also known as apple scrap vinegar, it generally has a less acidic taste and a mild flavor when compared to its whole-apple counterpart.
Add one cup of sugar (any kind, but no alternative sweeteners), ½ cup of raw, unfiltered apple cider vinegar, and two quarts of filtered, non-chlorinated water for every pound of pomace. Combine and stir once a day for six days, then place on a counter for two weeks to ferment (you'll need to keep the top open to allow gas to escape). Strain when bubbling slows, reserving the "mother" that has developed (a thin film on top), then let it age for another month or two before using.