How To Cook A Perfect Rack Of Barbecued Ribs
Cook the perfect rack of ribs with these secrets and techniques
May is Grilling Month at Tasting Table.
Want great ribs? You're gonna have to get a little messy. And if you're Tasting Table's food editor Andy Baraghani, that's half the reason to grill a slab.
"They're so good, because the rub penetrates the meat, and it soaks up the smoke and the mop sauce. Then you get to eat them in a primitive way—with your hands—that makes them taste even better," he says.
But when it comes to actually cooking the ribs, Andy is modern and precise about his method, which minimizes grill tending in favor of a few steps that ensure deeply flavorful, exquisitely tender meat every time (see the recipe). He says, "You can spend that five or six hours around the fire if you want to, but this brings the same great flavor and maybe even a better texture."
Get hip to his rib technique:
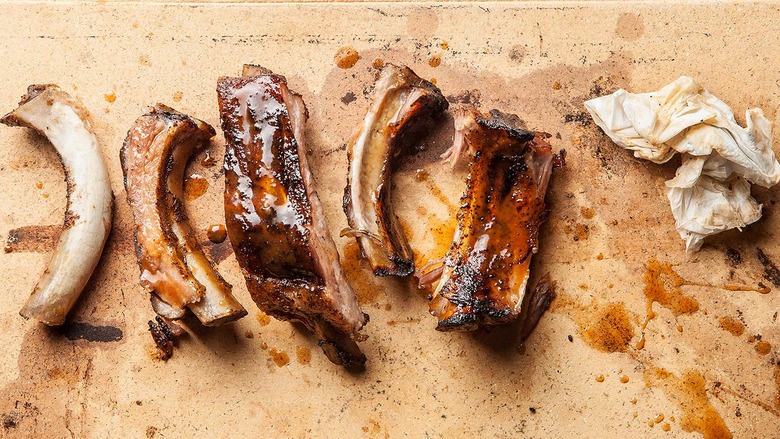
Rack it up. It all starts with a great slab. Beef, pork or lamb, baby back or spare—the choice is yours. But Andy swears by buying from a butcher so the meat is trimmed just the way you like it. You can ask for the thin silverskin membrane to be removed at the time of purchase or remove it at home by working a paring knife under the corner and stripping it off. Some grillers like to leave it on to help the ribs maintain their shape, but Andy sees it as a barrier between the rub and the meat.
 The ribs get some help from a coffee and brown sugar rub and a flavorful mop sauce.
There's the rub. It's an age-old dilemma—marinate or rub? Well, Andy believes a rub is the only way to go. "It's basically a dry brine that cures and flavors the meat," he says. Though no ingredients are off limits, salt is essential ("The rub could just be salt and pepper and nothing else!") balanced out by sweet, smoky and spicy elements. For him, brown sugar, ground coffee, smoked paprika, cumin and cayenne hit all the right notes, and the racks receive a generous coating before a four-hour or overnight stint in the fridge atop a wire rack.
Chill out. These next few steps might seem a little fussy, but they're essential to making sure the ribs stay intact. "You see those commercials about 'fall-off-the-bone' ribs, but do you really want meat falling all over your grill?" Andy asks. "What you're really looking for is tenderness." To ensure that, remove the ribs from the refrigerator at least one hour before cooking. They don't have to come to room temperature, but the chill should be off before you wrap them tightly in foil, place them bone-side down on a rimmed sheet pan and bake them in a 300-degree oven for three hours until tender. Then wrap up the ribs again and rechill them for an hour or up to two days.

All about that baste. While the ribs are chilling, pour any pan juices into a bowl and whisk them together with a mixture of hard cider, cider vinegar and your favorite barbecue sauce. When it's time to get cooking, prepare a medium-hot fire (Andy prefers charcoal, but you do you) and cook the rack directly on top of it, mopping it lavishly with the cider blend as you flip. The meat is already cooked, so you're just looking for a light char and a deep amber color on the meat. Note: Resist the urge to brush on barbecue sauce while they're still on the grill. "The sauce will probably just burn. Use it as a serving condiment," Andy advises.
Haste makes waste. No one could blame you for wanting to get your hands on that rack the second it's off the grill, but it'll be even better after five minutes of resting time when the juices have redistributed. Then cut it into half slabs or individual ribs, put 'em on a platter with sauce on the side and get your hands deliciously dirty.