How To Cut And Form Crispy Cheese Straws At Home
Cheese straws are a beloved Southern treat you can enjoy on their own or pair them with your best cocktails or dipping sauce. Making these savory sticks at home is surprisingly easy. Just arm yourself with a tasty cheese straw recipe then whip up the perfect cookie-like dough. Once that's done, the next crucial step is to shape the dough before baking. Most eaters will be instantly drawn to the signature ribbed-edged cheese straw shape so you want to get it right. The easiest way to achieve this is with a cookie press with a star-shaped end. However, if you don't own this gadget, there's a workaround: Roll and cut the dough.
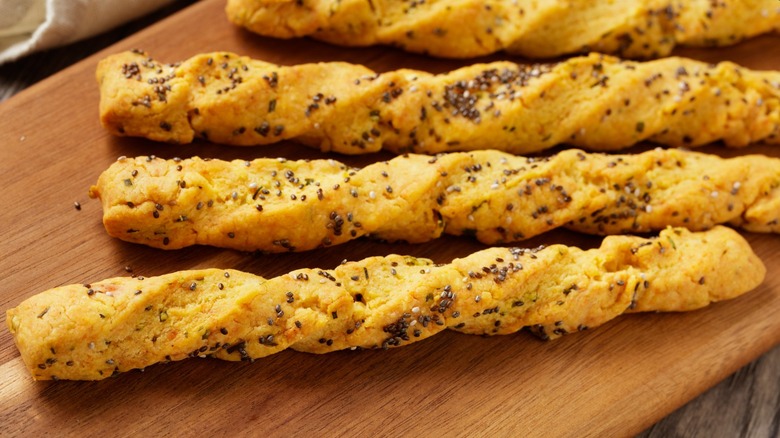
While this alternative method won't produce the ridged pattern, it still results in unique, well-defined cheese straws that are easy to handle and perfect for any occasion. Begin by dusting your clean and dry countertop surface with flour. Place the dough on the surface and roll it out to form a rectangle about 1/16 inch thick. Using a pizza cutter, pastry cutter, or a sharp knife, cut the dough into identical strips — a width of ¾ inch and a length of 6 inches will do. As you place each strip on a parchment-lined baking sheet, you can twist them a few times for a fun design. Now your cheese straws are ready to bake. However, if you're still bent on creating the familiar ribbed pattern, here's how to use a pastry bag in place of a cookie press.
How to form cheese straws using a pastry bag
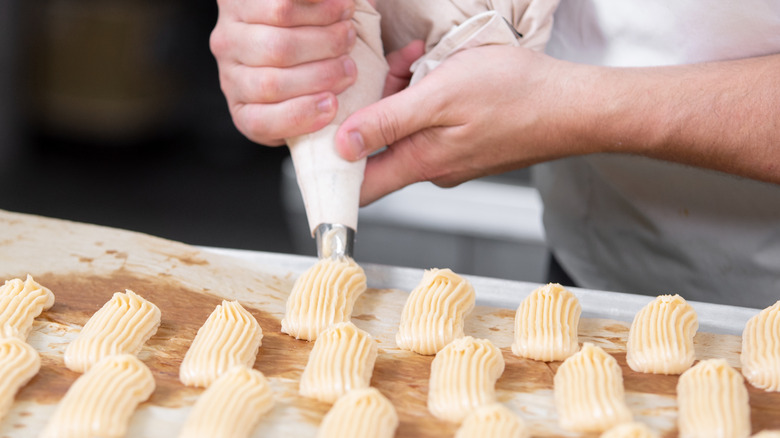
Forming cheese straws is one of the many creative uses of a pastry bag. But keep in mind that this can be a bit trickier than the conventional cookie press because the cheese straw dough is quite dense and not as easily pipeable as frosting. To make the dough easier to pipe, you can warm it slightly in the microwave. Place your dough in a microwave-safe bowl and warm it on low power (aka, power level 1) for a few minutes. You don't want to heat the dough to a cooking point, of course, just soften it enough to make it easier to squeeze through the piping bag. Once it's pliable, load the dough into the piping bag fitted with a star tip. Hold the bag firmly and pipe the dough onto a parchment-lined baking sheet in long, straight lines.
Piping cheese straws in this way creates those signature ridges that lead to crispy edges. However, do your best to apply even pressure when piping to maintain consistent thickness throughout the strip. This helps the cheese straws cook evenly and ensures that crisp texture everyone loves. Although this method takes a bit more effort, it's worth it for the final result. With the ribbed pattern, your cheese straws will be as visually appealing as they are delicious.